


27
ENGLISH
Erasing the memory assigned to a DIRECT buttons:
All codes and names which were previously memorized for each of the
functions (such as TV, LD, VCR, etc.) in pages can be erased. Press
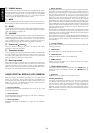
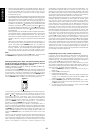
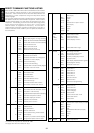
and hold the CLEAR button ⁄4 and press the < or > button , 2 times.
You will see the “DIR- CLR?” (direct button - clear?) indication in the
LCD window (see Figure 5). If you wish to go ahead and clear all of the
memorized codes for that DIRECT button (8 buttons x 4), press the OK
button
Figure 5
Erasing the memory assigned to each function command set:
All codes and names which were previously memorized for each of
the functions (such as TV, LD, VCR, etc.) can be erased.
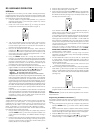
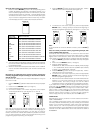
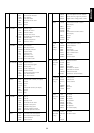
Press and hold the CLEAR button ⁄4, and press the function button
that you want to erase 2 times. You will see the “FNC - CLR?” (function
- clear?) indication in the LCD window (see Figure 6).
Figure 6
If you wish to go ahead and clear all of the memorized codes for that
function button, press the OK button within the cursor keys ⁄6. After
clearing the memory contents for that function, the RC-18SR will
restore any factory programmed RC-5 codes for the function, if any,
or will simply be empty.
If you want to cancel the memory clear operation, do not press the
“OK” button, but instead simply touch any other button. When you
clear all the commands associated with a function button, all of the
learned direct function commands (D-1 through D-8, pages 1 through
4) and control buttons, ten keypad, etc are cleared as well.
Complete erasure:
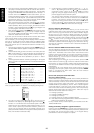
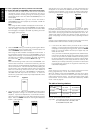
While holding the CLEAR button ⁄4 depressed, press both of the ON
and OFF POWER buttons v simultaneously; “ALL-CLR?” is
displayed on the LCD window (see Figure 7).
Figure 7
If you wish to finalize the complete erasure process, press the OK
button within the cursor keys ⁄6. If you do not wish to proceed with the
complete erasure process, simply press any key other than OK.
Remember, the RC-5 codes as supplied from the factory cannot be
erased from memory, but they can be replaced with different codes as
you wish.
n The all-clear operation takes about 15 seconds after the OK button
is pressed.
n By now, you have learned how to memorize codes from other
brands of components, including changing the various function,
status, and direct function names.
Before continuing on to the more advanced RC-18SR
programming techniques, you may wish to continue “teaching” the
RC-18SR remote control with any or all other commands for other
components in your system. When you feel you’ve transferred as
many different commands from other components into the RC-
18SR as you’d like, and possibly changed some or all of their
names as well, then feel free to proceed to the next section.
ADVANCED PROGRAMMING TECHNIQUES
Macro mode:
The word “macro” is used to describe a series of specific steps
carried out in sequence. For example, a word processing program
can use macros to carry out common repetitive typing tasks. During
the day to day operation of an A/V system, you might often find
yourself pressing the same combination of remote control buttons.
The RC-18SR features the ability to “learn” a sequence of infrared
commands, and “assign” that sequence to a single button, called a
MACRO button n. Then, when you want to achieve a specific result,
you can activate a macro button to begin sending out a series of
commands. For example, suppose you wish to activate your A/V
system, and watch a movie on laser disc. A single macro button
could send out the following commands in this suggested sequence:
n Turn the main amp power on, then turn the TV power on, then
switch the TV to the AUX video input, then change the amp to the
laser disc (LD) input, then turn the LD player power on, then
activate the LD play command, then set the amp surround sound
mode to Dolby Pro Logic.
The above 7 step sequence can be programmed into a single macro
button, and can be used anytime you want to watch a LD movie.
Other macro functions could be used for CD listening, or any other
sequence of steps that you regularly perform while controlling your A/
V system.
Macro commands are available when the RC-18SR is set to USE
mode.
To program a macro, first identify which commands you wish to
memorize, and note if any commands must be in a specific order (for
example, before you can activate an amplifier’s surround mode, the
amp must first be turned on).
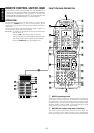
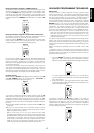
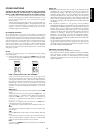
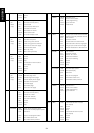
1. Press the MACRO x operation mode button with the tip of a
paper clip. Within the LCD window, the MACRO indication
appears, then the LEARN indicator starts blinking (see Figure 8).
Figure 8
If a macro was previously programmed, one or more of the
numeric indicators at the bottom of the LCD window will appear
with a box around it.
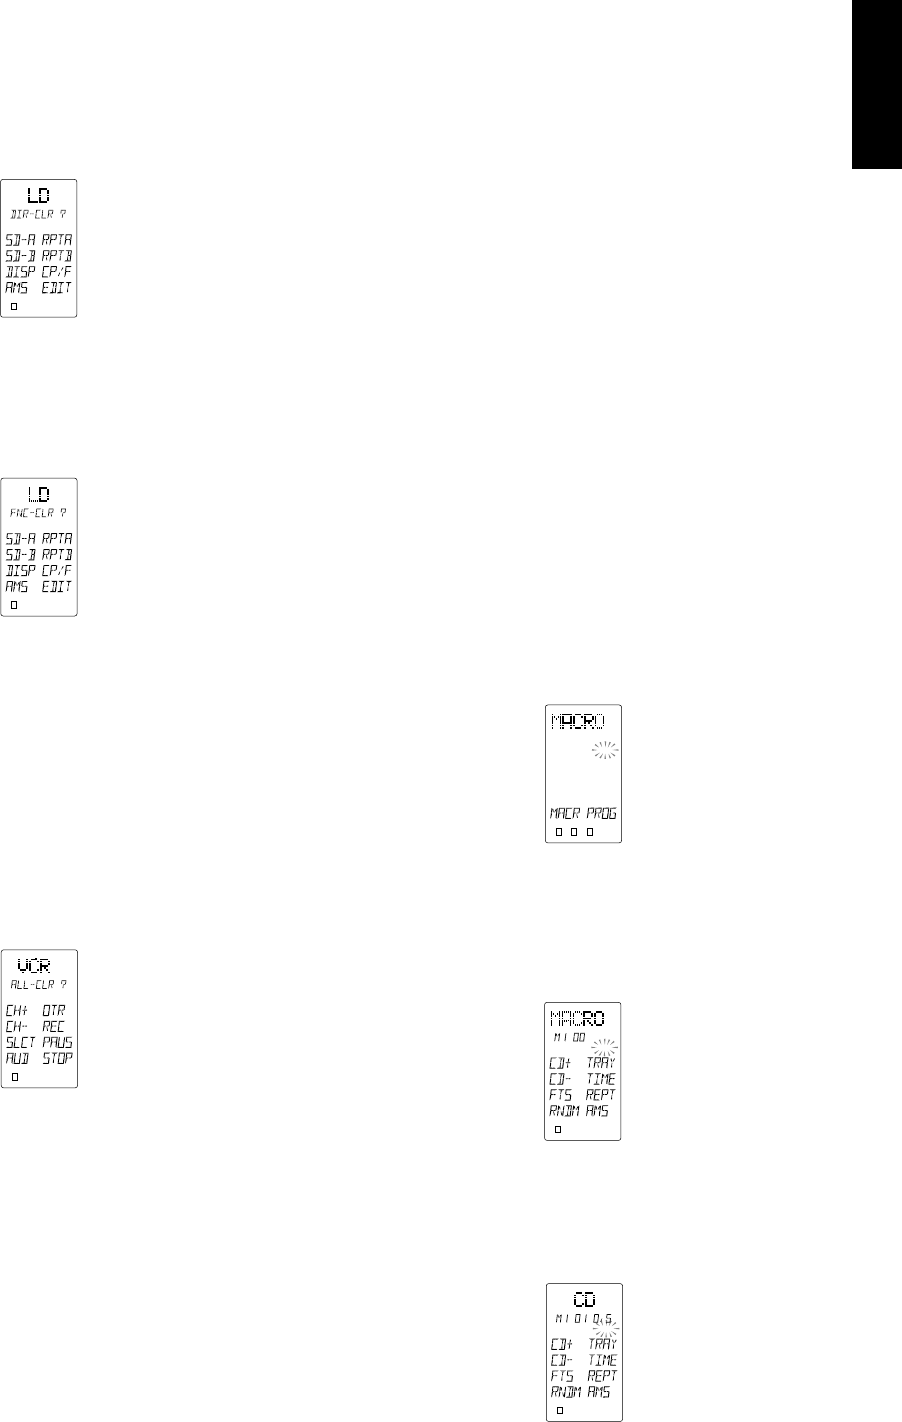
2. Press macro button 1 n to begin memorizing the various codes.
In the LCD display window the indicator “M1-00” appears in the
status line b (see Figure 9).
Figure 9
The “M1-00” indication signifies Macro number 1, no steps yet
programmed. As each macro step is programmed, the “00” indicator
will advance by one digit-”01”, “02”, etc. After the first macro step is
programmed, two additional digits (with a decimal in between)
become visible at the end of the status line, showing the timing value
for each step (see Figure 10).
Figure 10
LOW
LEARN
NAME
NAME
1
2 3 4
LOW
USE
LEARN
NAME
NAME
1
2 3 4
1
2 3 4
LOW
LEARN
NAME
NAME
LOW
LEARN
NAME
NAME
1
2 3 4
LOW
LEARN
NAME
NAME
1
2 3 4
LOW
LEARN
NAME
NAME
1
2 3 4