


5
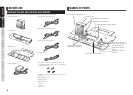
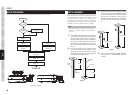
BEFORE USENAME OF PARTS
BASIC
OPERATION
ADVANCED
CONNECTIONS
SETUP
TROUBLESHOOTING
OTHERS
ADVANCED
OPERATION
SETUP
ADVANCED OPERATION
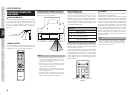
USING A PROGRAMMABLE
REMOTE CONTROLLER
This unit can be controlled using a programmable
remote controller (such as an RC9001 or RC2001).
For commands used to control this unit, refer to the
table at right. For details on programmable remote
controllers, contact your Marantz dealer or Marantz
Consumer Marketing.
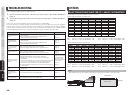
RC5
Command
Operation
00 56 15
Moves the anamorphic lens to the
operating position.
00 62 01
Moves the anamorphic lens to the
operating position.
00 56 20
Moves the anamorphic lens to the
non-operating position.
00 62 02
Moves the anamorphic lens to the
non-operating position.
NOTES WHEN SIMULTANEOUSLY USING +12 V
TRIGGER INPUT AND REMOTE CONTROLLER
This unit can be controlled using a +12V trigger input
in combinati
on with a remote controller. In this case,
the very last control is prioritized.
Ex.1) A 12V DC signal is input to the +12V TRIGGER
IN jack and the anamorphic lens moves
to the operating position. If AUX2 on the
remote controller is pressed at this time, the
anamorphic lens moves to the opposite end
from the operating position.
Ex.2) The anamorphic lens is moved to the operating
position using the r
emote controller. Even
though nothing happens even if a 12V DC
signal is input to the +12V TRIGGER IN jack at
this time, when the 12V DC signal being input
to the +12V TRIGGER IN jack is cut off, the
anamorphic lens moves to the opposite end
of the operating position.
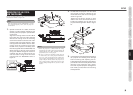
FIXING THE ANAMORPHIC
LENS POSITION
This unit is controlled according to the last signal
input. When a 12V DC signal from the projector
is input to the +12V TRIGGER IN jack of the unit,
if the projector
’
s power is turned off and the 12V
DC trigger signal is no longer input, the anamorphic
lens moves to the opposite end from the operating
position. To fix the anamorphic lens position, unplug
the AC/D
C adapter from the power outlet and stop
the supply of power.
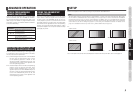
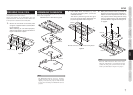
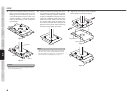
SETUP
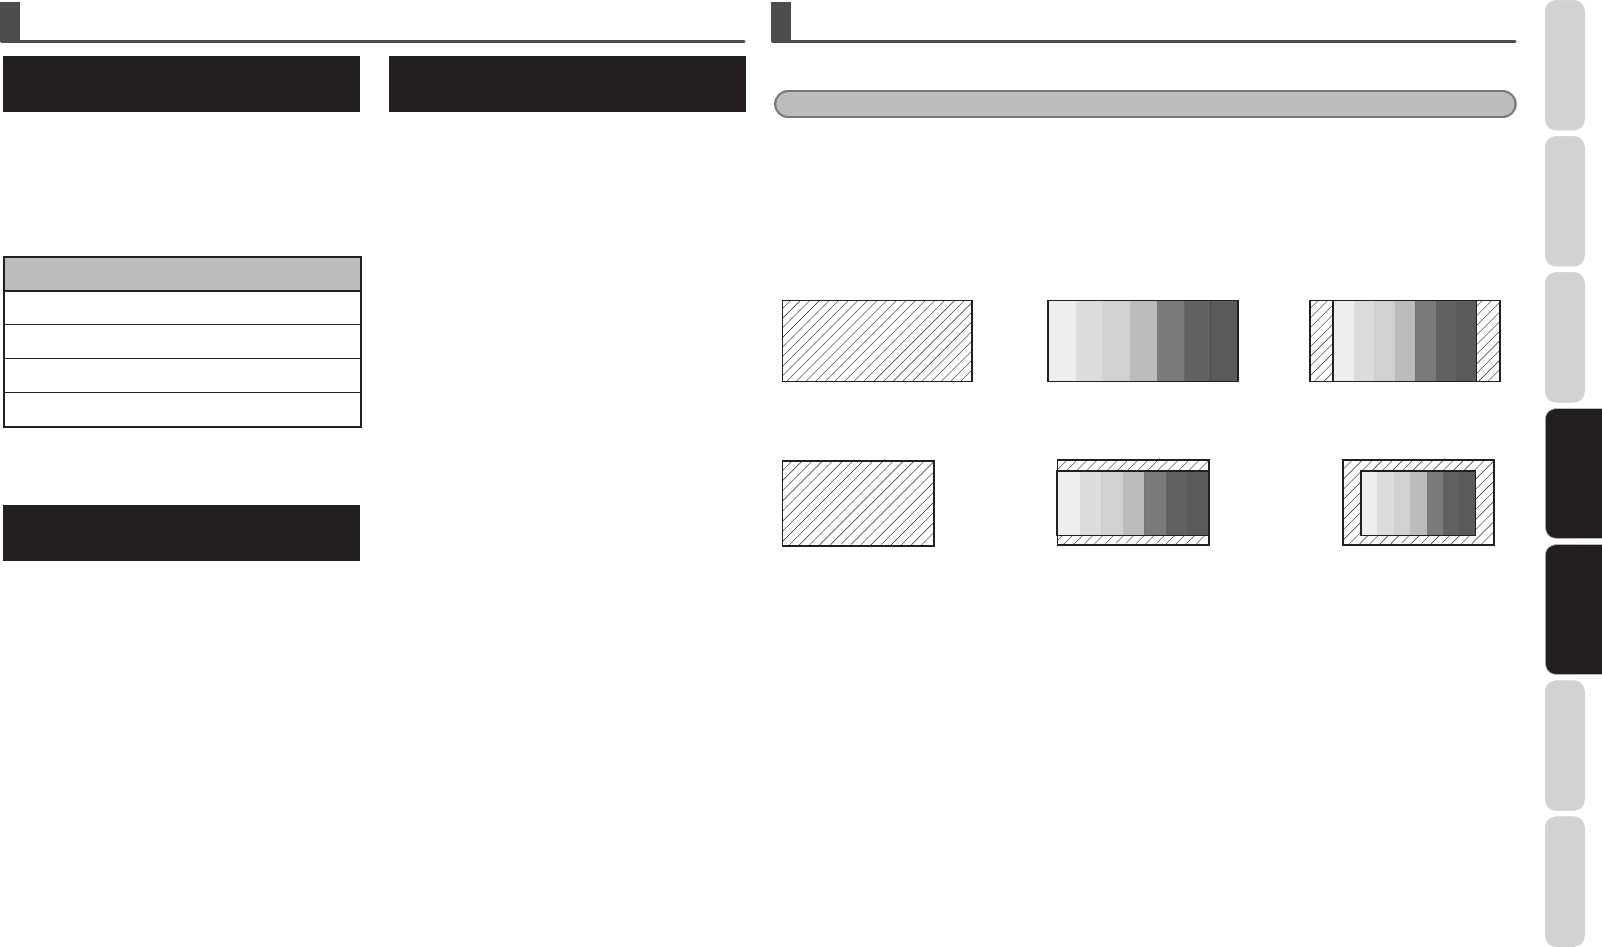
Mount and adjust the LN-11S1A according to the procedure described below.
Note:
The LN-11S1A enlarges projected images by approximately 1.3 times in the horizontal direction. When using
the LN-11S1A in combination with a screen having a 2.35:1 aspect ratio, be sure to determine the installation
location based on the screen size in the vertical direction. In addition, there is a possibility that the projected
image may stick out beyond the left and right screen borders when using the LN-11S1A with a screen you already
own. In this case, be sure to change the projector’s zoom setting or its installation location. For details on the
projector’s installation location, refer to the user’s guide included with your projector.
Ex.:
2.35:1 screen
Screen When using an anamorphic lens When not using an anamorphic lens
1.78:1 screen
Screen When using an anamorphic lens When not using an anamorphic lens
For an example of the Screen Size and Projection Distance VP-11S2, VP-15S1, refer to the page 12.