20
ENGLISH
Source
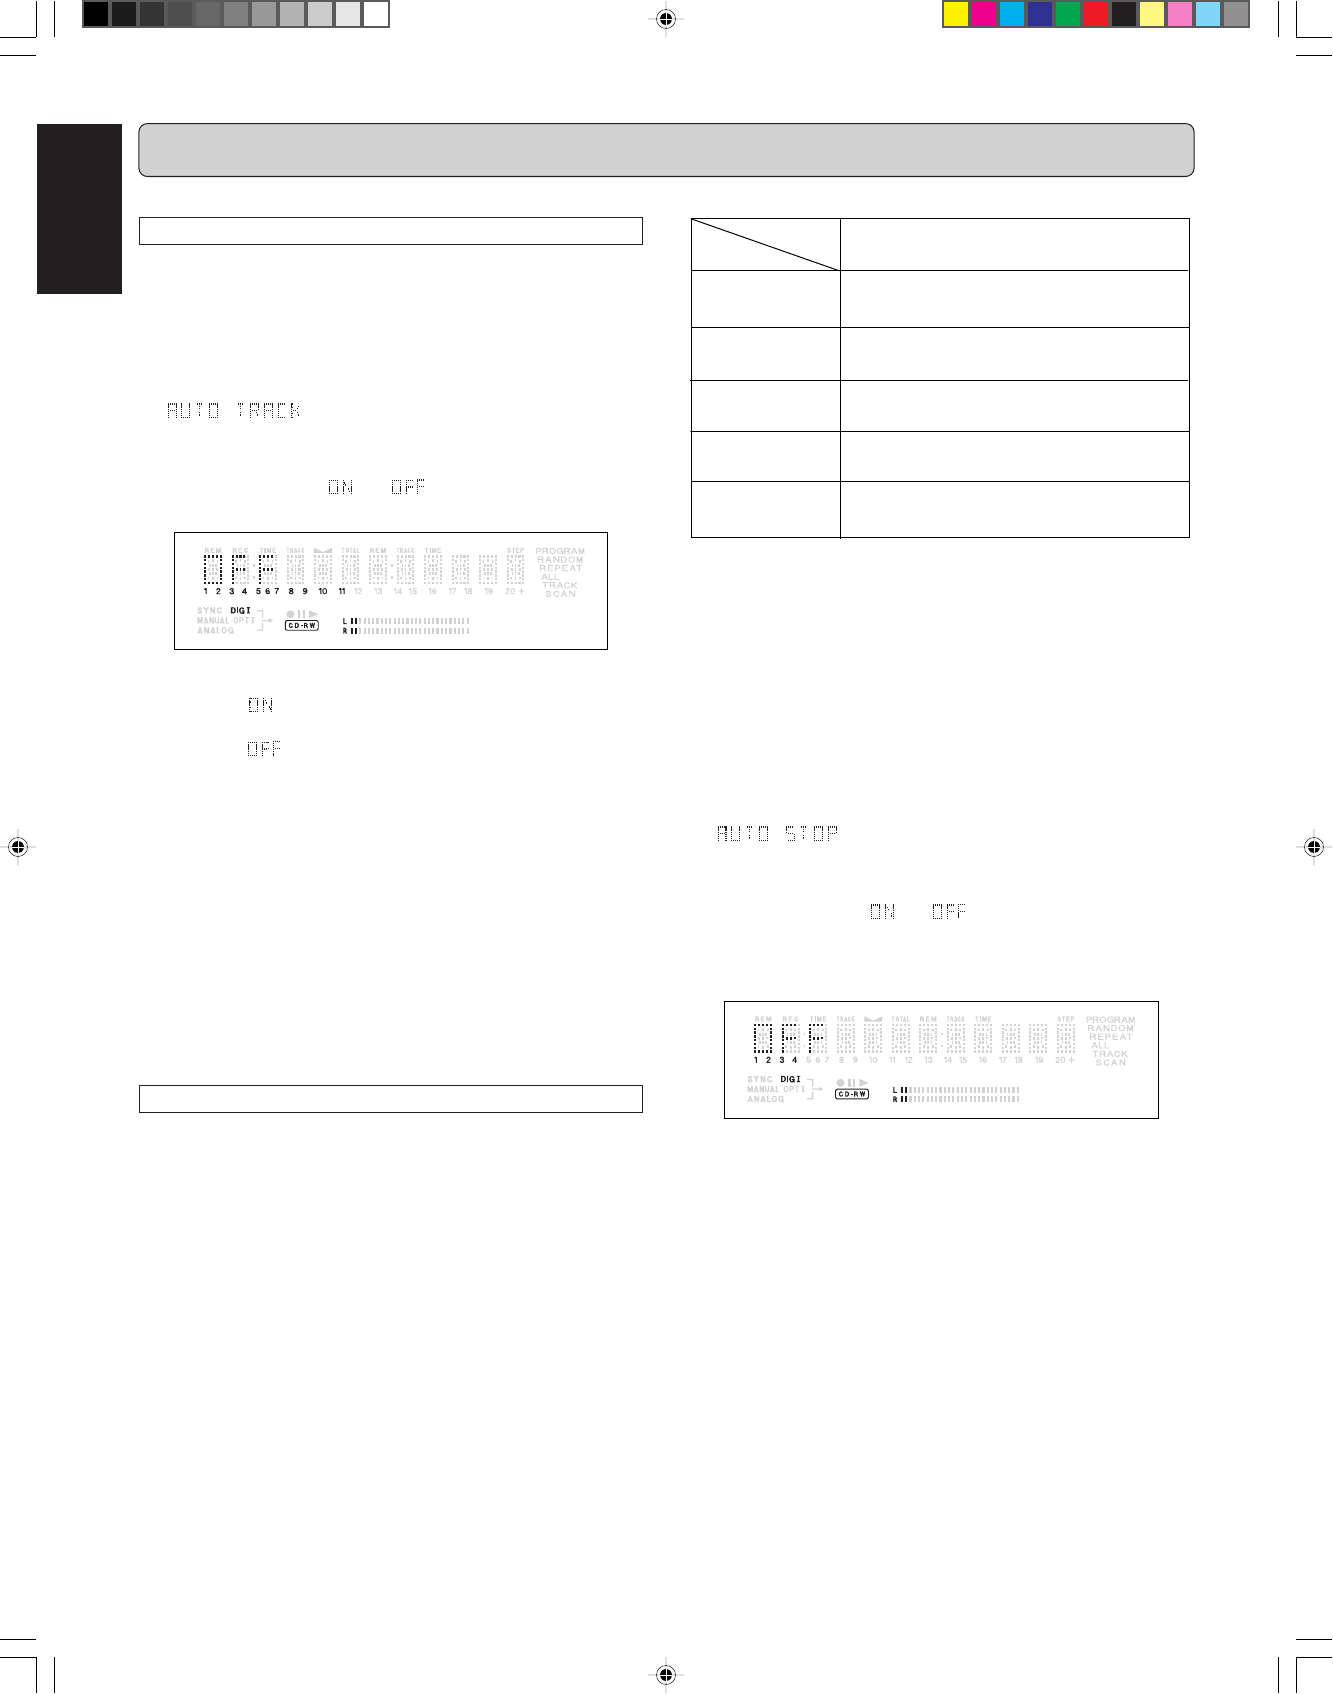
AUTO STOP
ON
Stop after 3 seconds of user DATA of stop
pattern detected on the incoming source signal
CD/MD
(with user data)
No source
(no lock)
DAT/DCC
(with user data)
Unknown
(no user data available)
Analog
Stop after 20 seconds of silence
Stop after 20 seconds of silence
Stop after 20 seconds of silence
Stop after 3 seconds of unlock
The benefit of turning Auto Stop OFF is, for example, when you
are recording sources such as classical music, which could
have long passages of low level sound. If Auto Stop is ON in
such a case, the CDR631 may automatically stop when it is not
supposed to.
11
11
1
Stay in the stop mode.(No operation)
22
22
2
Press
STORE/MENU
(20, 77) on the deck or the remote
control to enter Menu mode.
33
33
3
Rotate
REC LEVEL/SELECT
(19) or press
SS
SS
S (15, 74),
TT
TT
T (16, 82) to select the AUTO STOP submenus.
appears on the display.
44
44
4
Press
REC LEVEL/MENU
(19) or
ENTER
(78) to confirm.
55
55
5
Select Auto stop or by rotating
REC LEVEL/
SELECT
(19) or press
SS
SS
S (15, 74),
TT
TT
T (16, 82).
AUTO STOP ON : fully automatic stop.
AUTO STOP OFF : only manual stop during the recording.
66
66
6
Press
REC LEVEL/SELECT
(19) or
ENTER
(78) on the
remote control to confirm.
77
77
7
Press
STORE/MENU
(20, 77) to store setting and return
to the submenu, or press
9 9
9 9
9 (13, 81) to exit.
Note:
- The Auto Track menu item is also available during the
Record-Pause and Record modes.
- The Auto Track setting determines if the Auto Stop menu
item is available. If Auto Track is OFF, Auto Stop is auto-
matically OFF and the Auto Stop menu item is not displayed
in the menu. If Auto Track is ON, the Auto Stop menu item is
available and Auto Stop can be switched ON or OFF. See
page 20 for information regarding the Auto Stop menu item.
MENU MODE
The numbers between parentheses refer to the fold-out.
Auto track increment
11
11
1
Stay in the stop mode. (No Operation)
22
22
2
Press
STORE/MENU
(20, 77) on the deck or the remote
control to enter Menu mode.
33
33
3
Rotate
REC LEVEL/SELECT
(19)
or press
SS
SS
S (15, 74),
TT
TT
T (16, 82) to select the AUTO TRACK submenu.
appears on the display.
44
44
4
Press
REC LEVEL/SELECT
(19) or
ENTER
(78) to confirm.
55
55
5
Select Auto track or by rotating
REC LEVEL/
SELECT
(19) or
press
SS
SS
S (15, 74),
TT
TT
T (16, 82).
66
66
6
Press
REC LEVEL/SELECT
(19) or
ENTER
(78) to confirm.
• When is selected, track numbers will be automati-
cally incremented during recording.
•
When is selected, you can mark the recorded tracks
yourself by press
TR.INCR.
(25) or
TRACK INCR
(67).
77
77
7
Press
STORE/MENU
(20, 77) to store settings and re-
turn to the submenu or
9 9
9 9
9 (13) to exit.
Notes:
- The Auto Track menu item is also available during recording
and in the record-standby mode.
- The Auto Track setting determines if the Auto Stop menu
item is available. If Auto Track is OFF, Auto Stop is automati-
cally OFF and the Auto Stop menu item is not displayed in
the menu. If Auto Track is ON, the Auto Stop menu item is
available and Auto Stop can be switched ON or OFF. See
this page for information regarding the Auto Stop menu item.
Auto stop
If the Auto Track function is ON, the Auto Track menu item will
become available. The Auto Stop function can then be turned
ON or OFF depending on the recording requirements.
Note:
Auto Stop is automatically turned OFF and the menu item will
not be displayed when Auto Track is OFF.
If Auto Stop is ON, the chart below indicates what amount of
silence (-55dB or lower) is required for each source to trigger
the CDR631 to stop recording. If Auto Stop is OFF, the
CDR631 will record until stopped by the
STOP
(13, 81) button
or the end of the disc is reached.
CDR631(U)_Eng_P12-23.p65 8/4/00, 9:39 AM20


