


– 9 –
About sounds output through the rear terminals
• Through the AUX OUT (RIGHT/LEFT) jacks:
Analog stereo signals are output.
When playing a source encoded with Dolby Digital*
( ), multichannel signals are mixed to the right
and left front channel signals, then output. You also need
to set “DOWN MIX” setting correctly. (See page 33.)
– You cannot reproduce the sound encoded with DTS
Surround** ( ).
• Through the OPTICAL DIGITAL OUTPUT
terminal:
Digital signals (Linear PCM, Dolby Digital*, DTS
Surround**) are output.
To reproduce the multichannel sounds such as Dolby
Digital and DTS Surround, connect an amplifier or a
decoder compatible with these multichannel sources to
this terminal, and set “DIGITAL AUDIO OUTPUT”
setting correctly. (See page 33.)
* Manufactured under license from Dolby Laboratories.
“Dolby” and the double-D symbol are trademarks of Dolby
Laboratories. Confidential Unpublished Works. ©1992–1997
Dolby Laboratories. All rights reserved.
** Manufactured under license from Digital Theater Systems,
Inc. US Pat. No. 5,451,942 and other world-wide patents
issued and pending. “DTS,” and “DTS Digital Surround,” are
a registered trademarks of Digital Theater Systems, Inc.
Copyright 1996, 2000 Digital Theater Systems, Inc. All
Rights Reserved.
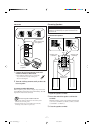
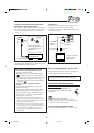
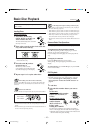
TV
Composite
video cord
(supplied)
S-video cord*
(not supplied)
VIDEO
S-VIDEO
VIDEO OUT
To composite
video input
To S-video
input
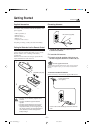
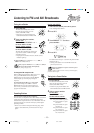
Now, you can plug the AC power cord.
When connecting the AC power cord into a wall outlet, the
unit automatically starts display demonstration.
IMPORTANT: Be sure to check all connections to be done
before plugging the AC power cord into a wall outlet.
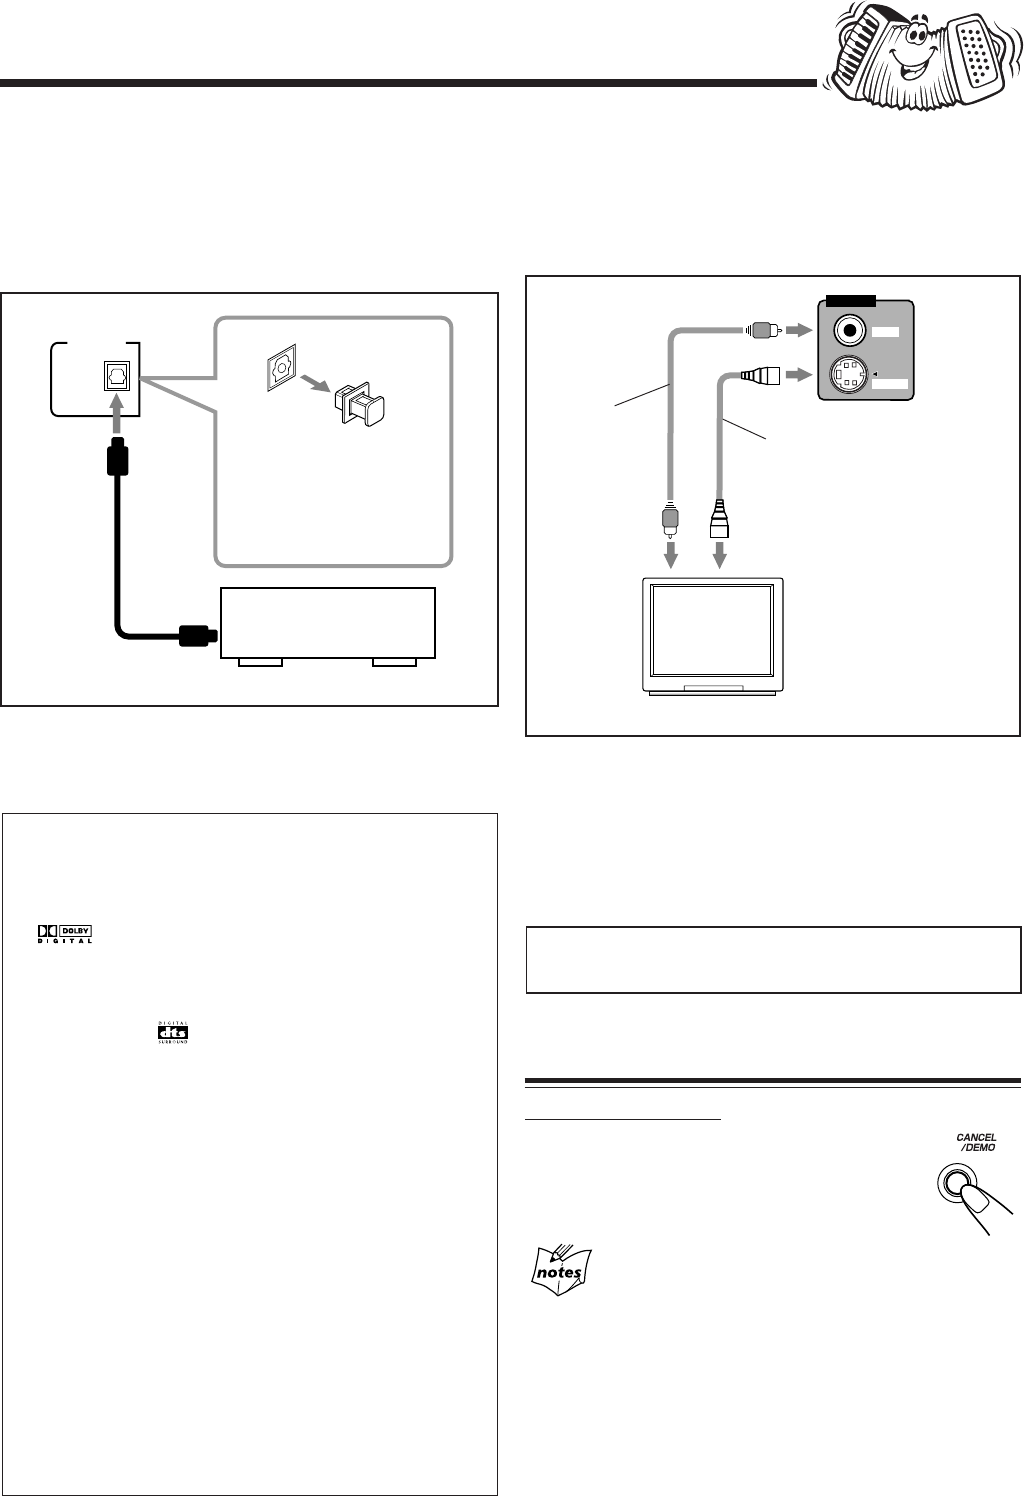
Canceling the Display Demonstration
On the unit ONLY:
To cancel the display demonstration, press
CANCEL/DEMO until “DEMO OFF” appears
on the display.
When you press other buttons
The display demonstration stops temporarily. It will start
automatically again (if no operation is done for 2 minutes) unless
you cancel it by pressing CANCEL/DEMO.
To start the display demonstration manually
Press and hold CANCEL/DEMO for more than 1 second.
To connect a TV
Connect your TV and this unit using the composite video
cord (supplied) or an S-video cord (not supplied).
• You can also use JVC’s AV COMPU LINK control system.
For details, see page 42.
* Using an S-video cord
gives you a better
quality pictures.
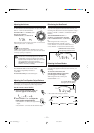
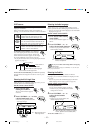
OPTICAL
DIGITAL OUTPUT
PCM /
STREAM
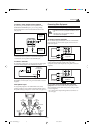
To connect audio equipment with an optical digital
input terminal—such as digital decoder
You can connect a digital decoder such as an MD recorder or
a CD recorder by using an optical digital cord (not supplied).
• See “About sounds output through the rear terminals”
below.
Connect an optical digital cord (not supplied) between the
optical digital input terminal on the other equipment and the
OPTICAL DIGITAL OUTPUT terminal.
Before connecting the
other equipment, remove
the protective plug from
the terminal.
Protective
plug
To optical digital input
Audio equipment with an
optical digital input
EN01-13.MX-DVA9[J,C]_f 01.7.3, 3:09 PM9