


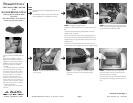
➔
➔
➔
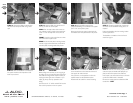
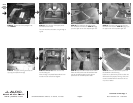
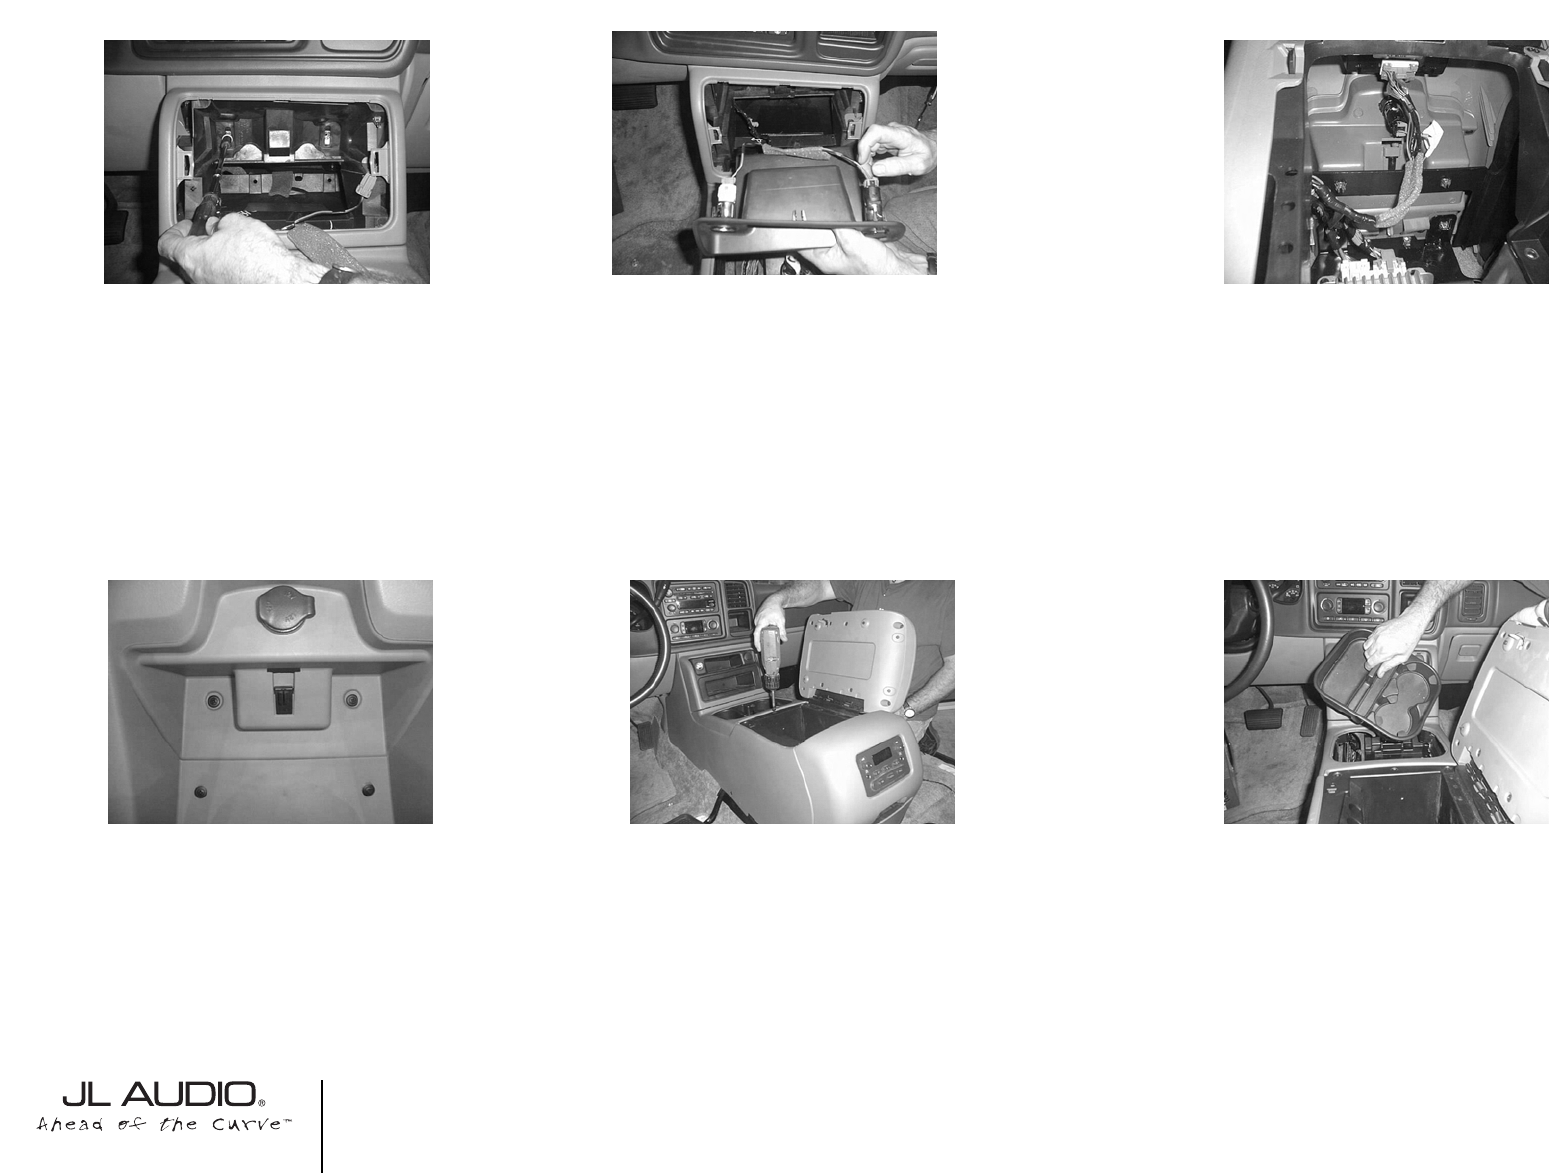
STEP 46: Reconnect the rear stereo controls and
12v plug from STEP 22.
Also reconnect the white plug with the lever from
STEP 9.
Cont.
From
Previous
Page
Continued on Next Page ➔
➔
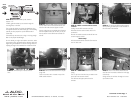
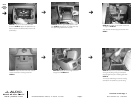
STEP 47: Replace the rear of the outer cosmetic
console and the four mounting screws from
STEP 21.
STEP 48: Replace the main storage bucket and
storage lid from STEP 6 & 7.
STEP 49: Replace the cup holders from STEP 8.
As long as everything is lining up at this point.
Securely tighten the pair of mounting bolts from
STEP 20.
You can use undercoating to coat the mounting
assembly.This will prevent any type of rusting.
SB-GM-BURBCNSL/10W3v2, JL AUDIO, Inc 2005
Sheet SKU#011167 3/08/2005Page 7
www.jlaudio.com
➔
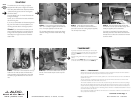
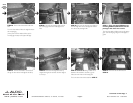
STEP 45: With the upper storage pocket in hand
from STEP 4, reconnect the 12v outlets.Then snap
the upper storage pocket back into place.
STEP 44: The pair of 10mm bolts that where
removed in STEP 5, need to be replaced.You may
have to reposition the OEM console, to have it line
up like factory.