26
L– L+
– +
R– R+
– +
GTS100
GTS100
L– L+
– +
R– R+
– +
+–
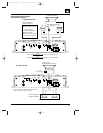
Front Outputs Rear Outputs
Front Satellite
Speakers
Preamp output to preamp input
Rear
Full-Range
Speakers
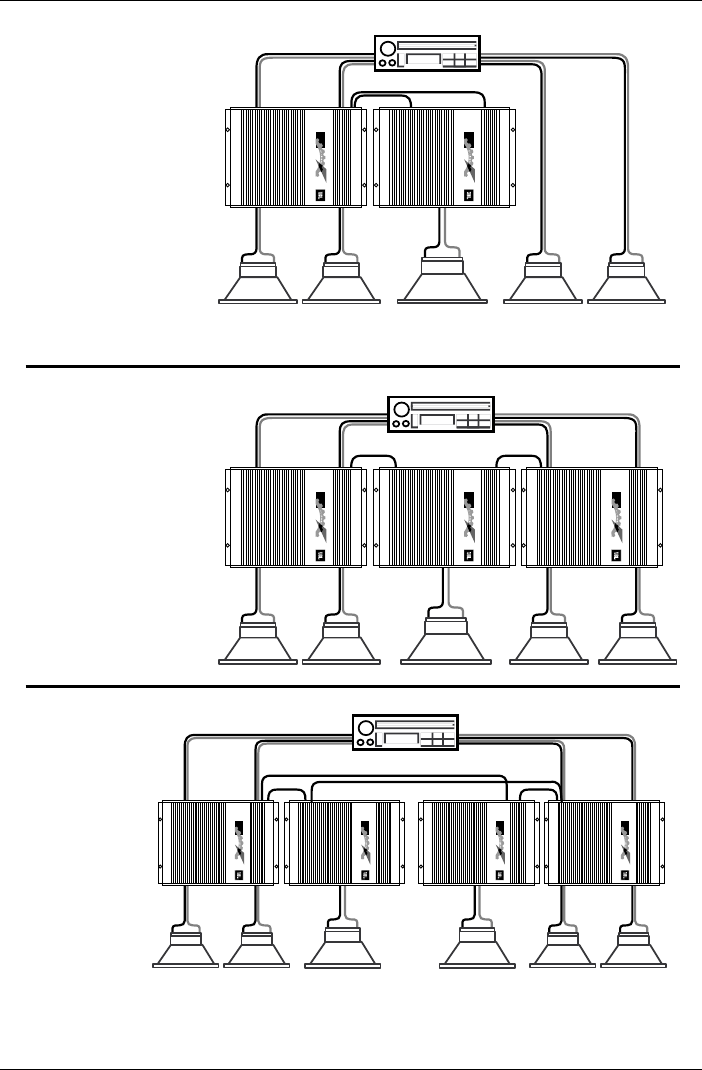
System 3
Add a Second GTS100
1 or 2
Subwoofers
GTS100 GTS100
L– L+
– +
R– R+
– +
GTS100
GTS100
GTS100
L– L+
– +
R– R+
– +
+–
Front Outputs Rear Outputs
Front Satellite
Speakers
Preamp output to preamp input
Rear Satellite
Speakers
System 4
Add Power to the Rear
1 or 2
Subwoofers
GTS100 GTS100 GTS100
L– L+
– +
R– R+
– +
GTS100
GTS100
GTS100
L– L+
– +
R– R+
– +
+–
Front Outputs Rear Outputs
Front Satellite
Speakers
Rear Satellite
Speakers
Preamp output to preamp input
System 5
Add a Second
Subwoofer Amplifier
GTS100
+–
Subwoofers
GTS100 GTS100 GTS100 GTS100
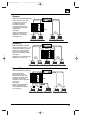
Get more power and system
control by adding a second
GTS100 to power the main
speakers and subwoofers
individually. Use the built-in
crossover to high-pass the
front speakers and low-pass
the subwoofers.
Next Step:
Add power to the Rear Full-
Range Speakers.
Note: For Non-Fading
bass, also connect the
rear-channel head unit
speaker output to the
speaker level input of the
subwoofer GTS100.
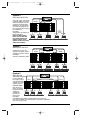
Add an amp for the rear
speakers for higher volume
capability and more control.
Next Step:
Add more subwoofer power.
For the ultimate in
bass output, add a
second subwoofer
amplifier for a total
system power of
340 Watts RMS!
Note the cross-
linking of preamp
inputs for the two
subwoofer
amplifiers to
provide non-
fading bass.
Next Step:
Add additional amplifiers in bridge-mode to the front and
rear main speakers. Then add electronic crossovers and biamp
front and rear speakers.
JBL 1394 Manual 7/17/98 11:49 AM Page 26


