1616
1616
16
Every surround-sound system requires "bass-management" to direct low-frequency content from any or all
channels to the speakers best able to reproduce it. For this function to operate correctly, it is important that
you correctly identify your speakers' capabilities.
We use the terms "Small" and "Large" (and "None"), but note that physical size may be irrelevant.
• A "Small" speaker is any model, regardless of physical size, that lacks significant deep-bass response,
that is, below about 80 Hz.
• A "Large" speaker is any full-range model, that is, one with deep-bass response
• A "None" speaker is one that is not present in your system. For example, you might not have any
surround-back speakers installed; in that case, you would set the <Surr Back> setup item to "None."
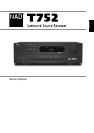
SPEAKER SETTINGSSPEAKER SETTINGS
SPEAKER SETTINGSSPEAKER SETTINGS
SPEAKER SETTINGS
From the OSD’s main <Setup> menu select the <Speaker Settings> line using the HTR 2 remote's [
∧∧
∧∧
∧/
∨∨
∨∨
∨],
and [Enter] keys. Using the [
<<
<<
< /
>>
>>
>] keys, set <Front:> to "Large" or "Small” as your main-front speakers
require according to the guidelines noted above. Similarly, set <Center:>, <Surround:>, and <Surr Back:> to
"Large," "Small," or "None" as your system's loudspeakers require. Set <Sub:> to "On" or “Off,” selecting
“On” only if you have a subwoofer connected to the T 752's SUB analog output jack.
NOTE: The Speaker Settings configuration is “global”; that is, it remains in force with all inputs and in all
listening modes. However, speaker settings are part of the T 752’s Preset system; consequently, multiple
speaker settings can be stored for easy recall as different types of recordings or listening modes require.
See “Creating and Using Presets,” below.
NOTE: You can set Subwoofer to "On" even with "Large" front speakers, in which case bass content from
any channels set to "Small" will be routed to both the subwoofer and to the front speakers; LFE-channel
signal will pass only to the sub. In most subwoofer-equipped systems, setting front speakers to "Small" is
usually the better option.
From the OSD’s main <Setup> menu select the <Listening Mode> line using the HTR 2 remote's [
∧∧
∧∧
∧/
∨∨
∨∨
∨], and
[Enter] keys. Using the [
∧∧
∧∧
∧/
∨∨
∨∨
∨] and [
<<
<<
< /
>>
>>
>] keys you can select mode variations, and adjust various
parameters, depending on the current Listening Mode. For more information, see “About the T 752's
Listening Modes,” below.
NOTE: Listening Mode is part of the T 752’s Preset system. See “Creating and Using Presets,” below;
NOTE: The Listening Mode used the last time a given input was selected will be recalled the next time that
input is selected, unless overridden by a Dolby Digital or DTS signal, which automatically invoke their native
Listening Modes.
Adjusting the relative balance of your system's loudspeakers ensures that surround-sound recordings,
whether music or film, will present the balance of effects, music, and dialog that the artists intended.
Additionally, if your system incorporates a subwoofer it establishes a correct relationship between the
volume of the subwoofer and the other speakers, and thus of low-frequencies (bass) to other sonic
elements.
USING AN SPL METERUSING AN SPL METER
USING AN SPL METERUSING AN SPL METER
USING AN SPL METER
It is quite practical to perform the T 752 Level setup routines "by ear," and careful work will produce
acceptably accurate results. However, the use of an inexpensive sound-pressure level (SPL) meter, such as
Radio Shack part number 33-2050, makes this task easier, more accurate and more repeatable. Ownership
of such a meter could prove a valuable audio tool; your NAD audio specialist may be able to help you with
temporary use of a meter.
The SPL meter should be placed at the primary listening position, at approximately the height of the seated
listener's head. A tripod is helpful, but with a little duct tape almost anything—a pole lamp, music-stand, or
ladder-backed chair, for example—can do as well. Just be sure that no large acoustically reflective surfaces
obstruct or are near the microphone element. Orient the meter with its microphone (usually at one end)
pointing straight up toward the ceiling (not forward toward the speakers) and ensure that its "C" weighting
scale is selected. Set the meter to display 75 dB SPL. (On Radio Shack meters this necessitates either setting
the meter to its 80 dB range and taking your readings at the -5 point, or selecting the 70 dB range and
reading at the +5 point.)
SETTING CHANNEL BALANCESETTING CHANNEL BALANCE
SETTING CHANNEL BALANCESETTING CHANNEL BALANCE
SETTING CHANNEL BALANCE
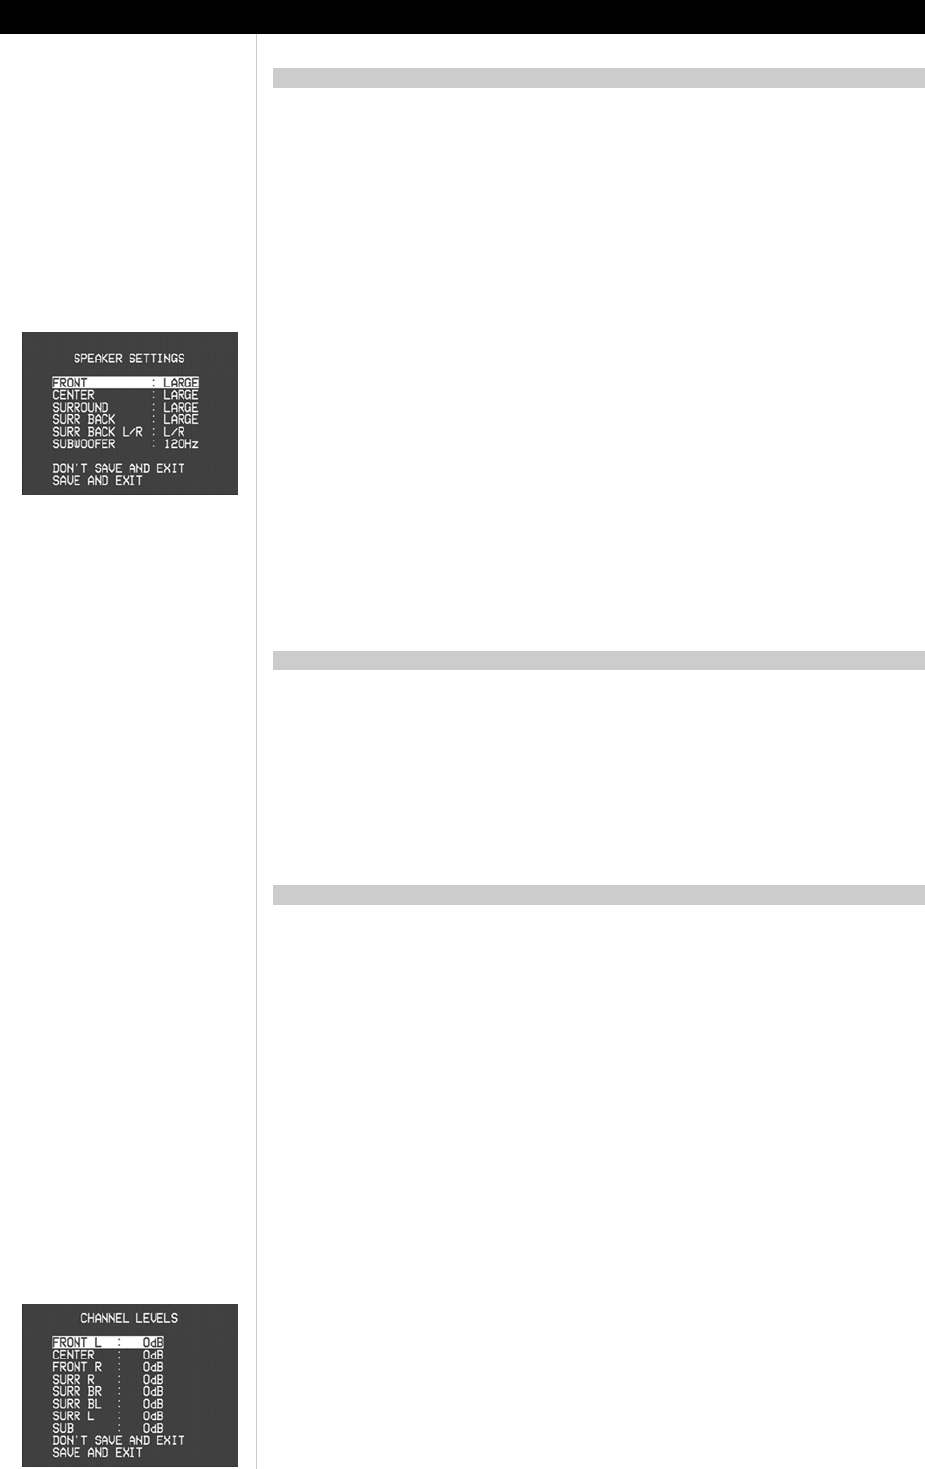
Press the HTR 2 remote’s [Test] key, activating the T 752’s channel-balancing test signal and displaying the
<Channel Levels> menu on the OSD. You will hear a "surf" sound that cycles through your speakers,
beginning with the left-front. (If you do not hear the test signal, check your speaker connections (above),
and your <Speaker settings> OSD menu settings, (above.)
ABOUT THE ON-SCREEN DISPLAYS (OSD) AND FRONT-PANEL READOUT
SPEAKER SETUPSPEAKER SETUP
SPEAKER SETUPSPEAKER SETUP
SPEAKER SETUP
LISTENING MODELISTENING MODE
LISTENING MODELISTENING MODE
LISTENING MODE
CHANNEL-BALANCE (TEST) SETUPCHANNEL-BALANCE (TEST) SETUP
CHANNEL-BALANCE (TEST) SETUPCHANNEL-BALANCE (TEST) SETUP
CHANNEL-BALANCE (TEST) SETUP