


PROGRAMMING THE REMOTE 43
Programming the Remote
Code Readout
When the code has been entered using the Auto
Search method, it is always a good idea to find
out the exact code so that it may be easily
reentered if necessary. You may also read the
codes to verify which device has been
programmed to a specific Control Selector
button.
1. Press and hold both the Input Selector
4
for the device you wish to find the code for and
the Mute button
g
at the same time. Note
that the Program/SPL Indicator
2
will ini-
tally turn amber and begin flashing. Release the
buttons and begin the next step within 20 sec-
onds.
2. Press the Set button
F
.The Program/SPL
Indicator
2
will then blink green in a sequence
that corresponds to the three-digit code, with a
one-second pause between each digit. Count the
number of blinks between each pause to deter-
mine the digit of the code. One blink is the number
1, two blinks is the number 2, and so forth. Note
that a rapid sequence of three blinks is used to
indicate a “0.”
Example: One blink, followed by a one-second
pause, followed by six blinks, followed by a one-
second pause, followed by four blinks indicates
that the code has been set to 164.
For future reference enter the Setup Codes for the
equipment in your system here:
DVD ____________ CD ________________
VID1/VCR ________ VID2/TV __________
VID3/CBL/SAT ______________________
VID4 ______________________________
TAPE ______________________________
Learning Codes from a Remote
In addition to using codes from the remote’s
internal code library, the AVR 5550’s remote is
able to “learn” codes from remotes that may not
be in the code library. In addition, you may use
this function to “learn over” the codes from a
preprogrammed device to add functions not
included in the preprogrammed codes. To learn
or transfer codes from an IR remote to the
AVR 5550’s remote, follow these steps:
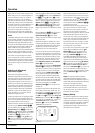
1. Place the front of the original remote with the
code being sent so that it is facing the IR
Transmitter Window
1
on the AVR 5550
remote “head-to-head.” The remotes should be
between 2 and 4cm apart.
2. Select the button on the remote that you wish
to use as the device selector for the codes about
to be entered.This must be any of the Input
Selectors
4
or the AVR Selector
5
. Note
that when new codes are learned with the AVR
5
Selector, they may no longer control the
AVR 5550.
3. Press the Input Selector
45
button
chosen and the Learn Button
f
at the same
time. Hold these buttons until the Program/SPL
Indicator
2
flashes amber and the light
under the device selector button turns red.
Release the buttons. It is important that you
begin the next step within 20 seconds.
4. Press the button on the AVR 5550 remote that
you wish to program. Note that the Program/
SPL Indicator
2
will stop flashing.
Important Note: Codes cannot be taught to all
buttons on the remote. The buttons with the
following numbers are not learnable (for
numbers, see drawing on page 11):
4
,
7
,
8
,
B
,
I
,
O
,
Q
,
S
,
Y
,
c
,
e
,
f
. In these cases the Program/SPL
Indicator
2
keeps flashing after the button
was released.
5.As long as the Program/SPL Indicator
2
is on steadily (for five seconds), press and hold
the button on the original remote that you wish
to “teach” into the AVR 5550 remote. If you
pressed the button too late or no command was
received within five seconds, the Program/SPL
Indicator
2
will flash red three times and
then amber, then simply repeat step four. When
the Program/SPL Indicator
2
turns green,
release the button on the original remote. Note
that the Program Indicator will then begin to
flash amber again.
NOTE: If the Program/SPL Indicator
2
turns
red steadily during Step 5, the programming was
not successful. Repeat the steps to see if the
code will “take.” If the indicator keeps flashing
red in step 5, this code cannot be taught.
6. Repeat steps 4 though 5 for each button on
the source remote that you wish to transfer to
the AVR 5550 remote.
7. Once all codes have been transferred from the
original source remote to the AVR 5550 remote,
press the Learn button
f
.This will turn off all
LEDs and turn off the learning mode.
8. Repeat Steps 1 through 7 for any additional
remotes you wish to “teach” into the AVR 5550
Remote.
Erasing Learned Codes
The AVR 5550’s remote allows you to remove or
erase the code learned into a single button for a
single device, to remove or erase all the codes that
have been learned for a single device, or to erase
all commands that have been learned to all
devices.
To erase a single learned code from
within a single device’s settings, follow
these steps:
1. Press and hold both the Input Selector
45
within which the individual button to be
erased has been programmed and the Learn but-
ton
f
.
2.When the red LED under the Input Selector
turns red and the Program/SPL Indicator
2
flashes amber, release the buttons.
3. Press and release the Input Selector
45
again for the device within which the individual
button to be erased has been programmed.
4. Press the 7 button
H
three times.
5. Press and release the individual button for
which the code is to be erased.The Program/SPL
Indicator
2
will blink green two times and
then return to amber.
6.To erase other buttons within the same device,
press them as noted in Step 5.
7.When all buttons to be erased have been
pressed, press the Learn button
f
to complete
the process.
To erase all codes within a single device,
follow these steps:
1. Press and hold both the Input Selector
45
for which you wish to erase the codes
and the Learn button
f
.
2.When the red LED under the Input Selector
turns red and the Program/SPL Indicator
2
flashes amber, release the buttons.
3. Press and release the same Input Selector
45
again for the device whose codes you
wish to erase.
4. Press the 8 button
H
three times.
5.The Program/SPL Indicator
2
will turn off,
the red light under the Input Selector will flash