6
INSTALLATION & CONNECTIONS
Unpacking
Due to its weight and size, we strongly recommend
that help is at hand when unpacking and installing the
subwoofer. Unpack the subwoofer on a clean, even and
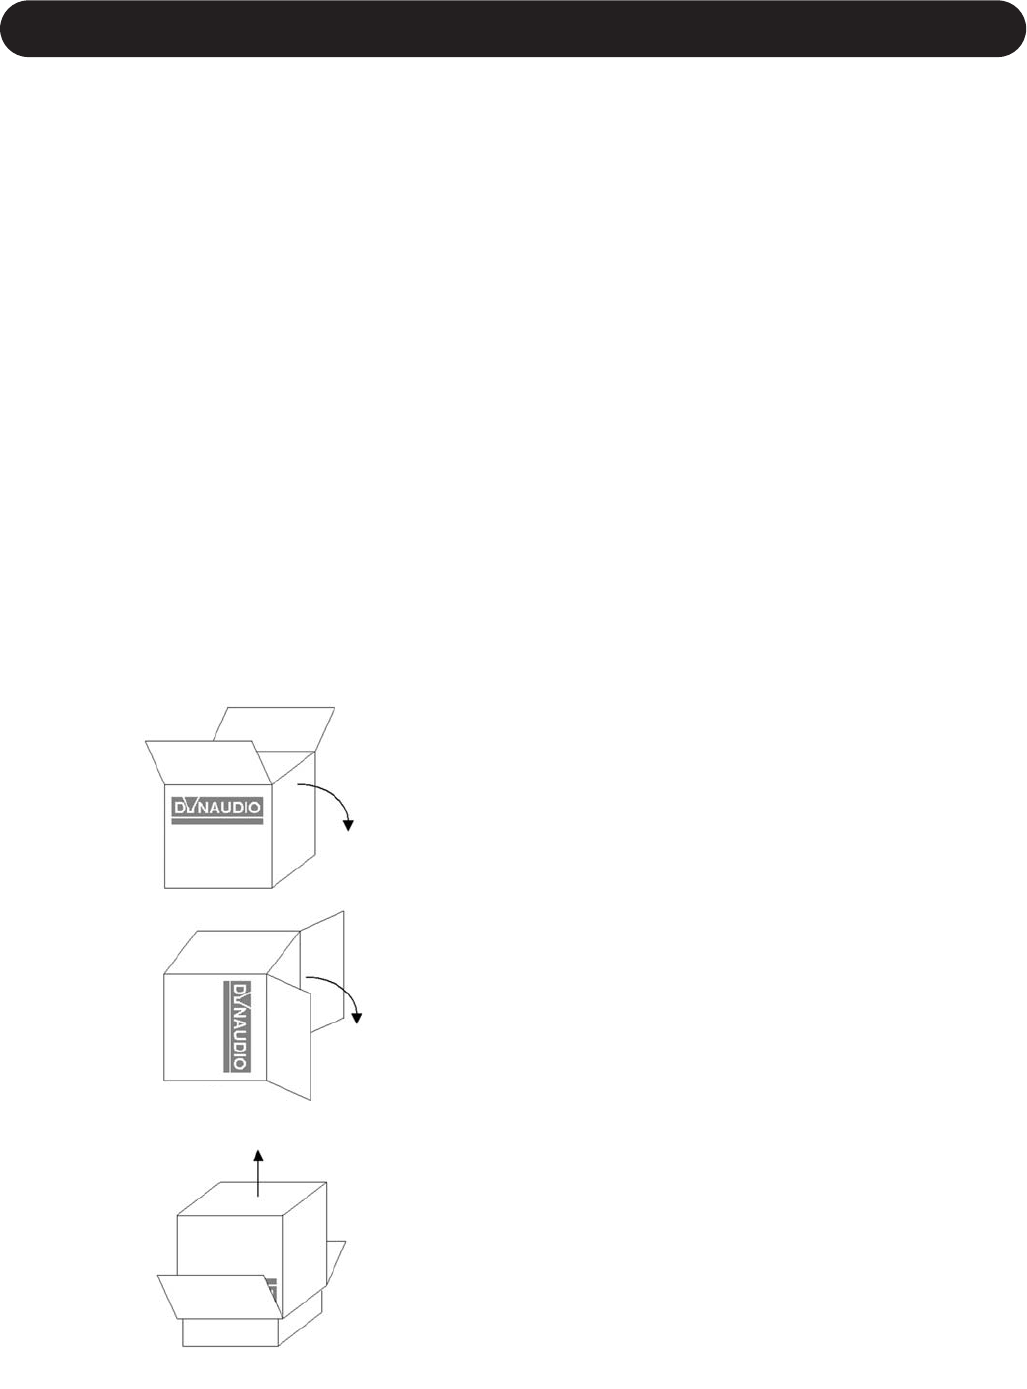
soft area; floor carpeting is very suitable. Please refer
to Fig. 1.
• The packaging should be opened from the top. Remove
all accessories that come packed with the subwoofer,
such as AC power cord, remote control and warranty
card). Do not remove the top part of the protective
material.
• With the protective material still in place but with
accessories removed, carefully tilt the packaging on its
side and tilt again to turn it upside-down. Ensure that no
part of the top-cover is obstructing the opening at the
top.
• The outer packaging can now be lifted away from the
subwoofer itself. Remove the protective material that now
is on top. Through the polythene bag you can now see
the underside of the subwoofer.
• Open the polythene bag and remove from around the
base of the subwoofer.
• Again, carefully tilt the subwoofer on its side and again to
turn it onto its feet. Note that the top part of the protective
material will now come off easily so ensure that the
subwoofer doesn't drop or slide away in the process.
Check that the contents are complete:
• Subwoofer. The factory-set power requirements (refer to
label on rear of subwoofer) should correspond for the
region where the subwoofer was purchased. Refer also
to chapter "Safety Instructions".
• DSC1 Remote Control.
• AC mains lead. The supplied lead should be suitable for
the region where the subwoofer was purchased.
• Instruction Manual.
To decide on the most suitable location for the subwoofer,
please refer to chapter "Positioning Subwoofers". Once the
subwoofer is positioned in the listening room, it can be
connected to the rest of the system.
Making connections
Before making any connections to the subwoofer we
strongly recommend that the subwoofer is disconnected
from the mains outlet. Refer to figure 2.
1
2
3


