


10
ENGLISH
NOTES:
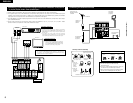
• The on-screen display signals are not output from the color difference (component) video signal
(MONITOR OUT) jacks.
• The on-screen display signals are output with priority to the S-VIDEO MONITOR OUT jack during playback
of a video component. For example, if the TV monitor is connected to both the AVR-2802’s S-Video and
video monitor output jacks and signals are input to the AVR-2802 from a video source (VDP, etc.) connected
to both the S-Video and video input jacks, the on-screen display signals are output with priority to the S-
Video monitor output. If you wish to output the signals to the video monitor output jack, do not connect a
cord to the S-VIDEO MONITOR OUT jack. (For details, see page 14.)
• The AVR-2802’s on-screen display function is designed for use with high resolution monitor TVs, so it may
be difficult to read small characters on TVs with small screens or low resolutions.
• The setup menu is not displayed when “HEADPHONE ONLY” is selected.
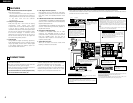
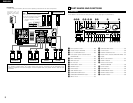
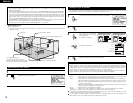
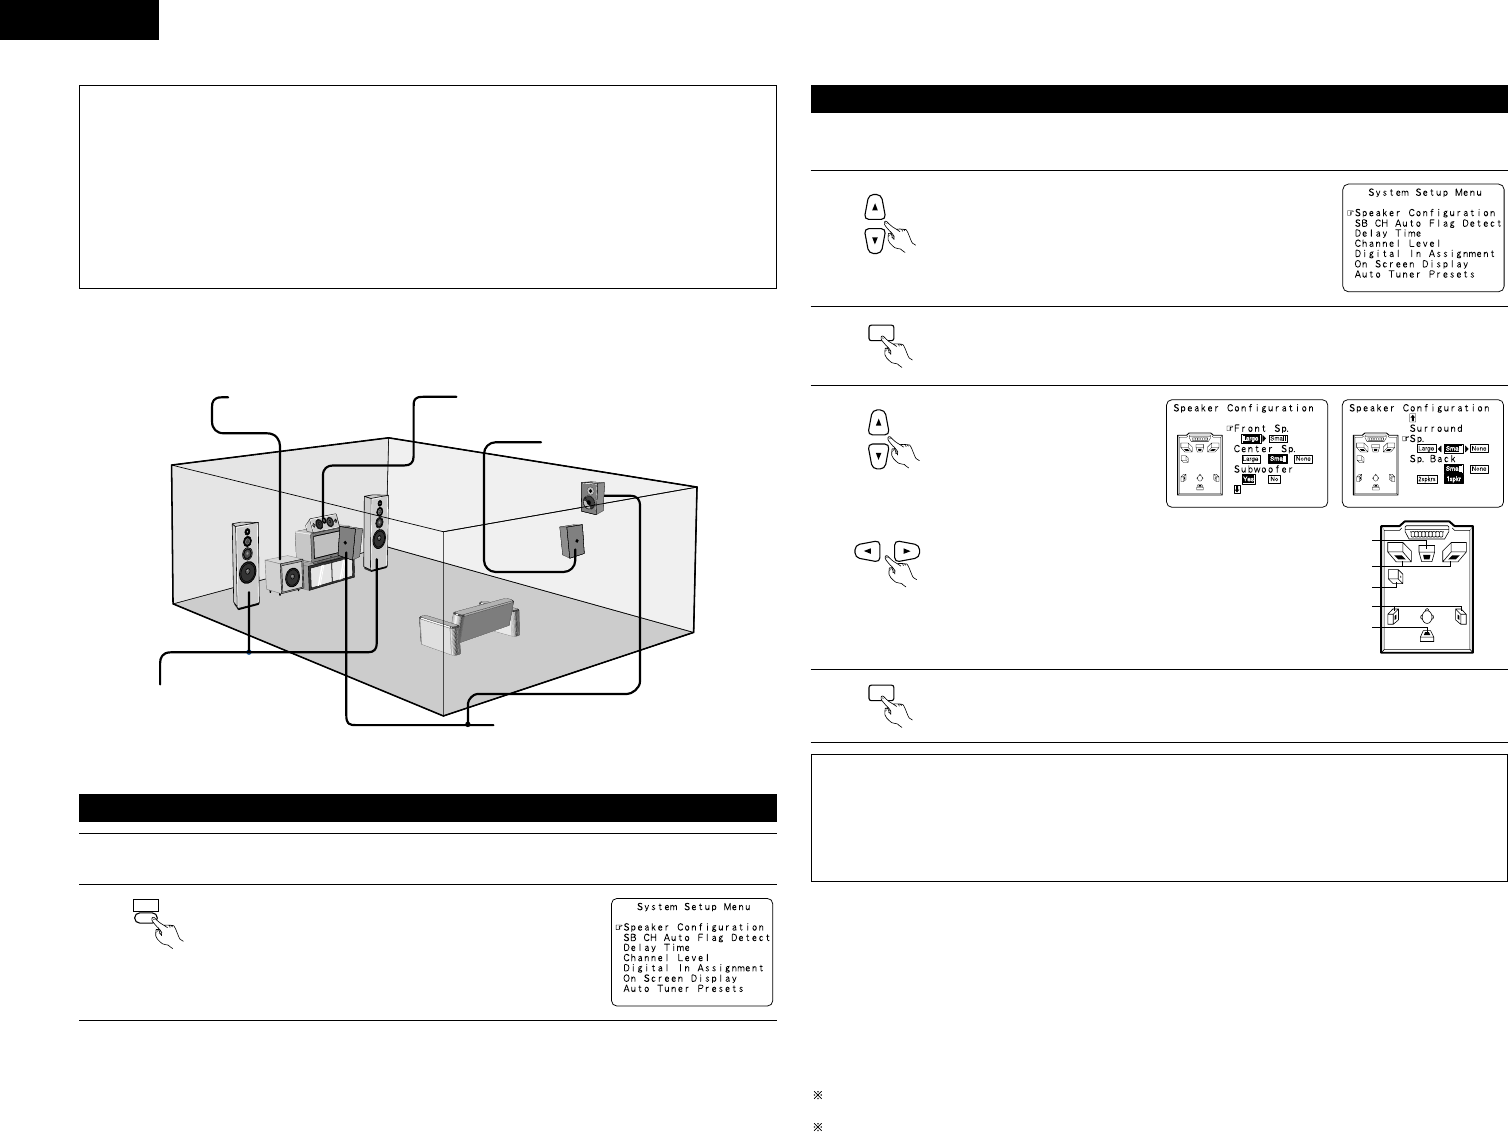
• Speaker system layout
Basic system layout
• The following is an example of the basic layout for a system consisting of eight speaker systems and a
television monitor:
Subwoofer Center speaker system
Surround speaker systems
Surround back speaker system
Front speaker systems
Set these at the sides of the TV or
screen with their front surfaces as flush
with the front of the screen as possible.
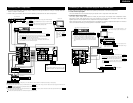
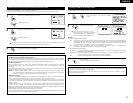
Before setting up the system
2
Display the System Setup Menu.
TITLE
SYSTEM
SETUP
1
Check that all the connections are correct, then turn on the main unit’s power.
• The composition of the signals output from the different channels and the frequency response are adjusted
automatically according to the combination of speakers actually being used.
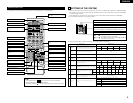
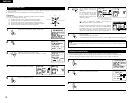
Setting the type of speakers
1
At the System Setup Menu select “Speaker Configuration”.
2
Switch to the speaker configuration screen.
ENTER
Center Sp.
Front Sp.
Subwoofer
Surround Sp.
Surround back Sp.
NOTES:
• Select “Large” or “Small” not according to the actual size of the speaker but according to the speaker’s
capacity for playing low frequency (bass sound below frequency set for the Crossover Frequency mode and
below) signals. If you do not know, try comparing the sound at both settings (setting the volume to a level
low enough so as not to damage the speakers) to determine the proper setting.
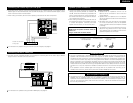
• When “2spkrs” is selected for the surround back channel, and external integrated pre-main amplifier or
power amplifier must be connected to the pre-out jacks (SBL and SBR). (See page 8.)
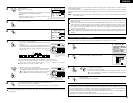
3
Set whether or not speakers
are connected and, if so, their
size parameters.
• To select the speaker
• To select the parameter
4
Press the ENTER button to finalize the setting.
ENTER
• Parameters
Large.................Select this when using speakers that have sufficient performance for reproducing bass
sound below the frequency set for the Crossover Frequency mode.
Small.................Select this when using speakers that do not have sufficient performance for reproducing
bass sound below the frequency set for the Crossover Frequency mode. When this is set,
bass sound with a frequency below the frequency set for the Crossover Frequency mode
is sent to the subwoofer.
When this setting is selected, low frequencies of below the frequency set for the Crossover
Frequency mode are assigned to the subwoofer.
None……..........Select this when no speakers are installed.
Yes/No…...........Select “Yes” when a subwoofer is installed, “No” when a subwoofer is not installed.
2spkrs/1spkr.....Set the number of speakers to be used for the surround back channel.
If the subwoofer has sufficient low frequency playback capacity, good sound can be achieved even when
“Small” is set for the front, center and surround speakers.
For the majority of speaker system configurations, using the Small setting for all five main speakers and
Subwoofer On with a connected subwoofer will yield the best results.