


16
The 551R allows level calibration to match the acoustic level between
different types/sizes or even manufacturers of speaker that may be being
used for each channel. This is achieved by adjusting the relative level of each
speaker. This can be done manually through the ‘Level Calibration’ menu in
the OSD or automatically, see the following Auto setup section of this manual.
The basic process for manual adjustment is to listen to or measure with a
Sound Pressure Level (SPL) meter (more accurate and recommended but not
essential) the level of sound produced by each speaker and set relative levels
for each speaker so that they all sound the same loudness at the normal
listening position. The 551R incorporates a Test Signal Generator (broad-
band white noise) to facilitate this.
Press the OSD button on the remote control then select the ‘Level
Calibration’ menu. Now turn on the test signal by highlighting this item and
pressing the Left or Right arrows:
You can now move up and down the channels using Volume Up/Down on the
remote. Each time a new channel is selected the test signal will be heard to
move to that channel. Compare the loudness of all channels as heard at the
listening position.
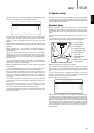
A “rushing” or “hissy” sound should be heard.
Now adjust the channels so they all sound the same (in terms of loudness
only, channels of different frequency responses can sound different in terms
of the “tone” of the sound i.e. more or less hissy).
Pick the channel that sounds most different and select it to listen to the test
signal. Now adjust the relative level in dB (using Arrow left/right on the
remote) and continue comparing it to other channels until it is of equal
loudness. The level can be adjusted up to + or - 10dB in 1dB steps. Repeat
the process with the next most different channel. Once all channels sound
the same in terms of loudness, press the OSD button again to save the
settings and exit the menu.
Auto speaker setup for Distance/Level
The 551R includes our simple automatic speaker setup system called
'CAMCAS' (Cambridge Audio Mic Controlled Auto Setup). The system performs
two sets of tests firstly checking which speakers are connected and whether
they are wired correctly and in phase then second automatically measuring
and adjusting the speaker delay timings (i.e. distance setting ) and levels.
Before activating this feature the 'Decode Mode' (i.e. type of speaker
package e.g. 5.1, 7.1) of the 551R and Large/Small/None status of each
speaker must be set correctly as per section 1. This is important as the unit
will only look for and check the speakers you have told it you have.
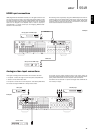
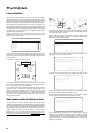
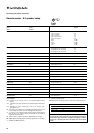
Level calibration
Level Calibration Menu
Test Signal :
Front L :
Front R :
Surround L :
Surround R :
Centre :
Subwoofer :
Surr. LB :
Surr. RB :
Return : [OSD]
On
0 dB
0 dB
0 dB
0 dB
0 dB
0 dB
0 dB
0 dB
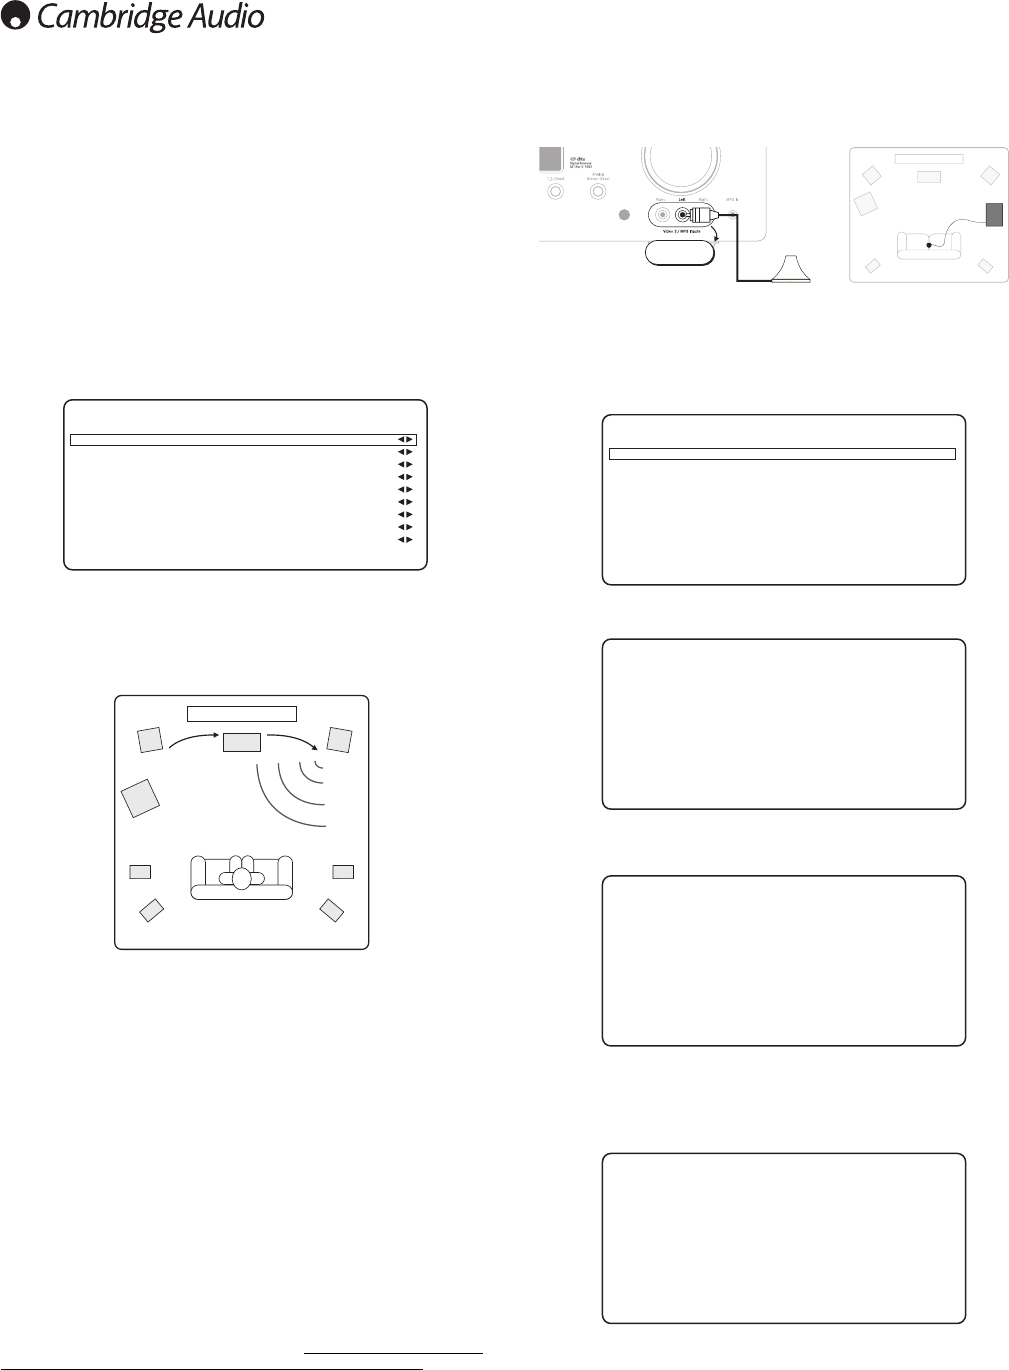
To perform Auto Distance/Level setup first connect the supplied microphone
to the front Left front panel audio input on the front panel and place it at your
normal listening position in the room.
Press the OSD button on the remote control to access the OSD and then
select the Speaker Setup Menu. Now select the option 'Auto Setup'. This will
access the 'Auto Setup Menu' as below.
Follow the on-screen instructions and press 'Enter' on the remote control
when ready to start the Auto Setup function.
Once activated the OSD will display the message below and the word
'AUTOSETUP' will also be displayed on the front panel of the 551R to confirm.
A series of test signals will now be output from all of the connected speaker
terminals of the 551R (including the Subwoofer output).
Once finished the unit will display a screen similar to the one below reporting
which speakers were found and any that appear out of phase.
If any speakers appear unconnected or out of phase carefully check the
connections on the speaker and the back of the unit. Also check any bi-wiring
links that might be present on the speaker. For any out of phase speakers
check that the relevant + terminal of the 551R goes to the + terminal of that
speaker and similarly the – terminal of the 551R goes to the – terminal of the
speaker for that channel.
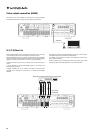
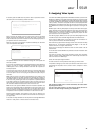
Auto Setup Menu
Continue : [ENTER]
Plug the microphone into the left channel of Video
3 on the front panel and place the microphone at
normal listening position and height
Auto Setup Menu
The unit is now checking which speakers are
connected and their phase
Please wait........
Auto Setup Menu
Continue : [ENTER]
The speakers that have been found are:
L C R SL SR LB RB SW
All speakers are in phase
Speaker Setup Menu
Auto Setup
Speaker Configuration
Speaker Distance
Level Calibration
Speaker Crossover
Return : [OSD]