


8
SYSTEM SETUP
!!
S
YSTEM SETUP
EnglishFrançais Español
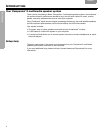
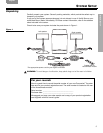
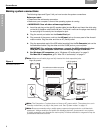
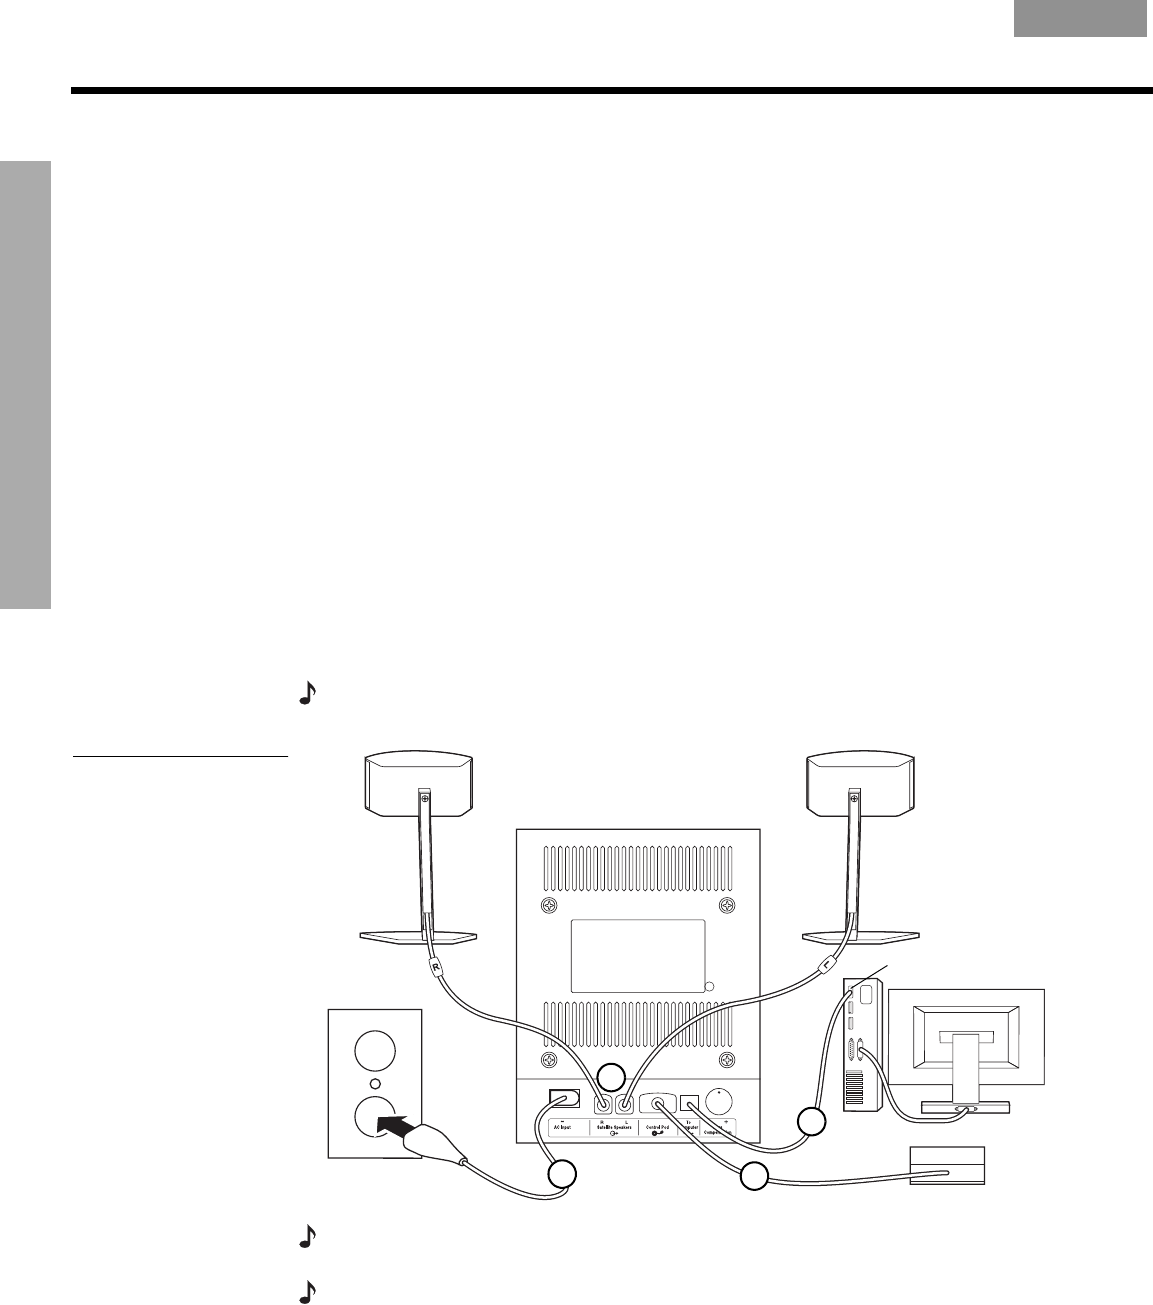
Making system connections
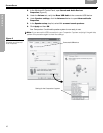
The following steps and Figure 3 tell you how to make the system connections.
Before you start:
• Please read the entire setup procedure.
• Make sure your computer is on and the operating system is running.
• IMPORTANT: Close all other software applications.
1. Insert the red plug on the right (R) speaker cable into the R jack and insert the white plug
on the left (L) speaker cable into the L jack. The R and L marks on the plugs must face up
for each plug to fit correctly into its respective jack.
2. Plug the control pod cable into the Control Pod jack.
3. Plug one end of the power cord into the AC Input jack on the rear panel of the Acousti-
mass
®
module. Plug the other end into an AC (mains) outlet.
4. Plug the appropriate end of the USB cable (supplied) into the To Computer jack on the
Acoustimass module. Plug the other end into a USB jack on your computer.
IMPORTANT: For optimum performance, connect the USB cable directly to a
USB jack on your computer rather than connecting through a USB hub.
5. For Windows
®
XP computers, go to “Windows
®
XP audio setup” on page 9.
For Mac OS
®
X computers, go to “Mac OS
®
X audio setup” on page 11.
Note:
Make sure all cable plugs are fully inserted into their respective jacks.
Figure 3
Connection overview
Right
(
R
)
speaker
Left (L) speaker
Control
pod
Computer USB
Acoustimass module rear panel
3
2
1
4
Note:
The Companion
®
5 system does not have an AC power switch. The system turns on in
Standby mode when you plug in the power cord. See “System modes” on page 13.
Note:
Bose recommends using a safety agency-approved surge protector on all electronic
equipment. Voltage variations and spikes can damage electronic components in any system.
A quality suppressor can eliminate the vast majority of failures attributed to surges and may be
purchased at electronics stores.