


E-8
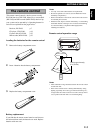
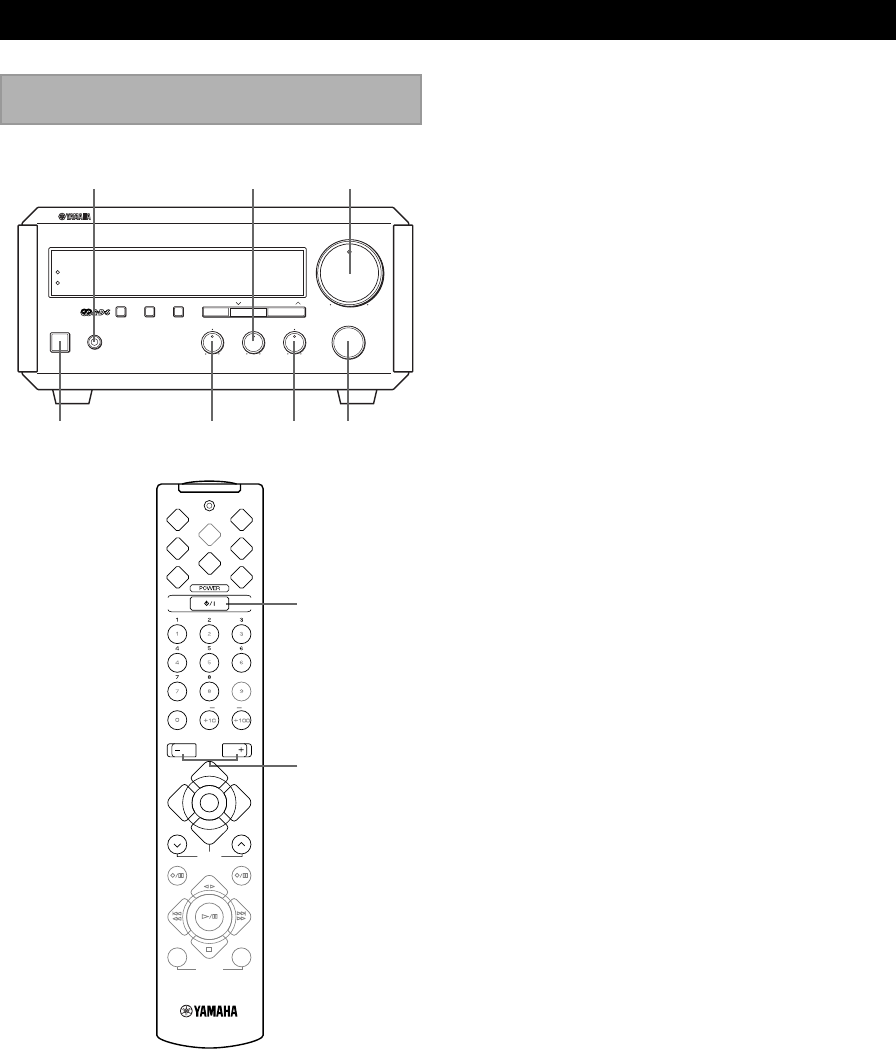
RX-E100 BASIC OPERATIONS
Listening to a source
4 Play the source. (Refer to the owner’s manual
supplied with each selected component.)
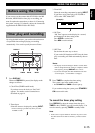
5 Adjust the volume level by turning VOLUME on the
front panel or pressing VOLUME + on the remote
control.
6 If desired, adjust BASS, TREBLE, and BALANCE.
BASS: Turn this control clockwise to increase (or
counterclockwise to decrease) the low frequency
response.
TREBLE: Turn this control clockwise to increase (or
counterclockwise to decrease) the high frequency
response.
BALANCE: Adjust the balance of the output volume
from the left and right speakers to compensate for
sound imbalance caused by the speaker location or
listening room conditions
• These controls are only effective for the sound from the main
speakers.
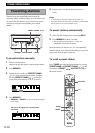
When you use headphones
Connect the headphones to the PHONES jack. You can
listen to the sound from the main speakers through the
headphones.
When you have finished using this
unit
Press STANDBY/ON on the front panel again or
POWER on the remote control to set this unit to the
standby mode.
• The STANDBY indicator lights up.
Auto power off function
RX-E100 will be put automatically into the standby mode
under the following conditions:
• The component connected to RX-E100 is in stop mode
and not operated for 30 minutes.
• TUNER or AUX is not selected as an input source.
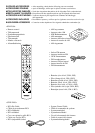
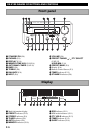
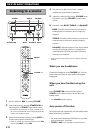
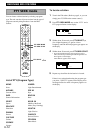
STANDBY/ON PHONES
DISPLAY
+-+-
RL
MEMORY AUTO/MAN'L
TIME ADJ TIMER
HOUR PTY SELECT MIN
BASS TREBLE BALANCE
MAXMIN
VOLUME
INPUT
PRESET/TUNINGPRESET/BAND
NATURAL SOUND STEREO RECEIVER RX-E100
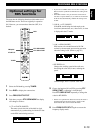
TIMER
STANTBY
VOLUME
STANDBY/ON INPUTBALANCE
TREBLE
BASS
PHONES
A
D
C
E
B
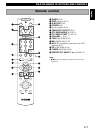
TIME
RNDM
VOLUME
MODE
PTY SEEKFREQ PS/PTY/RT/CT
START
TAPE
AUX
MD CD
TUNER
PRESET
PTY SELECT
TAPE
MD REC
MODE START
TAPE REC
PROG
TAPE
REP
PEAK
DUBBING
SLEEP DISP
POWER
VOLUME –/+
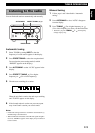
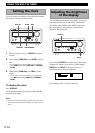
1 Set the volume to “MIN” by turning VOLUME.
2 Turn on the power by pressing STANDBY/ON on
the front panel, or POWER on the remote control.
• RX-E100 can be used to turn on or put in standby mode
the system connected E100 series components depending
on their prior standby/on status.
3 Select the desired input source by turning INPUT so
that the source appears on the display.
• When you operate the component connected to the AUX
terminal, turn INPUT to select AUX.