


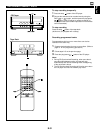


E-40
Timer recording
(To record a tuner program)
1 Load a blank tape into the DECK B cassette
compartment.
2 If desired, change the setting of the reverse mode and
the Dolby NR position.
3 Tune to the station of which program you want to record.
4 Follow step 2 of the “Timer play” on page 38 and 39.
* In step
➁
, select the TUNER position with the INPUT
SELECTOR control, and then press the TIMER REC
button. (“REC” will flash on the display.)
* In step
➂
, set the time when you want to begin the
timer recording.
* In step
➃
, set the time when you want to finish the
timer recording.
5 Press the TIMER button.
(The power will be turned off automatically.)
* If a normal display mode (the state which had been
selected before you began setting the timer recording)
is restored before you press the TIMER button, select
and follow either of the two methods below.
•
Press the DISPLAY button, and then press the
TIMER button. (The power is still on.)
•
Press the POWER switch to turn the power off, and
then press the TIMER button. (The power is turned
off.)
To confirm the timer time setting
Press the DISPLAY button.
To cancel the setting of timer recording
Press the DISPLAY button once or more so that “REC”
flashes on the display. While “REC” is flashing, press the
TIMER REC button.
* Unless the AC supply lead is unplugged or there is a
power failure for more than 5 minutes, the time set on the
timer will be retained until it is reset.
Note
When the timer recording is finished, the timer setting is
automatically canceled to avoid repeating timer recording of
the same setting.
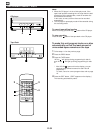
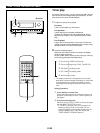
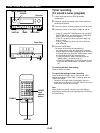
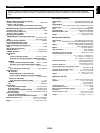
HOW TO USE THE BUILT-IN TIMER
Receiver
Tape Deck
2 1
12345
CD
678
67890
12345
TIME
PROG
TAPE EDIT +10
ABCDE
REPEAT
RANDOM
STOP
PLAY/PAUSE OPEN/CLOSE
MODE
DISC SKIP
TUNER
DECK
A/B
PLAY STOP PLAY
TAPE
INPUT
REC/PAUSE
-
+
-
+
EFFECT LEVEL
SP/PHONES
MODE DSS
POWER SLEEP
DISPLAY
VOLUME
POWER
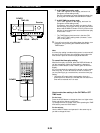
DISPLAY TIMER TIMER REC
INPUT SELECTOR
POWER
TUNER
input
selector
button
DISPLAY