MM102014V1, Rev. G
17
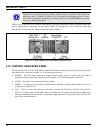
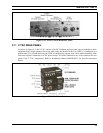
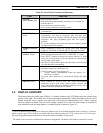
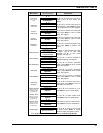
Table 4-1: Front Panel Controls and Functions
PART FUNCTION
POWER
Button/Volume Dial
• Push to turn the radio on
3
.
• Push and hold for approximately one-half (0.5) of a second
4
to
turn the radio off.
• Twist clockwise to increase volume.
• Twist counter-clockwise to decrease volume.
Mic Connection
• Connect hand-held, hands-free, DTMF microphone, speaker-mic,
or headset here.
EMERGENCY
button
• Pressing the EMERGENCY button, if enabled through
programming, will send an emergency alert and open voice
communication on the currently selected talk group or the default
emergency talk group (depending upon how the system is
defined).
• To end an emergency call, press and hold the emergency button
for approximately four seconds.
AMBIENT LIGHT
sensor
• Radio automatically adjusts the display and button backlight
brightness level based on ambient light. Do not block this sensor.
MENU and
SELECT buttons
• Cycle through the menu loop with UP and DOWN buttons.
• Scroll through selections with LEFT and RIGHT buttons.
• Press SELECT button to activate the current selection. In some
cases, this is not necessary as the last selection will automatically
activate after a short period.
• The SELECT button flashes green when the radio is receiving and
red when the radio is transmitting.
DISPLAY area
• Menu selections and messages.
• Network Connectivity icon (Figure 4-2)
• Current Volume Level icon (Figure 4-2);
♦ Volume numeric representation within the display (0 =
Muted, 40 = Loudest).
• User may select which one of several dwell displays the radio
uses.
PRE-SET buttons
• These buttons are used to store and recall user-selectable
parameters such as scan mode, selected profile, selected talk
group, and priority talk group. Different parameters can be stored
at each of the three different pre-set buttons.
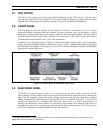
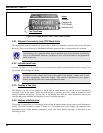
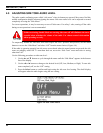
4.2 DISPLAY OVERVIEW
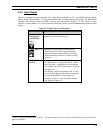
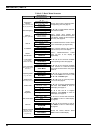
The display shows the radio status (Table 4-2). Network connectivity (OTP Mode only) and volume icons
appear on the right. The volume level is also represented numerically within the display with zero (0 or
muted) being the lowest volume level and forty (40) being the highest/loudest level. “Mute” displays
when the speaker is muted. The rest of the display consists of two text lines that change in response to
user interaction with the menu buttons. A sample display is shown in Figure 4-2.
3
The Power Button may be configured to function in different ways or be disabled altogether. Refer to Section 5.1 for more
detail. At power-up to V-TAC mode (e.g., portable radio not in vehicular charger at V-TAC turn on), the V-TAC will sound
four tones (high-medium-high-medium) as it initiates the default Extended Coverage mode.
4
The length of time necessary to hold the Power Button is configurable. The default time length is one-half of a second.


