8
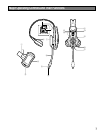
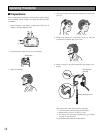
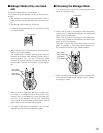
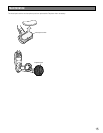
q Head Band and Head Pad
Adjustable to your head by sliding the head pad.
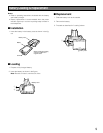
w Battery Lock [EJECT]
When removing the battery, slide out the lock.
When loading a battery, insert the battery until the lock
clicks.
e Battery Case / Battery (Optional accessory)
Refer to p. 6 "Precautions".
r Head Pad Cushion
t Switch Compartment
Do not open the cover of this compartment. It should be
opened only by qualified service personnel or system
installers.
y Power Button [POWER]
Pressing the button will turn the headset on.
Pressing the button again for 2 seconds or more will turn
the headset off.
u Earphone Pad
i Microphone Boom
Adjust the microphone position to your mouth by rotating
and bending the boom.
o Microphone
!0 Lane Indicator
Lights yellow or green to indicate which the lane is in
operation.
Yellow: Lane A is selected.
Green: Lane B is selected.
Yellow blinking: Lane A is being selected, and either
the Talk or Page mode is activated.
Green blinking: Lane B is being selected, and either
the Talk or Page mode is activated.
!1 Power Indicator
The indicator shows the status as follows.
Green: Power is supplied and the unit is operating.
Green blinking: Power is supplied and Manager mode
is activated.
Red: The battery requires recharging.
Red blinking: ID is not registered, or the center module
is set to the ID Registration mode.
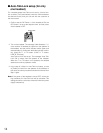
!2 Optional Function Button [R]
This button is intended for functional extension.
When the All-in-One Headset is set in the manager
mode and this button is pressed, operation cannot be
forwarded for talking or paging. At that time, the
Telephone Indicator of the Center Module lights.
To recover the talk or page operation, press this button
again.
The Telephone Indicator is turned OFF and the talk and
page operation becomes possible.
!3 External Device Control Button [C]
Press and hold the C button to turn on the external
device.
!4 Volume Control Buttons [VOL
!@
]
Pressing the buttons will increase or decrease the sound
level.
!5 Talk 1 Button [T1]
This button controls communications with the customer.
When the button is released, you can hear any customer
who is at the menu-board.
While the button is held down in the Press-To-Talk
mode, you can speak to the customer.
When the button is pressed in the Talk-Lock mode, you
can speak to the customer until you press the button a
second time.
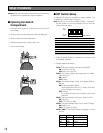
!6 Talk 2 / A/B Lane Selection Button [T2, A/B]
This button can be set to two functions by the DIP switch
setting. (Refer to p.16 "DIP Switch Setup".)
[T2]
This button controls communications with the customer
on lane B of double-drive-thru.
When the button is released, you can hear any customer
who is at the menu board.
While the button is held down in the Press-To-Talk
mode, you can speak to the customer who is at the
menu board.
When the button is pressed in the Talk Lock mode, you
can speak to the customer until you press the button a
second time.
[A/B]
This button switches from Lane A to B and vice versa.
The Lane indicator !0 displays the selected Lane in yel-
low (A) or green (B).
!7 Page Button [P]
This button controls communications with store person-
nel.
When the button is released, you can hear the communi-
cations among store personnel.
While the button is held down in the Press-To-Page
mode, you can speak to store personnel.
When the button is pressed in the Page-Lock mode, you
can speak to the store personnel until you press the but-
ton a second time.


