


5 - Restoring erased material
5–6
TASCAM MD-801R/P Mk II
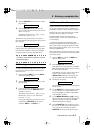
bers are renumbered accordingly. See the dia-
gram above for an example.
If you need to make the new track (formerly the
A-B portion) into part of the preceding and/or
following track, use the track combine facility
(see 5.4, "Combining tracks") to turn these
tracks into one track.
The A and B points are lost after this edit opera-
tion, and will have to be re-entered if they are to
be used again.
You can cancel the operation at any time in the
usual way (
SHUTTLE
wheel counterclock-
wise,
EDIT
key or
STOP
key).
NOTE
You cannot move the A-B portion inside itself
(i.e. the insert point cannot be between the A
point and the B point).
5.8 Restoring erased material
A track or section erased can be unerased. This is an
“all or nothing”-type process—all tracks and sections
deleted are restored, and it is not possible to restore
only one of these tracks or sections.
In addition, if tracks or sections are restored, the
audio data only is restored—the titles and recording
dates are not restored, but a title such as
RST.001
will be automatically given, showing
that this is a restored track. The tracks restored in a
single operation start numbering at 001, regardless of
any other track titles with the same number that were
on the disc before the operation.
This function can also be used in an emergency, if
recording was taking place, and power to the unit
was cut off part of the way through the recording
process. In this event, data on the disc will be
present, but will not be organized with the TOC and
will hence be inaccessible. This function may allow
the data to be accessed after the restore operation has
been performed.
However, there are occasions on which this function
does not restore such data, and the
Not
Execute!
message will appear..
NOTES
Tracks and sections of less than 12 seconds
in length may not be restored.
When restoring a track or tracks, the last
restored track will have the unused portion of
the disc automatically appended to it. This will
result in a
Disc Full
error message if
you try to record on the disc.
To overcome this problem, split the new long
track at the end of the recorded section, and
delete the new track which consists of the
unused part of the disc.
When restoring recordings that have been
interrupted, the time shown on the display
may disappear from the display at the point at
which the power was cut. This is a normal
function, and you should not be concerned if
this happens. You may want to use this as the
position to divide the new "long" track into two
before deleting the unwanted part, as
described above.
If a track or section occupies a part of the disc
which has been overwritten by a new record-
ing, the older section cannot be restored—the
data is no longer available.
This operation can take place in stop, play ready or
play mode.
1
Press the
EDIT
key, and turn the
DATA
dial
until the display shows:
2
Turn the
SHUTTLE
wheel clockwise to restore
deleted data.
The display may show
Not Execute!
.
Here, this means that the disc has no material
recorded on it which has been erased (there may even
be no material at all recorded on it).
5.9 Changing track attributes
After a track has been restored in the way described
above, it may have the wrong attribute assigned to it
(it may be restored as mono when it was originally
stereo, or
vice versa
). This function allows you to
restore the correct attribute.
1
Use the
TRACK
keys or any other convenient
method to select the track whose attributes you
wish to change.
2
After pressing the
EDIT
key, turn the
DATA
dial until the display shows:
RESTORE ?
TRK ATTR ?