


5 - Moving tracks
TASCAM MD-801R/P Mk II
5–3
The
PLAY
indicator above the
PLAY
key will
flash, as will the
EDIT
indication in the display,
to show that rehearsal mode has been entered.
In this rehearsal mode, the last 4 seconds
(approximately) of the previous track and the
first four seconds (approximately) of the current
track are continuously repeated, so that you can
audition the “join” between the tracks.
4
At this point, it is still possible to use the
TRACK
keys to select another track to be com-
bined. This newly-selected track will be com-
bined with the track immediately before the
new selection.
5
Turn the
SHUTTLE
wheel clockwise to com-
bine the tracks. The display will show
Now
Editing
, followed by
Complete
.
The track number of the first combined track (i.e. the
track immediately before the track selected prior to
the combine operation) is used for the combined
track.
The title of the second track is appended to that of the
first track.
NOTES
Selecting the first track and attempting a com-
bine operation will result in the message
TRK Illegal!
being shown on the
display—it is not possible to combine the first
and last tracks.
Mono and stereo tracks cannot be combined.
In some cases where an MD has had many
edit operations performed, the
Cannot
EDIT!
message may appear on the dis-
play. This does not indicate a fault with the
disc or the machine, but is a property of the
MD recording system.
5.5 Moving tracks
This function allows you to edit the running order of
the tracks, and re-place a track in a different position.
This can also be used with the combine function (5.4,
"Combining tracks") in order to combine non-contig-
uous tracks.
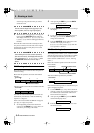
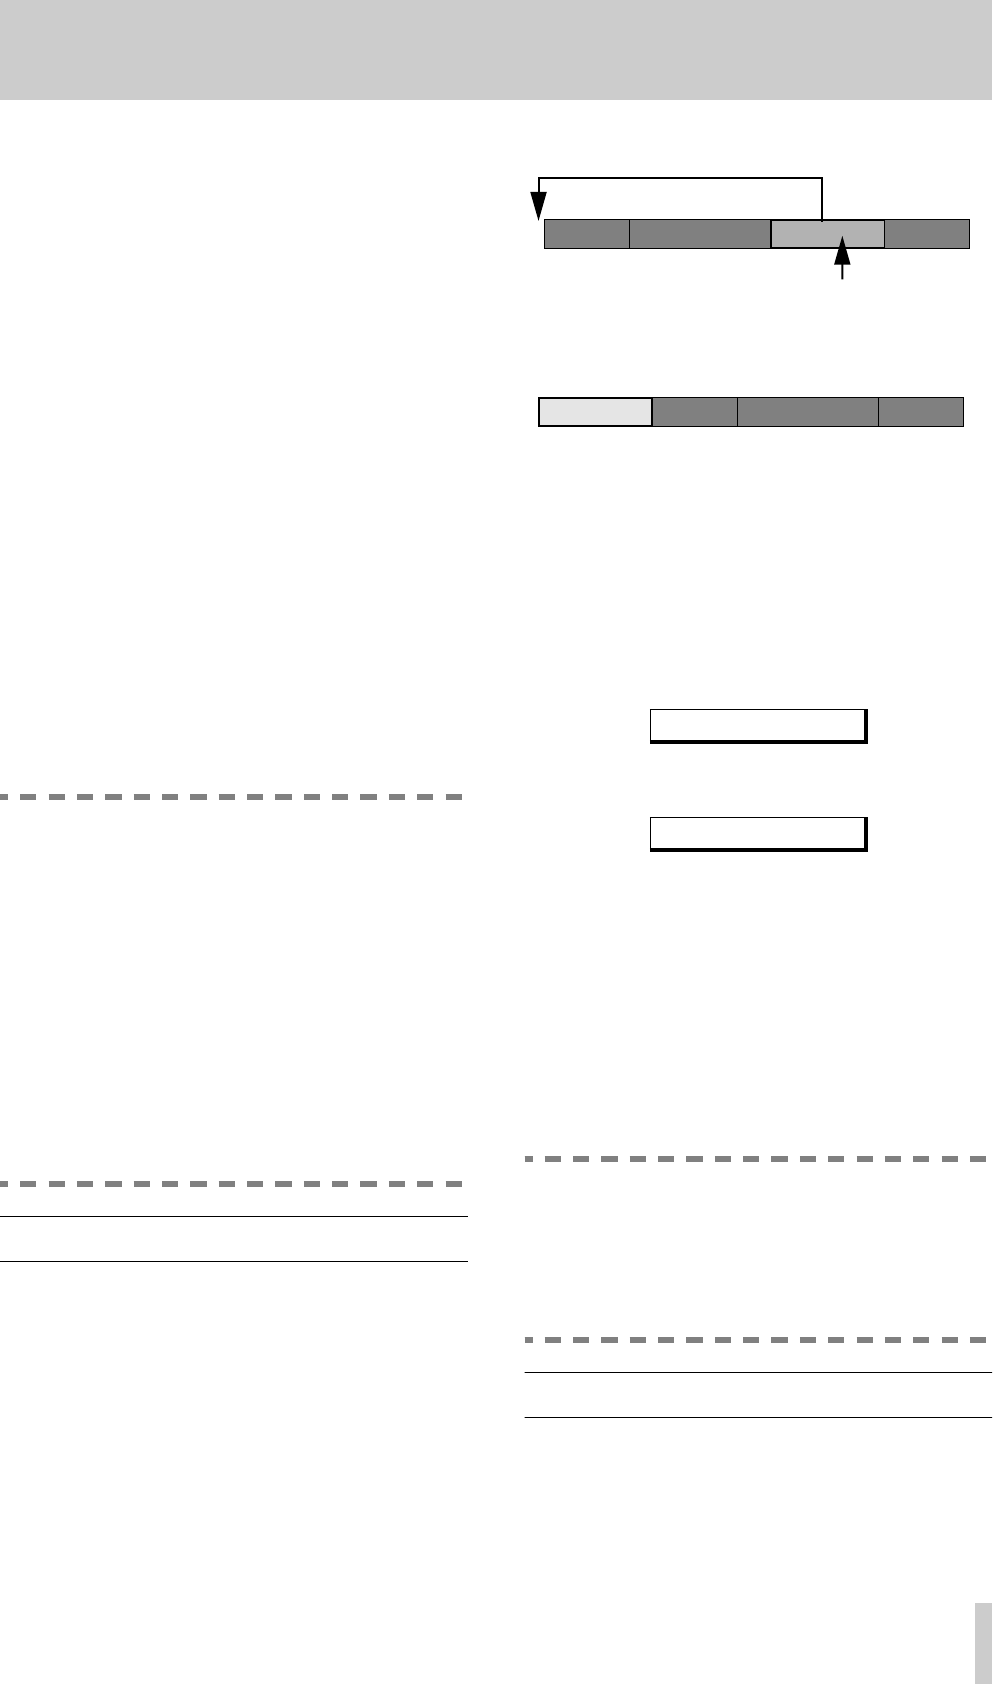
Before a move operation, the tracks and numbers
look like:
Following the move operation, the tracks look like:
The “gap” is closed up, and all tracks are re-num-
bered in the new sequence. A move operation can be
carried out in the stop, play ready or play modes.
1
Use the
TRACK
keys, or any convenient
method, to select the track to be moved.
2
After pressing the
EDIT
key, turn the
DATA
dial until the display shows:
3
Turn the
SHUTTLE
wheel clockwise to open
the move menu. The display will show:
The three numeric digits indicate the track num-
ber that the current track will occupy after the
move operation.
4
Use the
DATA
dial to change the destination
track number.
5
Turn the
SHUTTLE
wheel clockwise. The dis-
play will show
Now Editing
, followed
by
Complete
.
All tracks will be automatically renumbered.
NOTE
You cannot move a track to itself, e.g. if you
have selected track 1, the destination number
cannot be
001
. The display will show a
Not Execute
message if you attempt
this.
5.6 A and B point erase operations
The two location points (see 4.2.6, "Playback
between two location points") can be used for a vari-
ety of erasure purposes. Although the basic principle
MOVE ?
Move to 001?
Track number
12 3 4
This track is to be moved
New track numbers
123 4
(track numbers before the move)
312 4