User's Manual
48
CHAPTER 5
The Holographic Image is a unique
pro cess which enhances the three-
di men sion al effects and realism of
stereo sound. This is modeled in DSP,
from a design based on Bob's legend-
ary (and much sought after) Carver
C-9.
This circuit was designed to over-
come a problem in ob tain ing accurate
sound re pro duc tion:
In a stereo system, both ears will
hear the output from both speakers.
The left ear hears sound from the left
speaker and from the right speaker.
To see a problem with this, compare
what happens when listening to a live
musical performance:
During a concert, each ear will
receive one direct sound arrival. For
ex am ple, a cymbal crashes, both your
ears will hear it and the brain tells you
accurately the position of the mu si cian.
In a stereo recording of the concert, this
cymbal crash will be heard from both
speak ers. The left ear will hear the left
speak er, which is Þ ne, but it will also
hear the crash from the right speaker.
These extra sounds tend to confuse the
sense of sound source location.
The stereo effect in a good pair of
head phones is enhanced because the
left ear only hears the left head phone,
and the right ear hears only the right
headphone. There are no extra sound
arrivals.
To summarize :
1. A real musical event will create
only two direct sound arrivals,
one at the left ear and one at
the right.
2. Stereo playback will give four
arrivals , as both speakers
are heard by each ear. These
second sound arrivals reduce
our naturally accurate sense of
positioning.
The Holographic Image circuit was
de signed to cancel out the unwanted
second arrivals. The left ear will main-
ly hear the left speaker and the right
ear mainly hears the right speaker.
This is accomplished by send ing a
complex crosstalk signal from the left
and right speakers in addition to the
normal program. These extra signals
are virtually identical to the unwanted
second sound arrivals but they are
out-of-phase with them and they can-
cel each other out.
The result is a more three-di men -
sion al and wider soundstage, where
the positioning clues are restored. In
a way, the musicians have been freed
from the conÞ nes of the ß at plane be-
tween the speak ers. You will per ceive
them as playing forward or playing
behind the speakers or to one side
or the other, not just somewhere in
between. We recommend that you ex-
periment with its effect, remember that
you are listening for a more accurate
sense of the location of the different
musicians.
Because the Holographic Image
works by phase cancellation of the
unwanted second sound arrivals, ac-
curate speaker positioning is required.
You must make sure that the left
speak er is the same distance away
from you as the right speaker. Follow
the front speaker place ment on the
next page to get the best results. This
is the same as any standard stereo
system, only with more care taken to
position the left and right speakers
accurately.
The Hologram circuit can be
engaged using the remote control or
from the front panel. There is a short
mute period until the circuit is fully
engaged or dis en gaged.
Holographic Im age
Software CD
The Flash memory software can be
upgraded by connecting your PC to
the Receiver's RS-232 serial port, and
downloading an update Þ le from our
website: www.sunÞ re.com. This is the
preferred method, as the software can
be updated fairly quickly. See page 51
for more details.
Alternatively, the software can be
upgraded using a CD available from
SunÞ re Technical Support. This CD
will be available periodically if there
are major software changes since the
initial release.
The following notes show the CD
upgrade procedure. The CD or DVD
player must be connected to the
Receiver's digital audio inputs.
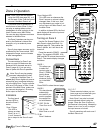
1. Turn on your TV, your CD
player and the Receiver.
2. Use the Receiver's remote to
select the On Screen Display.
3. Go to the Settings Menu and
then select the Software Menu.
4. Select "Upgrade Software,"
which brings up a second OSD
menu.
5. On the Receiver, select the
digital input which will play the
CD. Press ENT on the remote
(bottom right).
6. Press 1,2 and 3 on the remote,
then play the CD. The Receiv-
er display will show the status
as the CD data is transferred
into the Receiver.
7. Turn off the Receiver when the
software transfer is complete.
SOFTWARE
UPGRADE SOFTWARE
REVISION LIST


