


33
GB
D:\NORM'S JOB\SONY HA\SO0109\STR-DH520\4263361111_GB\GB04CON_STR-DH520-
U2.fm
masterpage: Right
STR-DH520
4-263-361-11(1)
Preparing the Receiver
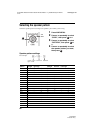
The table below provides measurement status
shown on the display panel.
* The corresponding speaker indicator lights up in
the display panel during measurement.
Tips
•You can also select the calibration type you want
and perform the Auto Calibration by using the
“CUSTOM” in AUTO CAL menu (page 35).
•You can change the unit of distance in
“DIST.UNIT” in SPEAKER menu (page 58).
To cancel Auto Calibration
The Auto Calibration function will be
canceled when you perform the following
during the measurement process:
–Press ?/1.
– Press the input buttons or turn the INPUT
SELECTOR on the receiver.
– Change the volume level.
– Press MUTING or .
– Connect headphones.
–Press AUTO CAL again.
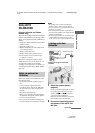
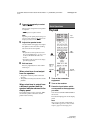
1 Confirm the measurement
result.
When the measurement process is
completed, the result appears on the
display panel with a beep sound.
2 View the measurement result.
Press V/v repeatedly to select the item.
Then, press .
3 Save the measurement result.
Select “SAVE.EXIT” in step 2.
“COMPLETE” appears on the display
panel and the settings are saved.
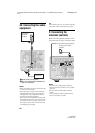
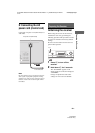
4 Disconnect the optimizer
microphone from the receiver.
Note
If you reposition your speaker, we recommend that
you perform Auto Calibration again to enjoy the
surround sound.
Tip
The size of a speaker (LARGE/SMALL) is
determined by the low frequency characteristics.
The measurement results may vary, depending on
the position of the optimizer microphone and
speakers, and the shape of the room. It is
recommended that you apply the measurement
results. However, you can change those settings in
the SPEAKER menu (page 54). Save the
measurement results first, then try to change the
settings.
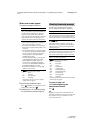
Measurement for Display
Speaker existence TONE
Speaker gain, distance, frequency
response
T. S. P.*
Subwoofer gain and distance WOOFER*
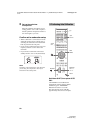
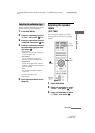
3: Confirming/saving the
measurement results
Measurement process
[Display]
Do this
Completes properly
[SAVE.EXIT]
Proceed to step 2.
Fails
[E -
xxx
xx
]
See “When error
codes appear”
(page 34).
• EXIT
Exits the setting process without saving the
measurement results.
• WARN CHK
Displays warning related to the
measurement results. See “Checking the
warning message” (page 34).
• SAVE.EXIT
Saves the measurement results and exits the
setting process.
•RETRY
Performs the Auto Calibration again.
continued