Getting Started
13
US
Check that you have the following items:
•Speakers (5)
• Subwoofer (1)
• Posts (long × 4, short × 4)
• Bases (4)
• Terminal covers (4)
• Screws (20)
• Surround amplifier (1)
• IR transmitter* (1)
• IR receiver* (1)
• IR receiver stand (1)
• Speaker base (1)
• AM loop antenna (aerial) (1)
• FM wire antenna (aerial) (1)
• Speaker cords (5 m × 6)
(16.5 ft. × 6)
• Video Cord (1)
• Remote Commander (remote) (1)
• Size AAA (R03) batteries (2)
• Wall-mount pads
• Operating Instructions
• Speaker and TV connections (card) (1)
* The cords of the IR transmitter and IR receiver are
for this system only. You cannot use a commercially
available extension cord.
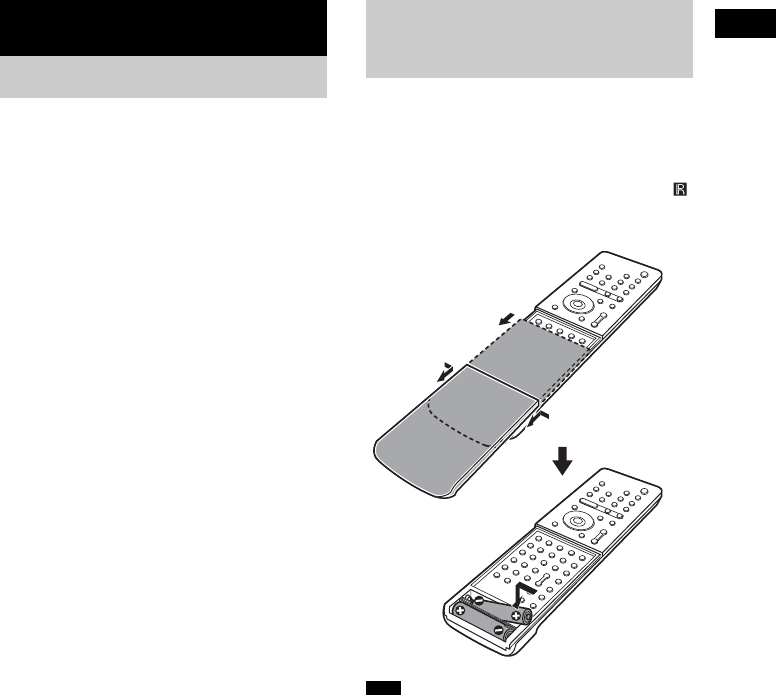
You can control the system using the supplied
remote. Insert two size AAA (R03) batteries by
matching the 3 and # ends on the batteries to
the markings inside the compartment. When
using the remote, point it at the remote sensor
on the system.
• Do not leave the remote in an extremely hot or humid
place.
• Do not use a new battery with an old one.
• Do not drop any foreign object into the remote casing,
particularly when replacing the batteries.
• Do not expose the remote sensor to direct light from
the sun or lighting apparatus. Doing so may cause a
malfunction.
• If you do not intend to use the remote for an extended
period of time, remove the batteries to avoid possible
damage from battery leakage and corrosion.
Getting Started
Unpacking
Inserting Batteries into
the Remote
Note
1Slide open the cover.
2Remove the
cover by pinching
the sides.
2


