


masterpage:Left
specdef v20060111
filename[G:\FM\Sony\0605\DAVX10_US\Source\3210565131\3210565131DAVX10\gb13add.fm]
model name [DAV-X10]
[3-210-565-13(1)]
86
US
If you experience any of the following
difficulties while using the system, use this
troubleshooting guide to help remedy the
problem before requesting repairs. Should any
problem persist, consult your nearest Sony
dealer.
Note that if service personnel changes some
parts during repair, these parts may be retained.
Power
The power is not turned on.
• Check that the AC power cord (mains lead) is
connected securely.
•Press "/1 after all indications disappear from the
front panel display.
• Check that nothing obstructs the soft-touch
buttons on the unit.
If “PROTECTOR” and “PUSH POWER” appear
alternately in the front panel display.
Press "/1 to turn off the system, and check the
following items after “STANDBY” disappears.
• Are you using only the specified speakers?
• Is anything blocking the ventilation slots of the
system?
Check the above items and fix any problems. After
“STANDBY” disappears, wait about 20 seconds
before turning on the power by pressing "/1. If the
cause of the problem cannot be found even after
checking all the above items, consult your nearest
Sony dealer.
Picture
There is no picture.
• The video connecting cords are not connected
securely.
• The video connecting cords are damaged.
• The unit is not connected to the correct TV input
jack (page 10, 20).
• The video input on the TV is not set so that you
can view pictures from the system.
• You have set progressive format but your TV
cannot accept the signal in progressive format. In
this case, return the setting to interlace format (the
default setting) (page 23).
• Even if your TV is compatible with progressive
format (525p/625p) signals, the image may be
affected when you set progressive format. In this
case, return the setting to interlace format (the
default setting) (page 23).
• Re-connect the connecting cord securely.
• The system is connected to an input device that is
not HDCP (high-bandwidth digital content
protection) compliant (“HDMI” on the front panel
does not light up). See page 98.
• If the HDMI OUT jack is used for video output,
changing the [HDMI RESOLUTION] setting in
[SCREEN SETUP] may solve the problem
(page 80).
Connect the TV and the system using a video jack
other than the HDMI OUT, and switch the TV’s
input to the connected video input so that you can
see the on-screen displays. Change the [HDMI
RESOLUTION] setting in [SCREEN SETUP],
and switch the TV’s input back to HDMI. If the
picture still does not appear, repeat the steps and
try other options.
• You have selected “P AUTO” (PROGRESSIVE
AUTO) or “P VIDEO” (PROGRESSIVE
VIDEO) using the RESOLUTION button on the
remote (“PROGRESSIVE” lights up in the front
panel display) even though your TV cannot accept
the progressive signal. In this case, disconnect the
HDMI cable from the unit and then select
“INTERLACE” (INTERLACE) so that the
“PROGRESSIVE” indicator turns off.
• If the signal from the S VIDEO OUT jack is
distorted, change the [HDMI RESOLUTION]
setting in [SCREEN SETUP] to [720 × 480p].
Picture noise appears.
• The disc is dirty or flawed.
• If the picture output from your system goes
through your VCR to get to your TV, the copy-
protection signal applied to some DVD programs
could affect picture quality. If you still experience
problems even when you connect your unit
directly to your TV, try connecting your unit to
your TV’s S video input (page 20).
Even though you set the aspect ratio in [TV
TYPE] of [SCREEN SETUP], the picture does
not fill the screen.
• The aspect ratio on the disc is fixed.
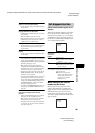
Color irregularity occurs on the TV screen.
The front speakers in this system are magnetically
shielded to prevent magnetic leakage. However,
some leakage may occur, as a high-strength magnet
is employed. If this happens, check the following
items:
• If the speakers are used with a CRT-based TV or
projector, install the speakers at least 0.3 m (1.0 ft)
from the TV set.
• If the color irregularity persists, turn off the TV set
once, then turn it on after 15 to 30 minutes.
Troubleshooting