


Getting Started – ADVANCED –
masterpage:Right
specdef v20060111
filename[G:\FM\Sony\0605\DAVX10_US\Source\3210565131\3210565131DAVX10\gb05gsa.fm]
model name [DAV-X10]
[3-210-565-13(1)]
21
US
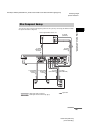
Note
• The video signals of connection method B (S VIDEO), C (COMPONENT VIDEO), and D (HDMI) are output,
only when the function is set to “DVD.”
* HDMI (high-definition multimedia interface)
The system incorporates High-Definition Multimedia Interface (HDMI
TM
) technology.
HDMI, the HDMI logo and High-Definition Multimedia Interface are trademarks or registered trademarks of
HDMI Licensing LLC.
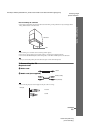
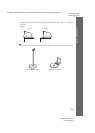
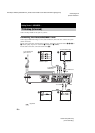
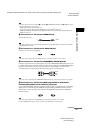
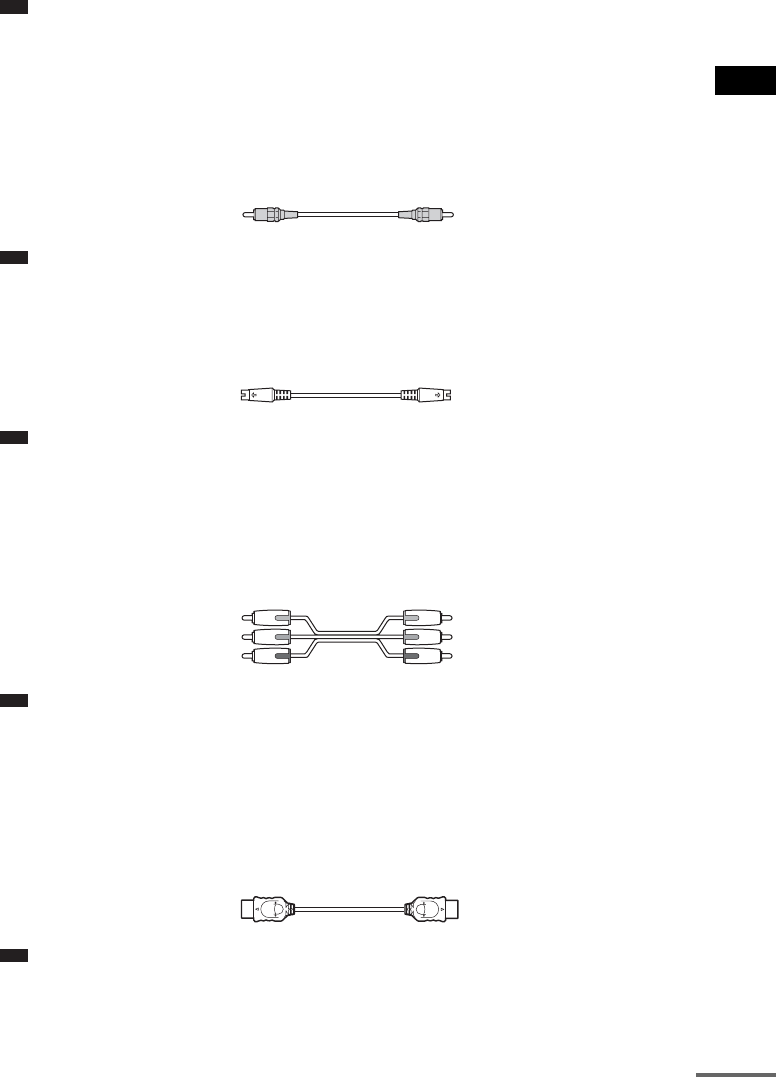
A To connect to a TV with the VIDEO IN jack
Connect the video cord.
.
Note
• The video signal that is input from the VIDEO (VIDEO IN or SAT/CABLE IN) jack is output from the VIDEO
(MONITOR OUT) jack only.
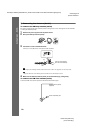
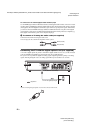
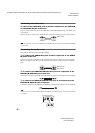
B To connect to a TV with the S VIDEO IN jack
Connect an S video cord (not supplied).
Note
• The video signal is output from the S VIDEO OUT jack, only when the function is set to “DVD.”
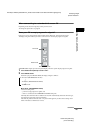
C To connect to a TV with the COMPONENT VIDEO IN jacks
Connect a component video cord (not supplied). To use the COMPONENT VIDEO OUT jacks (Y, PB/
C
B, PR/CR) instead of the video jacks, your TV monitor must be equipped with COMPONENT VIDEO
IN jacks (Y, P
B/CB, PR/CR). If your TV accepts progressive format signals, you must use this
connection and set the output channel of the system to progressive format (page 23).
Note
• The video signal is output from the COMPONENT VIDEO OUT jacks, only when the function is set to “DVD.”
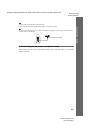
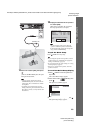
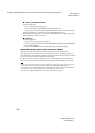
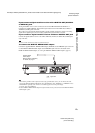
D To connect to a TV with the HDMI (high-definition multimedia
interface)/DVI (digital visual interface) input jack
Use a certified HDMI (high-definition multimedia interface) cable (not supplied) to enjoy high quality
digital picture and sound through the HDMI OUT (high-definition multimedia interface out) jack.
Note that Super Audio CD sound is not output from the HDMI OUT (high-definition multimedia
interface out) jack.
Note
• The video signal is output from the HDMI OUT jack, only when the function is set to “DVD.”
•Insert the HDMI cable in the jack oriented correctly as the HDMI cable connector is polar.
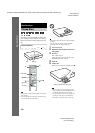
Yellow
Green
Blue
Red
continued