24
Normal speed Synchro-
Recording
The disc is recorded at the same speed as the
playing CD. You can hear the sound during
recording. To use Make-Disc Synchro-
Recording, set “Make Disc” in the Setup Menu
to “On” beforehand (page 35).
When using the remote, set DECK A/DECK B
to DECK B.
1 Do steps 1 to 3 of “High-Speed
Synchro-Recording” on page 23.
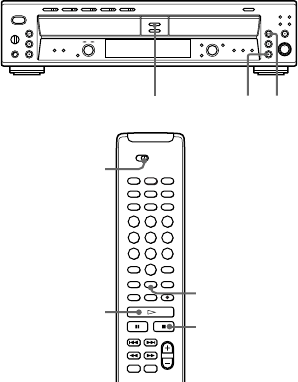
2 Press CD SYNCHRO NORMAL.
DECK B stands by for recording, and
DECK A stands by for playing.
When you place a CD-R or CD-RW in the
deck, the unit optimizes itself for the best
possible recording and “OPC” appears
temporarily in the display.
If “Not Blank” appears, make sure that the
blank disc is placed correctly.
DECK A/DECK B
H
x
CD SYNCHRO
NORMAL
x
H
CD SYNCHRO NORMAL
3 Press OPEN/CLOSE on DECK A (one of
the DISC 1-5 A buttons for RCD-
W500C) and place a CD on the disc
tray. Press OPEN/CLOSE (or A) on
DECK A again to close the disc tray.
When you perform Make-Disc Synchro-
Recording, the current disc in DECK A is
used to record.
When you perform Synchro-Recording, you
can choose the disc which you want to
record, and the play mode.
If you select “ALL DISCS” even though
you want to record only one disc, discs you
did not intend to record may be recorded.
4 Press CD SYNCHRO HIGH.
DECK B stands by for recording, and
DECK A stands by for playing.
5 After “New Track” appears in the
display, press H on DECK B to start
recording.
High-Speed Synchro-Recording starts.
DECK A and DECK B automatically stop
after recording.
To stop recording
Press x.
Notes
• When you make Synchro-Recording in
programmed order, the recording speed
automatically changes to Normal speed. You can
perform only Normal speed Synchro-Recording.
• If you select “ALL DISCS” even though you want
to record only one disc, discs you did not intend to
record may be recorded.


