


Putting the devices into operation
10
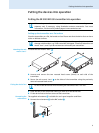
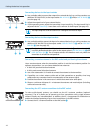
Mounting the transmitter into a 19” rack
Rack mounting one
transmitter
̈ Secure the rack mount “ears” of the supplied GA 3 rack adapter to the transmitter as
described on page 9.
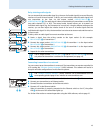
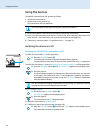
̈ Secure the blanking plate to one of the rack mount “ears” using two recessed head
screws (M 6x10) (see diagram).
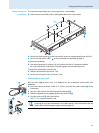
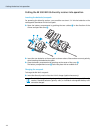
̈ Connect the antenna. You have the following options:
– You can connect the supplied rod antenna ƽ to the rear of the transmitter
(see page 9). In this case, insert the two blanking plugs into the holes of the
blanking plate.
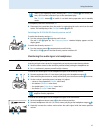
– You can use the AM 2 antenna front mount kit (optional accessory) and mount the rod
antenna to the blanking plate .
– You can use a remote antenna, if necessary in conjunction with the AC 3 antenna
combiner.
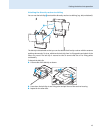
̈ Slide the transmitter with the mounted blanking plate into the 19” rack.
̈ Secure the rack mount “ear” and the blanking plate to the 19” rack.
Do not fit the device feet when mounting the transmitter into a 19” rack.
CAUTION! Risks when rack mounting the transmitter!
When installing the device in a closed or multi-rack assembly, please consider that, during
operation, the ambient temperature, the mechanical loading and the electrical potentials will
be different from those of devices which are not mounted into a rack.
̈ Make sure that the ambient temperature within the rack does not exceed the permissible
temperature limit specified in the SR 300 IEM G3 specifications. If necessary, provide
additional ventilation.
̈ Make sure that the mechanical loading of the rack is even.
̈ When connecting to the power supply, observe the information indicated on the type
plate. Avoid circuit overloading. If necessary, provide overcurrent protection.
̈ When rack mounting, please note that intrinsically harmless leakage currents of the
individual mains units may accumulate, thereby exceeding the allowable limit value. As a
remedy, ground the rack via an additional ground connection.