18
connections
19
ENG
● CONNECTIONS● CONNECTIONS
Front / Rear & Center Speakers Cradle Stand and Wall Mount Installation
Installing the Wall Mount
<Front/Rear> <Center>
22
11
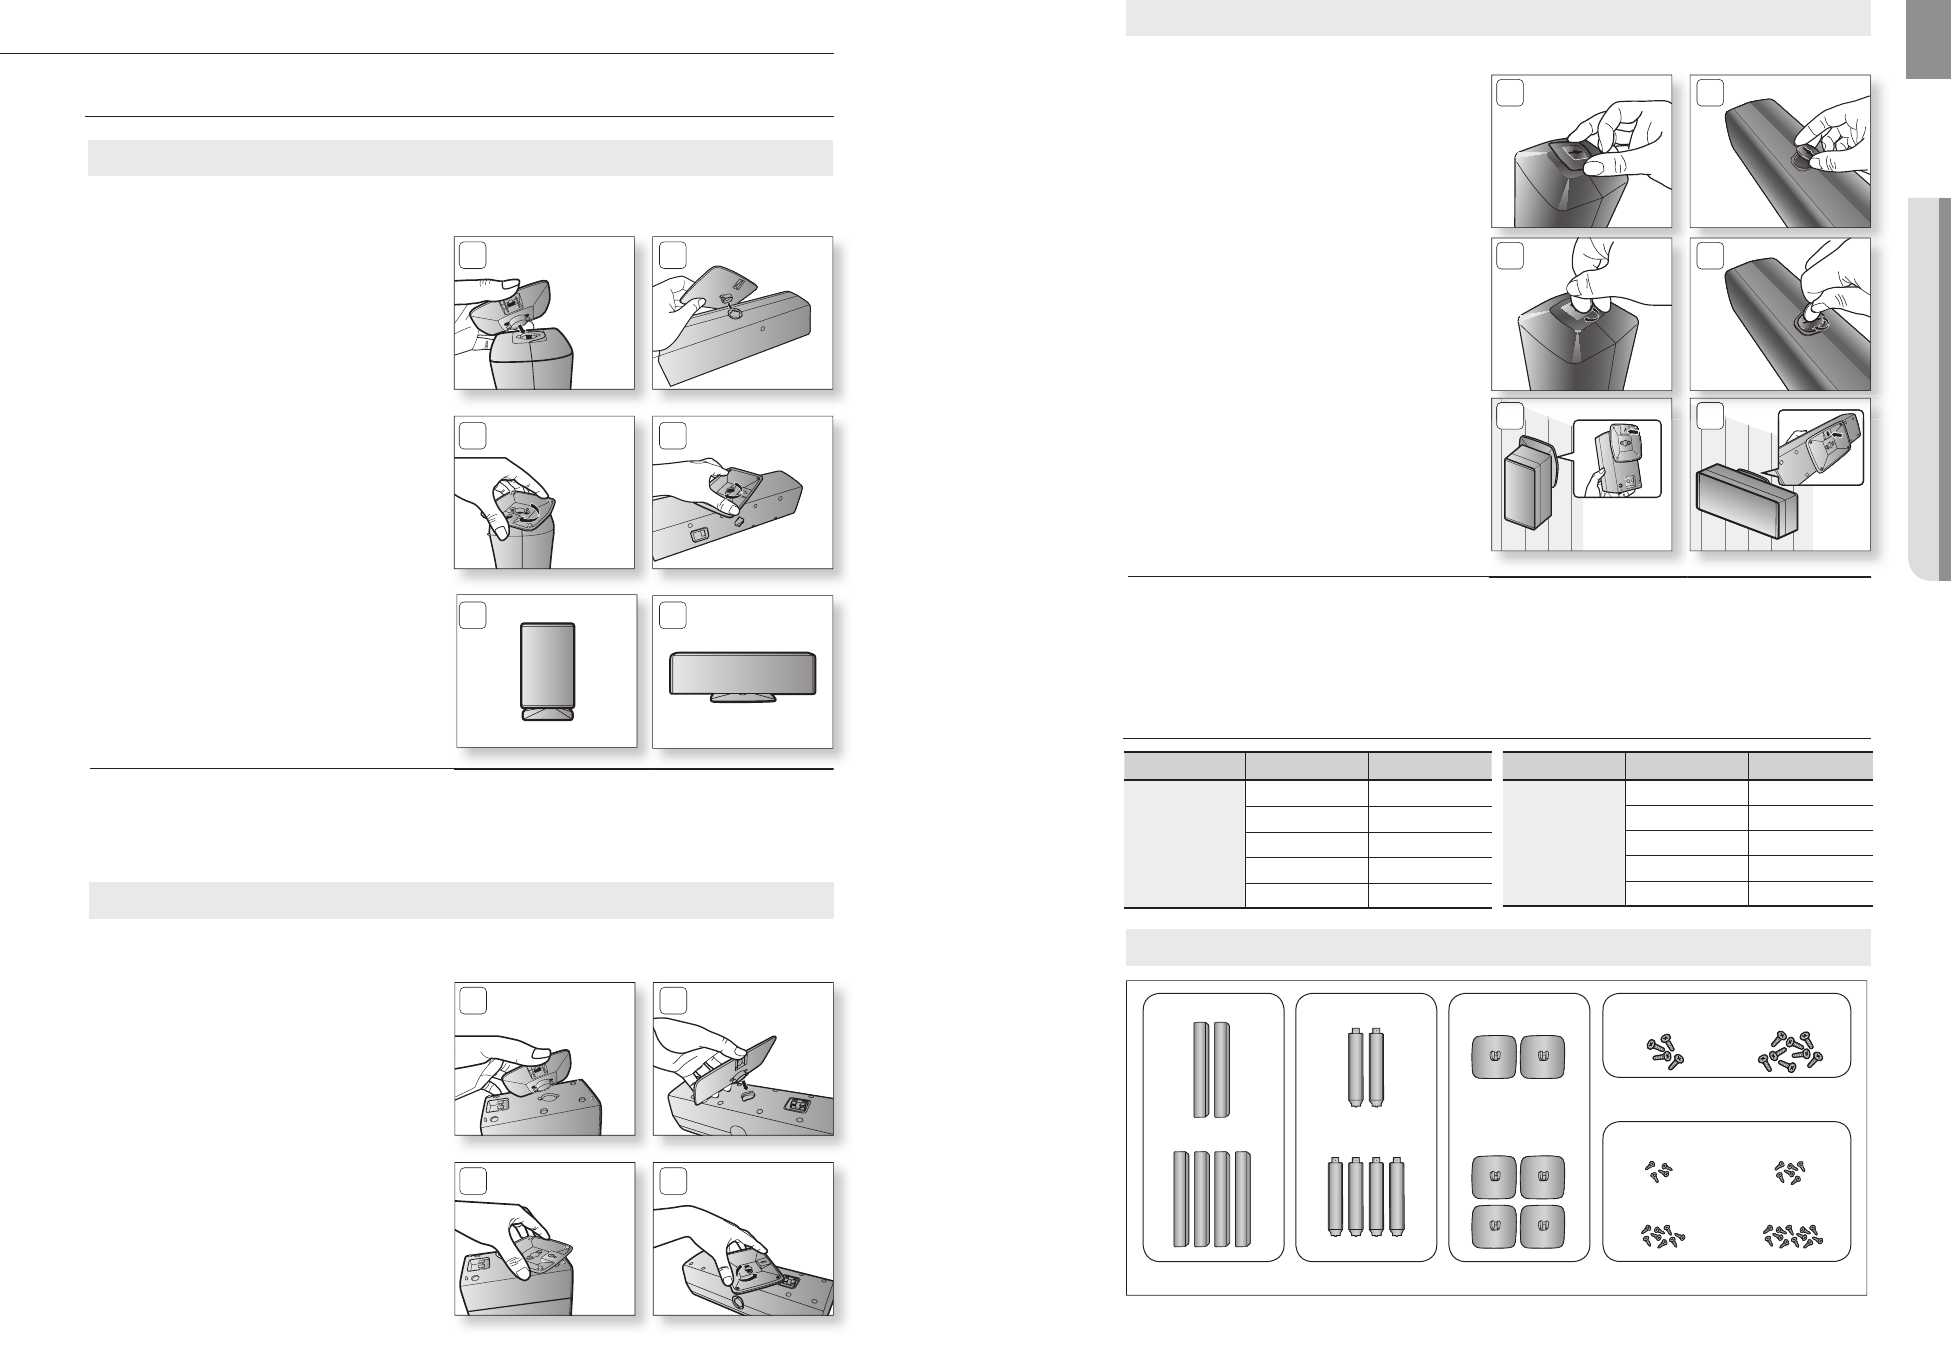
1. Insert the wall mount so that it fi ts into the
rear hole of the speaker as in the fi gure.
2. Turn the wall mount counter clockwise to
fi x it. (This is the reverse direction to the
cradle stand.)
Model Item Name Quantity
HT-TZ212/TZ312
SPEAKER 2EA
STAND 2EA
STAND BASE 2EA
SCREW (Large) 4EA
SCREW (Small) 4EA/6EA
Model Item Name Quantity
HT-TZ215/TZ315
SPEAKER 4EA
STAND 4EA
STAND BASE 4EA
SCREW (Large) 8EA
SCREW (Small) 8EA/12EA
Speaker Components
3. Put the hole cover on the hole of the
speaker.
4. Use a coin turn the hole cover clock wise
to fi x it. (Turning it counter-clock wise will
loosen from the hole.)
5. Use the wall mount hole (bracket) to install
the speaker on the wall.
M
The speaker system may vary, depending on the model. Please check your speaker system to
see if it includes the correct package of "Front/rear & Center Speakers" corresponding to
your model.
To avoid the speakers accident falling and consequently damaging yourself and the
equipment, make sure the speaker is hung safely.
55
33
5
5
44
Front/Rear Tallboy Stand
<Front/Rear> <Center>
Installing the Wall Mount (Con't)
1. Insert the stand so that it fi ts into the hole
as described in the fi gure.
2. Turn the stand clockwise to lock it.
(Turning it counter-clockwise will loosen
from the hole.)
3. This is the completion of the stand
installation.
<Front/Rear> <Center>
M
The speaker system may vary, depending on the model. Please check your speaker system to
see if it includes the correct package of "Front/rear & Center Speakers" corresponding to
your model.
Installing the Cradle Stand
33
22
11
SPEAKER
HT-TZ212/TZ312
HT-TZ215/TZ315
HT-TZ212/TZ312
HT-TZ215/TZ315
STAND
HT-TZ212/TZ312
HT-TZ215/TZ315
STAND BASE SCREW (Small)
SCREW (Large)
HT-TZ212/TZ312 HT-TZ215/TZ315
HT-TZ212 HT-TZ312
HT-TZ215 HT-TZ315


