


Installation
26 Signature Cinema™ SC-50d/SC-60d Installation/Operation Manual
PRE
L
IMINAR
Y
3.5
Installing the Optional
CineWide with
AutoScope Lens Motor
If you are installing a standard SC-50d/SC-60d (without an anamorphic lens), skip this
step and proceed with Mounting the SC-50d/SC-60d (page 27).
If you are installing an SC-50d/CineWide with AutoScope or SC-60d/CineWide with
AutoScope, proceed as follows to install the lens mount/motor assembly.
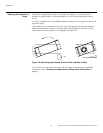
Remove Projector Front
Feet
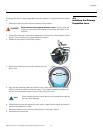
Place the projector upside down on a blanket or other soft surface. Loosen and remove
the two front feet on the projector.
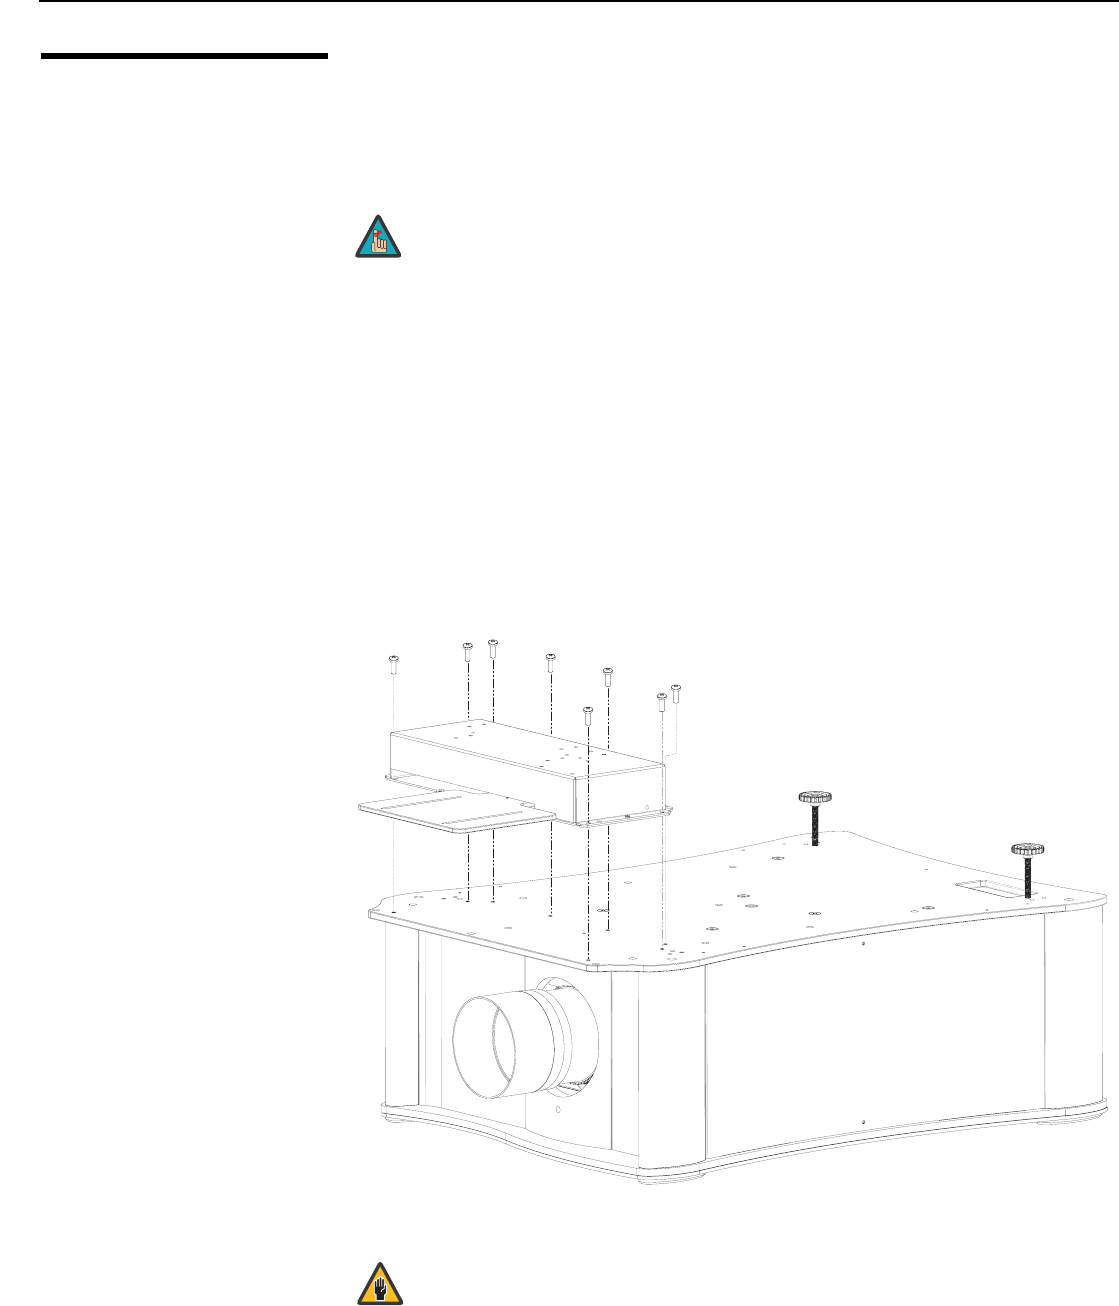
Install Anamorphic Lens
Motor
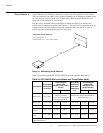
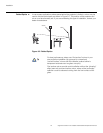
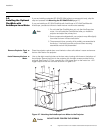
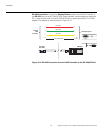
Line up the eight mounting holes on the lens motor housing with those on the bottom of
the projector. Secure the motor to the projector with the eight screws provided for this
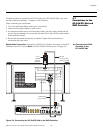
purpose. See Figure 3-7. Then, connect the +12V trigger input on the motor to a +12V
trigger output on the
DHD Controller as shown in Figure 3-18.
Figure 3-7. Attaching the AutoScope Lens Motor to the Projector
1. Do not install the CineWide lens yet, only the AutoScope lens
motor. You will install the CineWide lens after you install the
projector and adjust the primary lens.
2. Some components shipped with your projector may differ slightly
from what is shown in these instructions.
3. The anamorphic lens mounting kit is partially pre-assembled at
the factory – the AutoScope lens motor and lens mounting
assemblies are both fully assembled.
Note
➤
➤
DO NOT OVER-TIGHTEN THE SCREWS.
Caution