


For Customer Service, call 800-377-7655.
11
10
Get more information and exclusive accessories, visit www.polkaudio.com
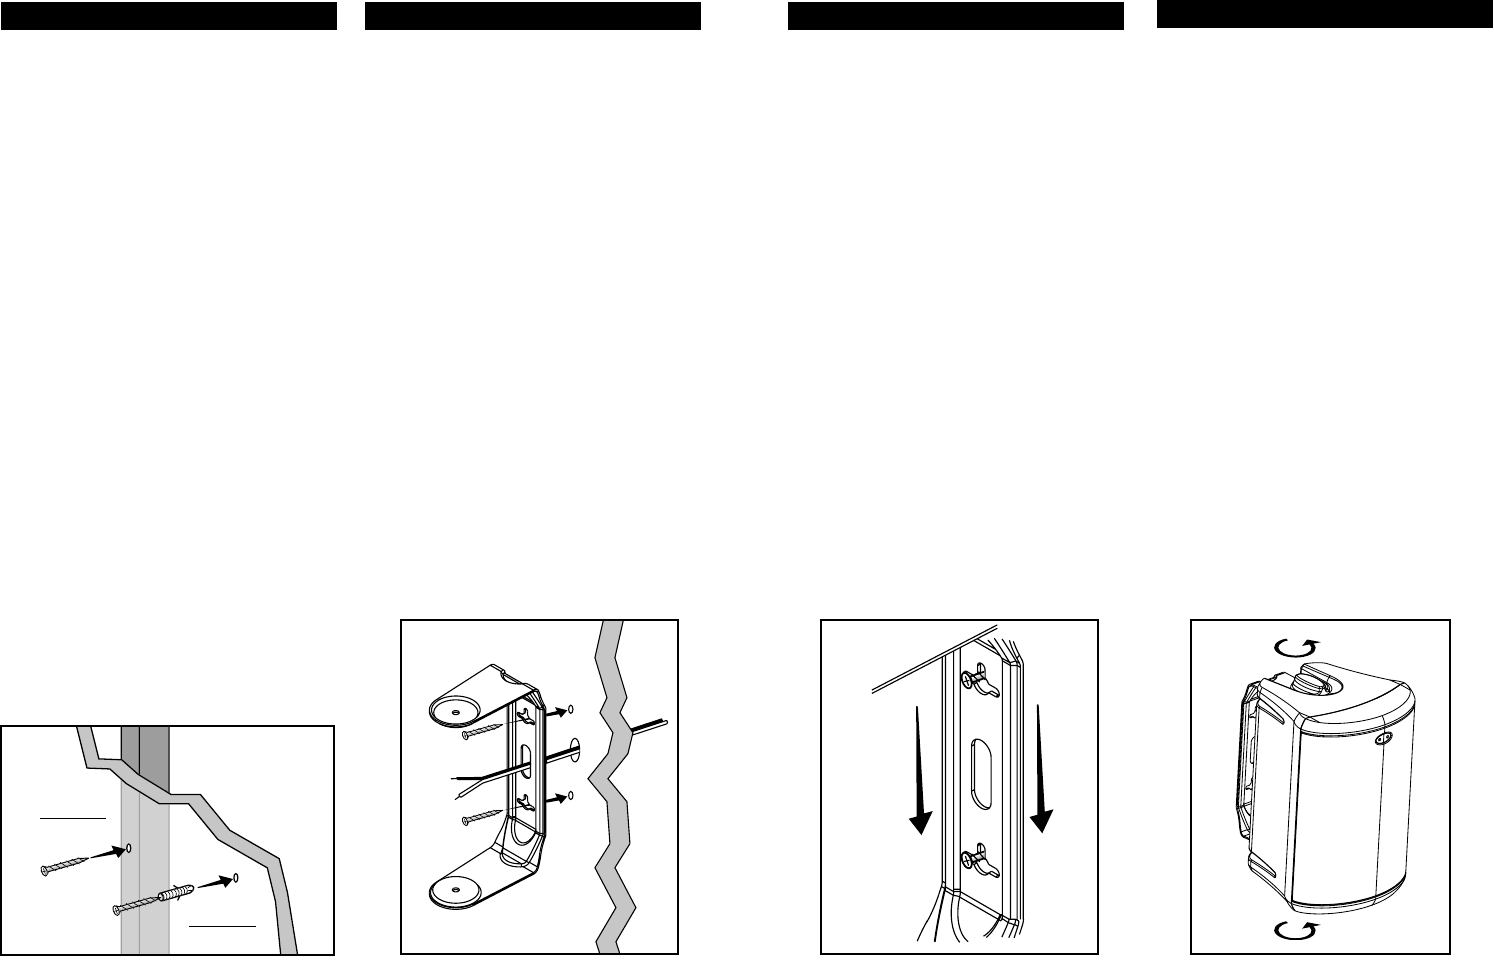
• Line up the bracket, attached to the speak-
er, so that the screw heads pass through
the large center hole of the bracket’s key-
hole slots.
• Let the speaker and bracket slide straight
down, allowing the screw head to slip
behind the smaller end of the keyhole slot
[figure 16].
• Tug gently on the speaker to make certain
that the screws and bracket are properly
aligned and that the wall anchors are
secure.
• If the bracket is not held snug against
the wall by the screw heads, remove the
speaker from the wall, drive the screws
in a little further and then remount
the speaker.
FIGURE 17
Adjust the bracket knobs to aim the speaker.
Ajuste las perillas del soporte para orientar el altavoz.
Ajustez les boutons du support pour diriger l'enceinte.
Stellen Sie die Position des Lautsprechers über die Knöpfe an der
Halterung ein.
FIGURE 16
Slide the bracket down on the screw heads
to catch the keyhole slots.
Deslice el soporte hacia abajo sobre las cabezas de los tornillos
para que encajen en las ranuras en forma de ojo de cerradura.
Glissez le support sur la tête de la vis jusqu'à ce qu'elle s'en-
clenche dans la fente.
Schieben Sie die Halterung auf die Schraubköpfe herunter, so
dass sie in den Ritzen einrastet.
• Once the speaker is mounted, the bracket
knobs can be loosened to “aim” the speak-
er, and then hand-tightened to keep the
speaker angled correctly [figure 17].
• Follow the speaker pair hookup directions
on the previous page.
SAFETY FIRST
When installing Atrium speakers be aware of
the weight of your particular model (Atrium
45P=approx [8lbs/3.63kg powered]
[6lbs/2.72kg passive]) and the weight bearing
tolerance of the material to which you are
mounting the speaker. If you are not sure of a
safe way of mounting your speakers please
consult a professional installer, your autho-
rized Polk Audio dealer, or a building contrac-
tor. Do not compromise safety.
• Prior to installation, hold the speaker in the
chosen location to make sure it safely
clears obstacles such as ceiling, adjacent
walls, corners, beams, lighting fixtures and
door/window frames.
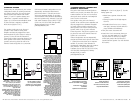
• Using the keyhole slots in the bracket as a
template, mark the installation location of
the two keyhole slots with a pencil. You can
do this by removing the bracket knobs on
the top and bottom of the speaker and
removing the bracket, or by leaving the
bracket connected to the speaker [figure
13]. Orient the bracket so that the small
ends of the keyhole slots are facing “up”
according to the direction of installation.
Reattach the bracket to the speakers, if you
have removed it, by reinserting it into the
bracket gap and then tightening the bracket
knobs.
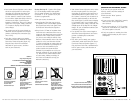
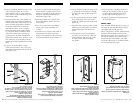
• If you are certain that there is a stud
behind the wall surface, drive #10 screws
(not included) through the wall and into the
stud [figure 14a].
• If there is no stud behind the wall at the
chosen location, install #10 (M4.5) wall
anchors (not supplied) into the wall by fol-
lowing the wall-anchor-manufacturer's
instructions [figure 14b].
• For masonry walls, use a masonry drill
bit and #10 masonry anchor and screw
(not included).
• Drive screws into stud or wall anchors,
leaving screw heads protruding 1/16"
(1.6mm).
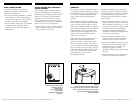
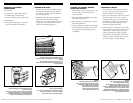
• If speaker wire is being fed from a hole in
the wall behind the bracket, pull this
speaker wire through the hole in the brack-
et before mounting the bracket [figure 15].
FIGURES 14a & b
Use #10 screw for wall stud,
use #10 wall anchors + screw for no wall stud.
Use tornillos n° 10 si la pared tiene parales internos, use anclas
de pared y tornillos n° 10 si la pared no tiene parales internos.
Utilisez une vis no10 pour fixer le support dans un montant.
Utilisez une cheville d'ancrage et une vis
no10 s'il n'y a pas de montant.
Verwenden Sie eine Schraube Nr. 10 für Wände mit
Holzstielverstärkung bzw. Dübel und Schrauben (Nr. 10) für
Wände ohne Holzstielverstärkung.
FIGURE 15
Feed speaker wire from wall through
bracket wire hole for easy mounting.
Para montar el altavoz con facilidad, pase el cable de altavoz
que sale de la pared por el agujero para cable del soporte.
Passez le fil de haut-parleur à travers le trou du
support pour faciliter l'installation.
Verlegen Sie das Lautsprecherkabel einfach von der Wand
durch die entsprechende Öffnung in der Halterung.
figure 14a
Wall Stud
figur
e 14b
No Wall Stud