


Advanced setup
11
82
En
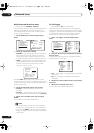
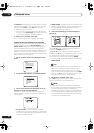
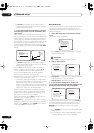
!! Complete !!
is displayed on-screen after the Acoustic
Calibration Equalization is set. If you want to check the
settings, select
Check
. Select
Next
after you have
finished checking each screen.
• If you want to copy these settings and adjust them
manually, select
Data Copy
. Go to step 3 of
Copying
your Acoustic Calibration EQ settings
below.
3 When you're finished, select ‘Exit’.
You will return to the Acoustic Cal EQ setup menu.
Setting the Acoustic Calibration EQ manually
Before manually adjusting the Acoustic Calibration EQ,
we recommend copying the
ALL CH ADJUST
or the
FRONT ALIGN
settings from the auto setup above (or
from
Automatically setting up for surround sound
on
page 12) to one of the custom settings. Instead of just a
flat EQ curve, this will give you a reference point from
which to start (see
Copying your Acoustic Calibration EQ
settings
below for how to do this).
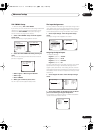
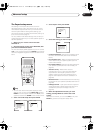
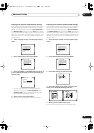
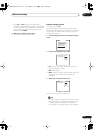
1 Select ‘Acoustic Cal EQ’ from the Expert setup
menu.
2 Select CUSTOM1 ADJUST or CUSTOM2 ADJUST.
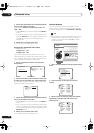
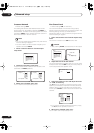
3 Select which method you would like to use to
adjust the overall frequency balance.
It is best to choose whichever one you copied to the
custom setting in
Copying your Acoustic Calibration EQ
settings
below.
•
ALL CH ADJUST
– All the speakers can be set
independently so no special weighting is given to any
one channel. When adjusting, test tones will sound
for each individual channel.
•
FRONT ALIGN
– Speakers are set in accordance with
the front speaker settings. The sound of the test tone
will alternate between the left front (reference)
speaker and the target speaker.
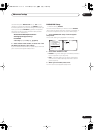
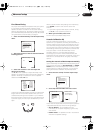
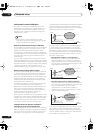
4 Select the channel(s) you want and adjust to
your liking.
Use the
/
(cursor up/down) buttons to select the
channel (and
ENTER
to select it).
Use the
/
(cursor up/down) buttons to select the
frequency and
/
(cursor up/down) to boost or cut the
EQ. When you’re finished, the cursor automatically
moves to the next channel after you press
ENTER
.
• The front speakers can’t be adjusted if you selected
FRONT ALIGN
.
Tip
• Changing the frequency curve of one channel too
drastically will affect the overall balance. If the
speaker balance seems uneven, you can raise or
lower channel levels using test tones with the
TRIM
feature. Use
/
(cursor up/down) to raise or lower
the channel level for the current speaker.
5 When you're finished, select ‘Exit’.
Select
Exit
again to confirm your custom settings and
return to the Acoustic Cal EQ setup menu.
Note
• Note that five bands are available for adjustment
here, however six bands are measured and displayed
with the
Professional Acoustic Calibration
on
page 84(including the PC graphical output feature).
The 1kHz band acts as a reference setting (to ensure
optimal adjustment of the other frequency settings)
for a total of six band adjustment.
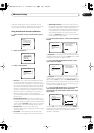
Expert
[ Crossover Network ]
[ Fine Channel Level ]
[ Fine Channel Delay ]
[ Acoustic Cal EQ ]
[ Bass Peak Level ]
[ D-Range Control ]
[ Exit ]
[ EQ AUTO SETTING ]
[ CUSTOM1 ADJUST ]
[ CUSTOM2 ADJUST ]
[ DATA COPY ]
[ DATA CHECK ]
[ Professional ]
[
Exit
]
Acoustic Cal EQ
VSX-9300.book 82 ページ 2004年5月21日 金曜日 午前11時28分