38
Additional Information
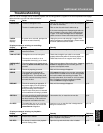
It’s often easy to mistake incorrect operation for trouble and malfunction of the unit. If you think there is something wrong
with the component, check the points below first. If the problem persists, contact you nearest Pioneer-authorized service
center and have them check over the unit.
Symptom
Power cannot be turned
on.
No sound is heard
during playback.
Cannot record.
Recorded sound is
distorted.
Remote control opera-
tion is impossible.
Some tracks are skipped
without being played.
Skip playback does not
occur.
A recorded
CD
–
R
disc
cannot be played on
other
CD
players.
The point-of-sale
demonstration is
displayed.
Cause
¶ The power cord is unplugged from the wall
outlet.
¶ The power was turned off from the compo-
nent (stereo amplifier, audio timer, etc.) to
which it is connected.
The recorder is not connected up properly.
¶ The recorder is not connected up properly.
¶ The
CD
–
R
or
CD
–
RW
disc in use has already
been finalized.
¶ The input selection is incorrect.
¶ The REC LEVEL control is set too low.
¶ The ecording level is set too high.
¶ Signal connections are incorrect.
¶ There is interference from a TV set.
¶ The disc is damaged or warped.
¶ The disc is extremely dirty.
¶ The remote control batteries are exhausted.
¶ There is an obstacle between the remote
control unit and main unit.
¶ The remote control unit is being operated
outside the remote controllable range.
The SKIP PLAY button is set to on.
The SKIP PLAY button is set to off.
¶ The disc has not been finalized after
recording. When such a disc is loaded in the
unit, the
CD–R indicator lights.
¶ The pickup lens of the other
CD
player is
dirty, impairing its ability to play
CD–R discs.
See page 36 for instructions on how to cancel
the store demo mode.
Remedy
¶ Plug the power cord into a power outlet.
¶ Turn on the component supplying the
power to the recorder.
Check all connections, especially to the
amplifier—pp.10–11
¶ Check all connections—pp.10–11
¶ Use a non-finalized disc or erase the
CD
–
RW
disc—pp.34–35
¶ Select the input connected to the source
component you’re recording from.
¶ Increase the recording level—pp.24–25
¶ Reduce the recording level—pp.24–25
¶ Check all connections—pp.10–11
¶ Turn the
TV
power off or install this unit
further away from the
TV
.
¶ Use another disc.
¶ Clean the disc.
¶ Replace both of the remote control
batteries with new ones.
¶ Remove the obstacle.
¶ Operate in the remote controllable
range—p.14
Set the SKIP PLAY button to off—p.27
Set the SKIP PLAY button to on—p.27
¶ Finalize the disc—p.33
¶ Try the disc on a different
CD
player. If it
plays
OK
then get the pickup lens on the
original player cleaned.
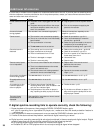
If digital synchro-recording fails to operate correctly, check the following:
1. Pause playback of the source, then press the DIGITAL SYNCHRO button again.
÷ If you’re recording from a portable CD player, etc., make sure that the shock-protection feature is
switched off.
2. Start playback of the source component once you see the SYNCHRO indicator start to blink.
3. If none of the above solves the problem, use manual digital recording to record.
÷ Digital synchro-recording uses a digital sub-signal contained in the source player’s digital output. Digital
synchro-recording will not work when recording from the following devices:
÷ CD players whose digital output does not include a sub-signal
÷ Portable CD, MD or DVD players which do not output a digital signal when stopped.


