


11
Getting Set Up
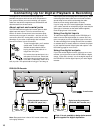
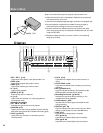
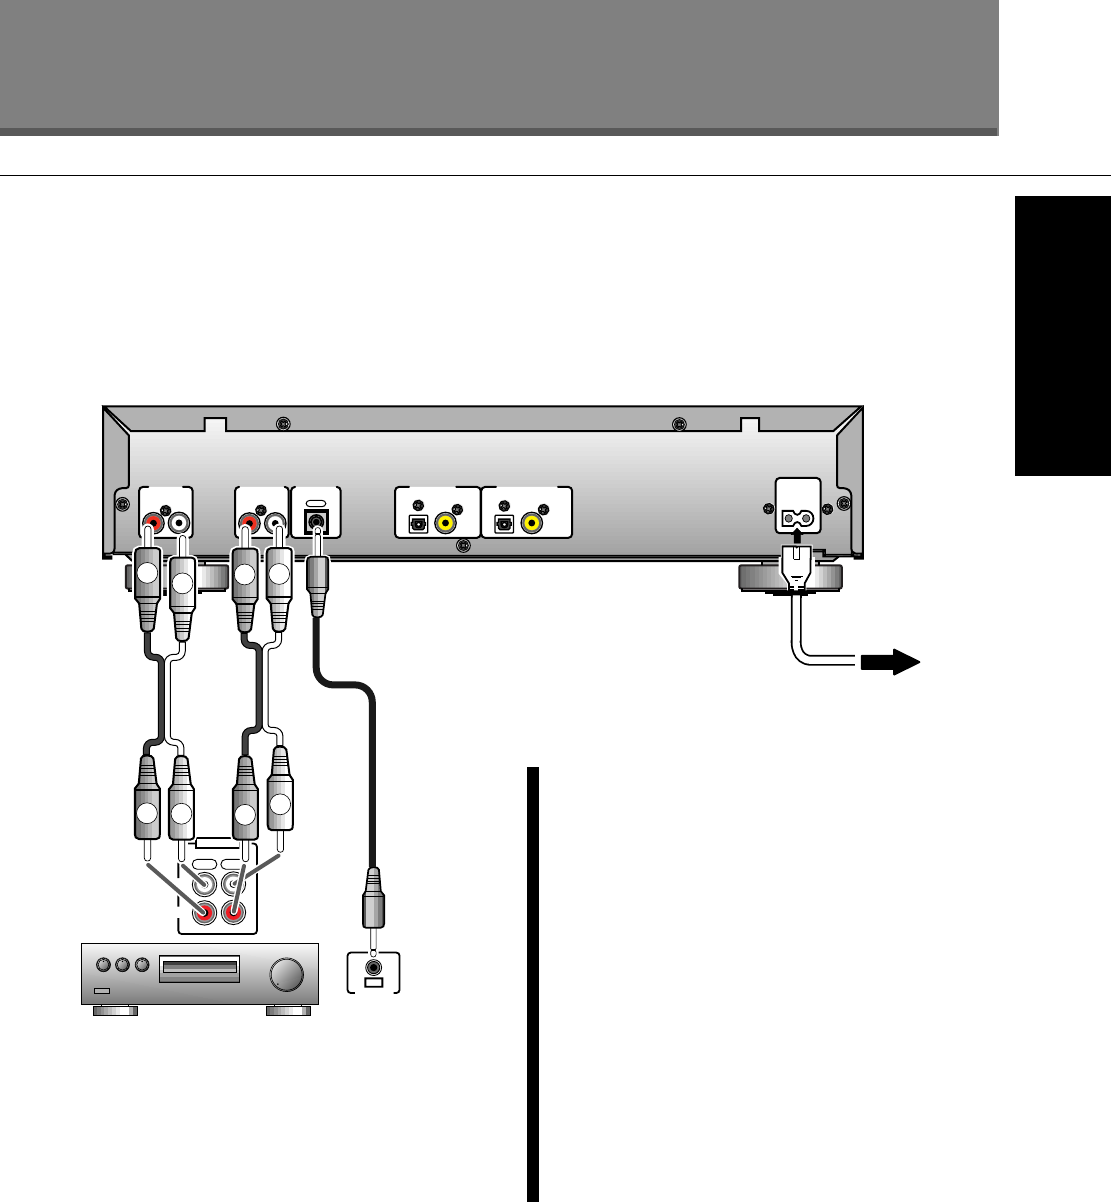
Connecting Up for Analog Playback & Recording
Connecting Up
Before you start, make sure that all the components are
switched off and disconnected from the wall outlet.
Next, connect this unit to your amplifier/receiver using the
two sets of supplied audio leads—one set for playback,
the other for recording. On the rear panel of your amplifier
find an unused set of inputs/outputs for a tape/
MD
recorder (check the instruction manual that came with your
amplifier if you’re unsure about which terminals to use).
Using this set up you can make recordings from any other
component connected to the amplifier, via the analog
inputs of this unit.
OUT
CONTROL
INPUTOUTPUT
PLAYREC
L
R
MD/TAPE
LINE IN DIGITAL IN
OPTICAL COAXIAL OPTICAL COAXIAL
DIGITAL OUT
LINE OUT
CONTROL
AC IN
RL RL
IN
L
R
L
R
L
R
L
R
PDR–509 CD-Recorder
Amplifier
To wall outlet.
Supplied stereo
audio cords
Connecting Other Pioneer
Î
Components
If you are using a Pioneer amplifier or receiver that has
this feature, you can control this unit with the multi-
remote controller that came with your amplifier/receiver.
The advantage of this is that you can use a single
remote control to operate several components. Check
the instruction manual that came with your amplifier or
receiver for more information on using its remote as a
multi-controller.
Use a commercially available cord with a mono mini-
plug at either end to connect the
CONTROL OUT
terminal of the amplifier/receiver to the CONTROL IN
terminal of this unit.
Make sure that at least one set of analog terminals is
connected to the amplifier when using
Î
control
cords.
Pioneer Î out
Note:
Rear panel show is that of U.S. and Canadian
models; others may look slightly different.