


21
Basic Playback and Recording
Basic Playback and Recording
Recording All Tracks from a Digital Source
If you want to copy all the tracks from a
CD
,
MD
,
DCC
or
DAT
, use this mode. Like the 1-track synchro recording mode, the
recorder starts and stops automatically. When recording from
MD
or
CD
, you can play the source in either normal play mode,
or program play if you’d like the recorded tracks in a different order to the original. We do not recommend recording from a
DAT
in program play mode—use the 1-track synchro recording mode if you want to record the tracks in a different order.
If you are simply duplicating a source disc or tape, you’ll probably want to finalize the
CD
–
R
(or
CD
–
RW
) after all-track sync
recording so that it’s ready to be played on other
CD
players. To finalize the disc automatically once recording has finished,
see
Automatically Recording and Finalizing a Disc
on the following page. If you're recording from a digital source other than
CD
,
MD
,
DCC
or
DAT
, see
Manually Recording a Digital Source
on page 23. If you’re recording from any source through the
analog inputs, see
Recording an Analog Source
on page 25.
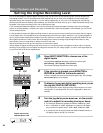
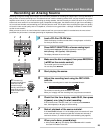
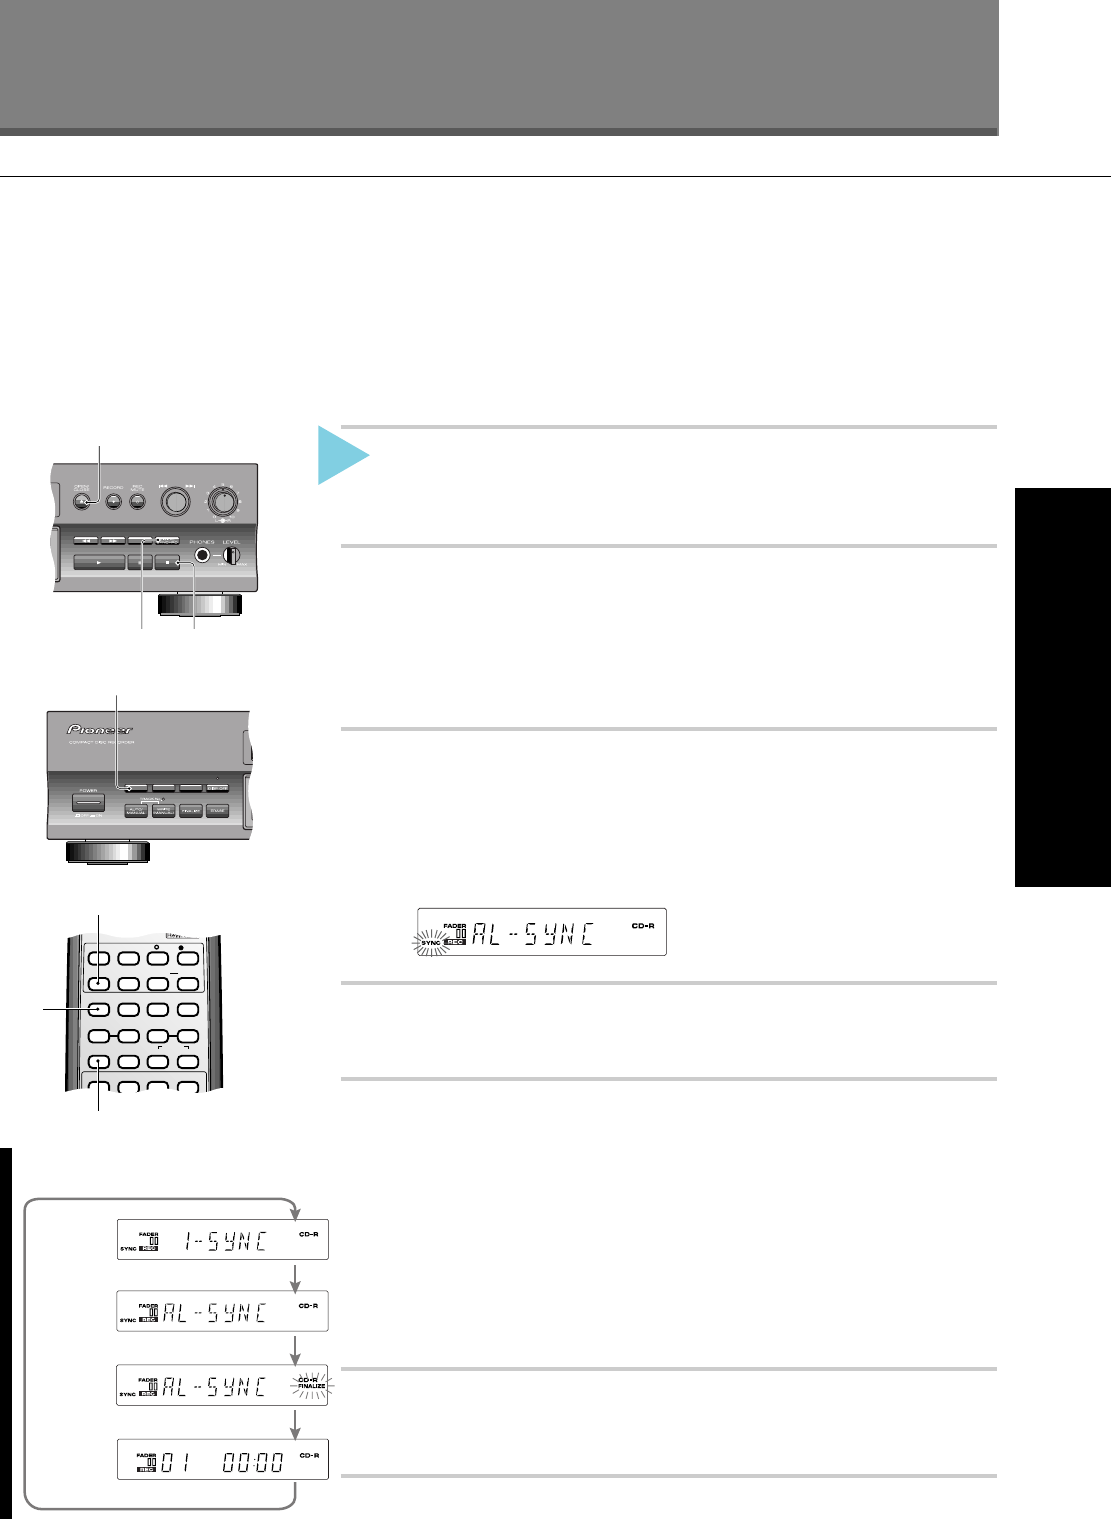
1
Load a CD–R or CD–RW disc.
Check the display to make sure that there's enough space on the disc
for what you want to record.
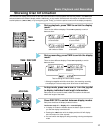
2
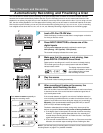
Press INPUT SELECTOR to choose one of the
digital inputs.
Pressing INPUT SELECTOR repeatedly switches the active input:
ANA (Analog) - OPT (Optical) - COA (Coaxial)
The recorder's display indicates the current input.
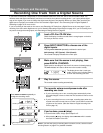
3
Make sure that the source is not playing, then
press DIGITAL SYNCHRO twice.
Digital synchro recording won't work if the source is already playing!
The recorder goes into all-sync record pause mode and the
SYNC
indicator starts to blink.
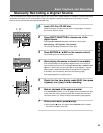
4
Play the source.
The recorder starts recording automatically.
5
After recording all tracks from the source, the
recorder goes into all-sync record-pause mode.
After the recorder encounters about five seconds of continuous silence,
it assumes the end of the source has been reached and goes into
record-pause mode and the display shows the
AL-SYNC message again.
Be careful:
if the recorder detects another signal (CDor MD) or start ID
(DAT or DCC) it will start recording again!
❖ The recorder will enter record-pause mode if the digital signal is
interrupted for more than 5 seconds—see
Digital signal interruptions
on page 19.
6
Press 7 (stop) to finish recording.
❖ After pressing 7 (stop), the display shows PMA REC while it records
the track information to the disc.
Note: If you find that synchro recording does not seem to work, see the trouble-
shooting section on page 37 for possible remedies.
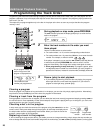
The display shows the all-track sync
mode, with the sync indicator blinking
to show that recording can start.
OPT
DIGITAL
REC LEVEL
ANALOG
REC LEVEL
REPEAT
1
3
2
6
◊ÛB
-
.?/
MONITOR
INPUT
SELECTOR
TIME
FINALIZE
ERASE
TIME
FADER
DIGITAL
SYNCHRO
INPUT
SELECTOR
SKIP
PLAY
SET
SKIP ID
CLEAR
AUTO/
MANUAL
TRACK NO.
WRITE
REC
1234
5678
783
1¡4¢
Î
3
6
OPT
OPT
OPT
OPT
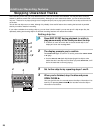
1-track sync mode
All-track sync mode
Record-pause mode (no sync)
Press DIGITAL SYNCHRO repeatedly to
change the recording mode:
All-track sync mode w/finalization
2