


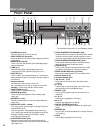
20
Basic Playback and Recording
Recording One Track from a Digital Source
If you want to record just a single track, or a few selected tracks, from a
CD
,
MD
,
DCC
or
DAT
, this mode is ideal. The
recorder starts and stops automatically, and there's no need to worry about recording levels—you'll get a perfect digital
copy of the original (if you want to change the digital recording level, see page 24). Before you start, make sure that your
digital source is properly connected to one of the recorder’s digital inputs—see
Connecting Up for Digital Playback &
Recording
on page 10 for more on this.
If you're recording all the tracks on the source, see
Recording All Tracks from a Digital Source
on the next page. If you're
recording from some other digital source, turn to
Manually Recording a Digital Source
on page 23. If you’re recording from
any source through the analog inputs, see
Recording an Analog Source
on page 25.
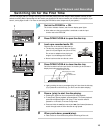
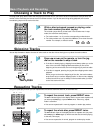
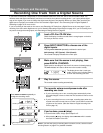
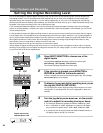
1
Load a CD–R or CD–RW disc.
Check the display to make sure that there's enough space on the disc
for what you want to record.
2
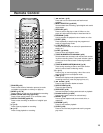
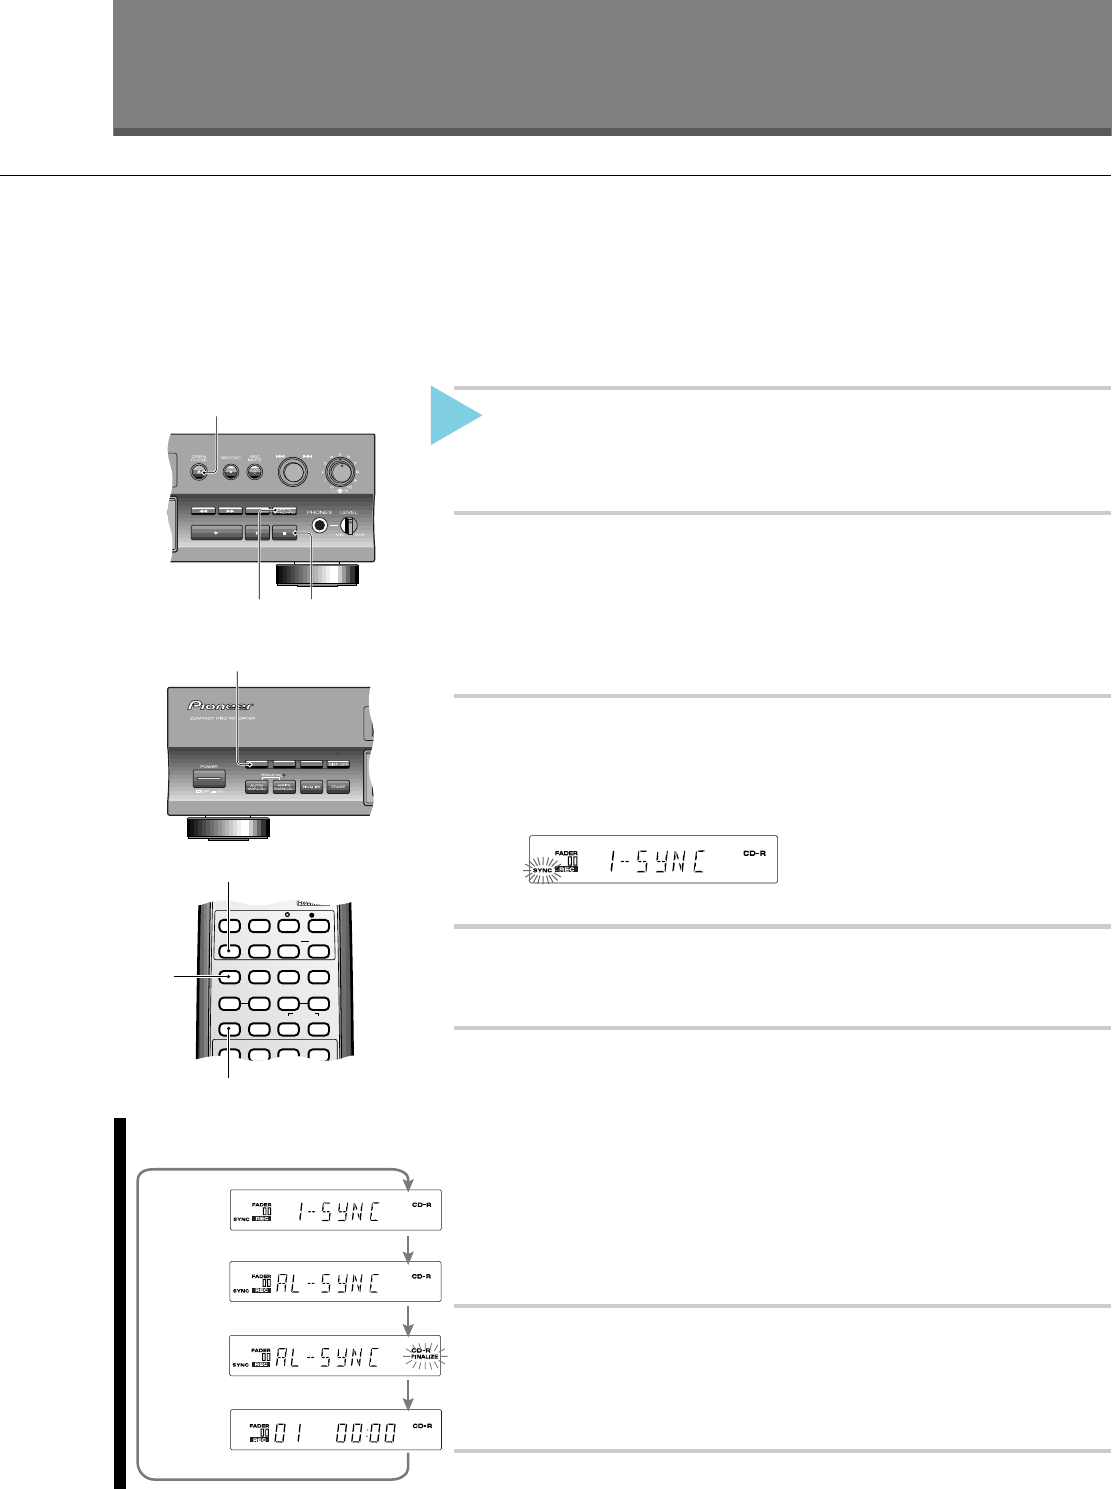
Press INPUT SELECTOR to choose one of the
digital inputs.
Pressing INPUT SELECTOR repeatedly switches the active input:
ANA (Analog) - OPT (Optical) - COA (Coaxial)
The recorder's display indicates the current input.
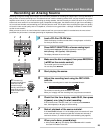
3
Make sure that the source is not playing, then
press DIGITAL SYNCHRO.
Digital synchro recording will not work if the source is already playing!
The
SYNC indicator will start to blink when the recorder is ready.
4
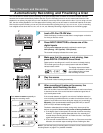
Play the source.
The recorder starts recording automatically.
5
The recorder enters record-pause mode after
recording one track.
❖ If you're recording a
CD
or
MD
, recording stops automatically when
the track changes or there is more than five seconds of silence on the
source.
❖ If you're recording from
DCC
or
DAT
tape, recording stops when the
recorder encounters a new start
ID
or there is more than five seconds
of silence on the source. (See also
Notes on Digital recording from
DAT
on page 19.)
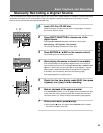
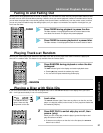
6
If you're done, press 7 (stop).
To record further tracks, simply repeat steps 3 to 5.
❖ After pressing 7 (stop), the display shows PMA REC while it records
the track information to the disc.
Note: If you find that synchro recording does not seem to work, see the trouble-
shooting section on page 37 for possible remedies.
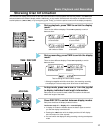
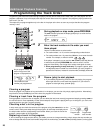
OPT
The display shows the 1-track sync
mode, with the sync indicator blinking
to show that recording can start.
OPT
OPT
OPT
OPT
1-track sync mode
All-track sync mode
Record-pause mode (no sync)
Press DIGITAL SYNCHRO repeatedly to
change the recording mode:
DIGITAL
REC LEVEL
ANALOG
REC LEVEL
REPEAT
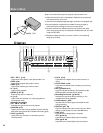
1
36
2
◊ÛB
-
.?/
MONITOR
INPUT
SELECTOR
TIME
FINALIZE
ERASE
TIME
FADER
DIGITAL
SYNCHRO
INPUT
SELECTOR
SKIP
PLAY
SET
SKIP ID
CLEAR
AUTO/
MANUAL
TRACK NO.
WRITE
REC
1234
5678
783
1¡4¢
Î
2
3
6
All-track sync mode w/finalization