


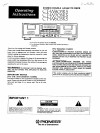

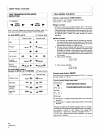


CONNECTIONS
I
L?-Th
Recording t
cord connection
cord
_ d REC PLAY I _Y" /
TAPE REC/PLAY
jacks
CD' DECK SYNCHRO
control cord
only)
Io0oO_l
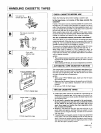
Stereo Amplifier
CONTROL OUT jack
Compact Disc Player
JCD_ SYNCHRO
jack
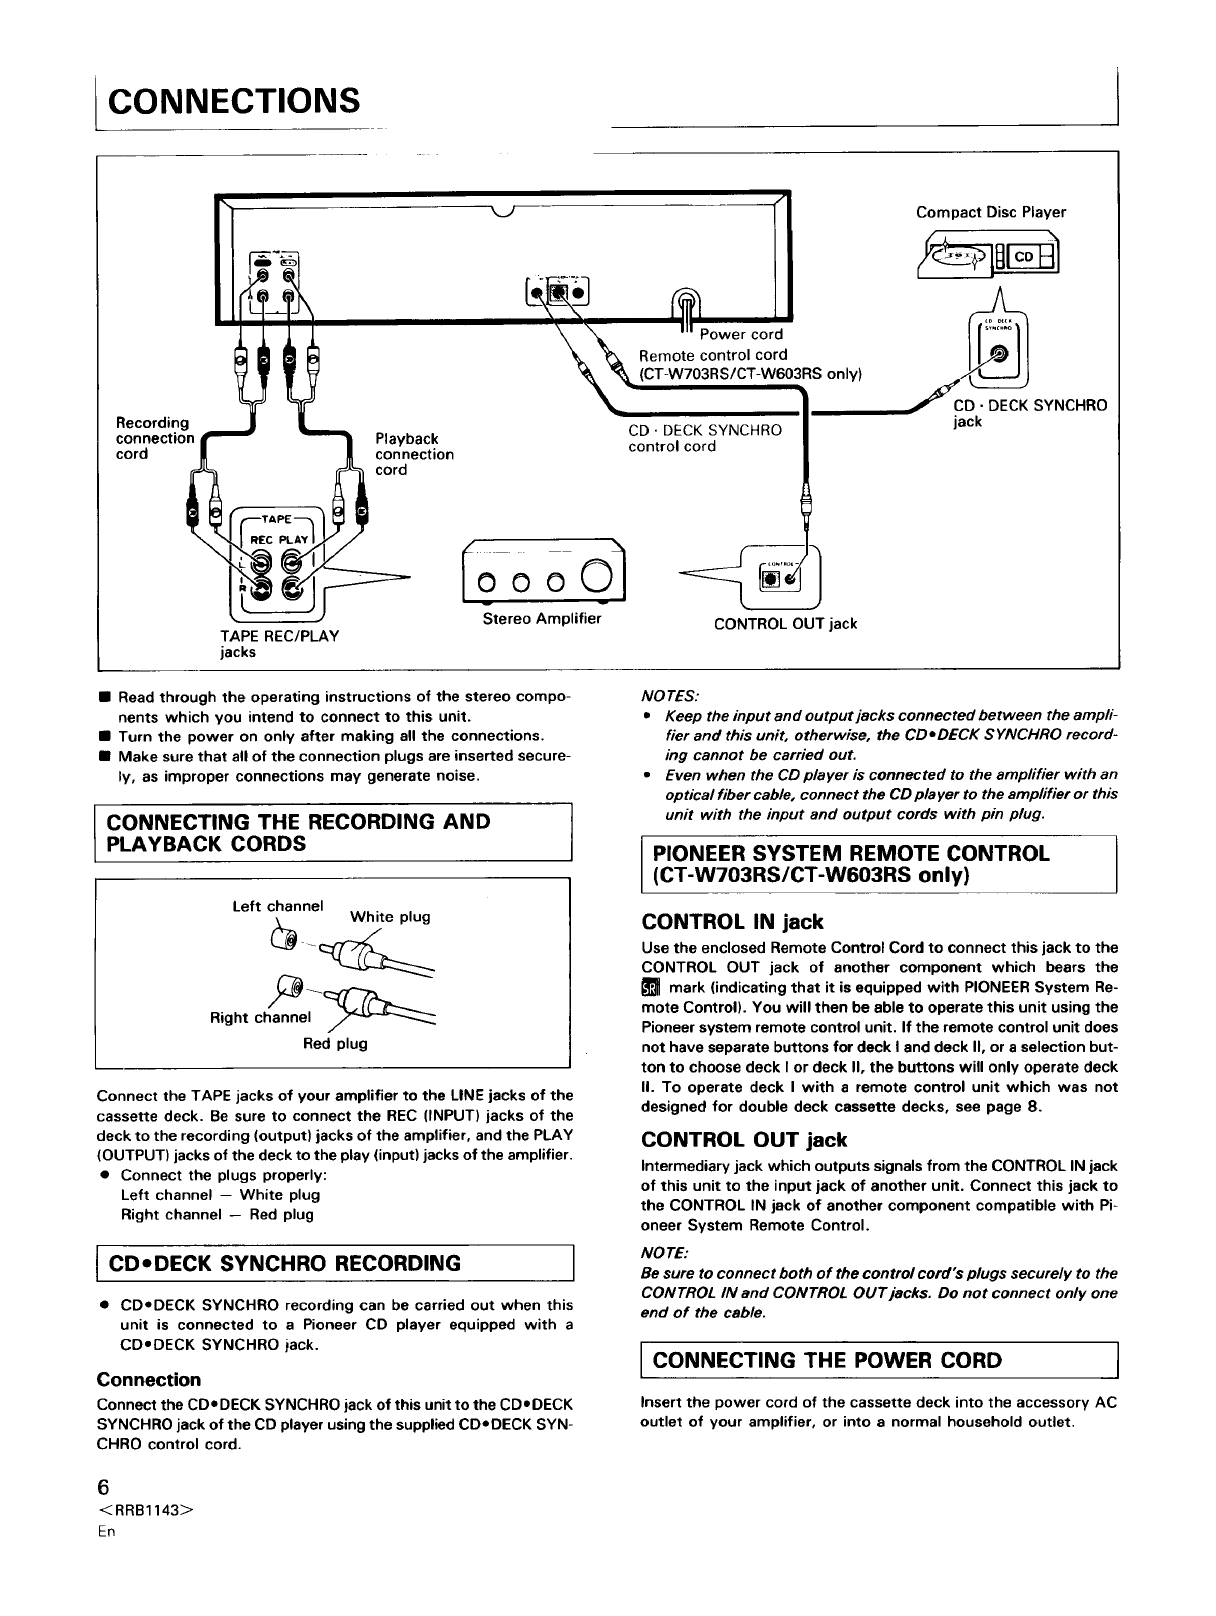
• Read through the operating instructions of the stereo compo-
nents which you intend to connect to this unit.
• Turn the power on only after making all the connections.
• Make sure that all of the connection plugs are inserted secure-
ly, as improper connections may generate noise.
I
CONNECTING THE RECORDING AND I
PLAYBACK CORDS
I
Left channel
(_ White plug
Right channel
Red plug
Connect the TAPE jacks of your amplifier to the LINE jacks of the
cassette deck. Be sure to connect the REC (INPUT) jacks of the
deck to the recording (output) jacks of the amplifier, and the PLAY
(OUTPUT) jacks of the deck to the play (input) jacks of the amplifier.
• Connect the plugs properly:
Left channel -- White plug
Right channel -- Red plug
i CDoDECK SYNCHRO RECORDING 1
• CDoDECK SYNCHRO recording can be carried out when this
unit is connected to a Pioneer CD player equipped with a
CDoDECK SYNCHRO jack.
Connection
Connect the CDoDECK SYNCHRO jack of this unit to the CDoDECK
SYNCHRO jack of the CD player using the supplied CDoDECK SYN-
CHRO control cord.
NO TES:
• Keep the input and output jacks connected between the ampli-
fier and this unit, otherwise, the CD•DECK SYNCHRO record-
ing cannot be carried out.
• Even when the CD player is connected to the amplifier with an
optical fiber cable, connect the CD player to the amplifier or this
unit with the input and output cords with pin plug.
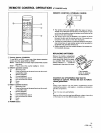
PIONEER SYSTEM REMOTE CONTROL
(CT-W703RS/CT-W603RS only)
CONTROL IN jack
Use the enclosed Remote Control Cord to connect this jack to the
CONTROL OUT jack of another component which bears the
mark (indicating that it is equipped with PIONEER System Re-
mote Control). You will then be able to operate this unit using the
Pioneer system remote control unit. If the remote control unit does
not have separate buttons for deck I and deck II, or a selection but-
ton to choose deck I or deck II, the buttons will only operate deck
I1. To operate deck I with a remote control unit which was not
designed for double deck cassette decks, see page 8.
CONTROL OUT jack
Intermediary jack which outputs signals from the CONTROL IN jack
of this unit to the input jack of another unit. Connect this jack to
the CONTROL IN jack of another component compatible with Pi-
oneer System Remote Control.
NO TE:
Be sure to connect both of the control cord's plugs securely to the
CONTROL IN and CONTROL OUT jacks. Do not connect only one
end of the cable.
I CONNECTING THE POWER CORD I
Insert the power cord of the cassette deck into the accessory AC
outlet of your amplifier, or into a normal household outlet.
6
<RRB1143>
En