


I RECORDING
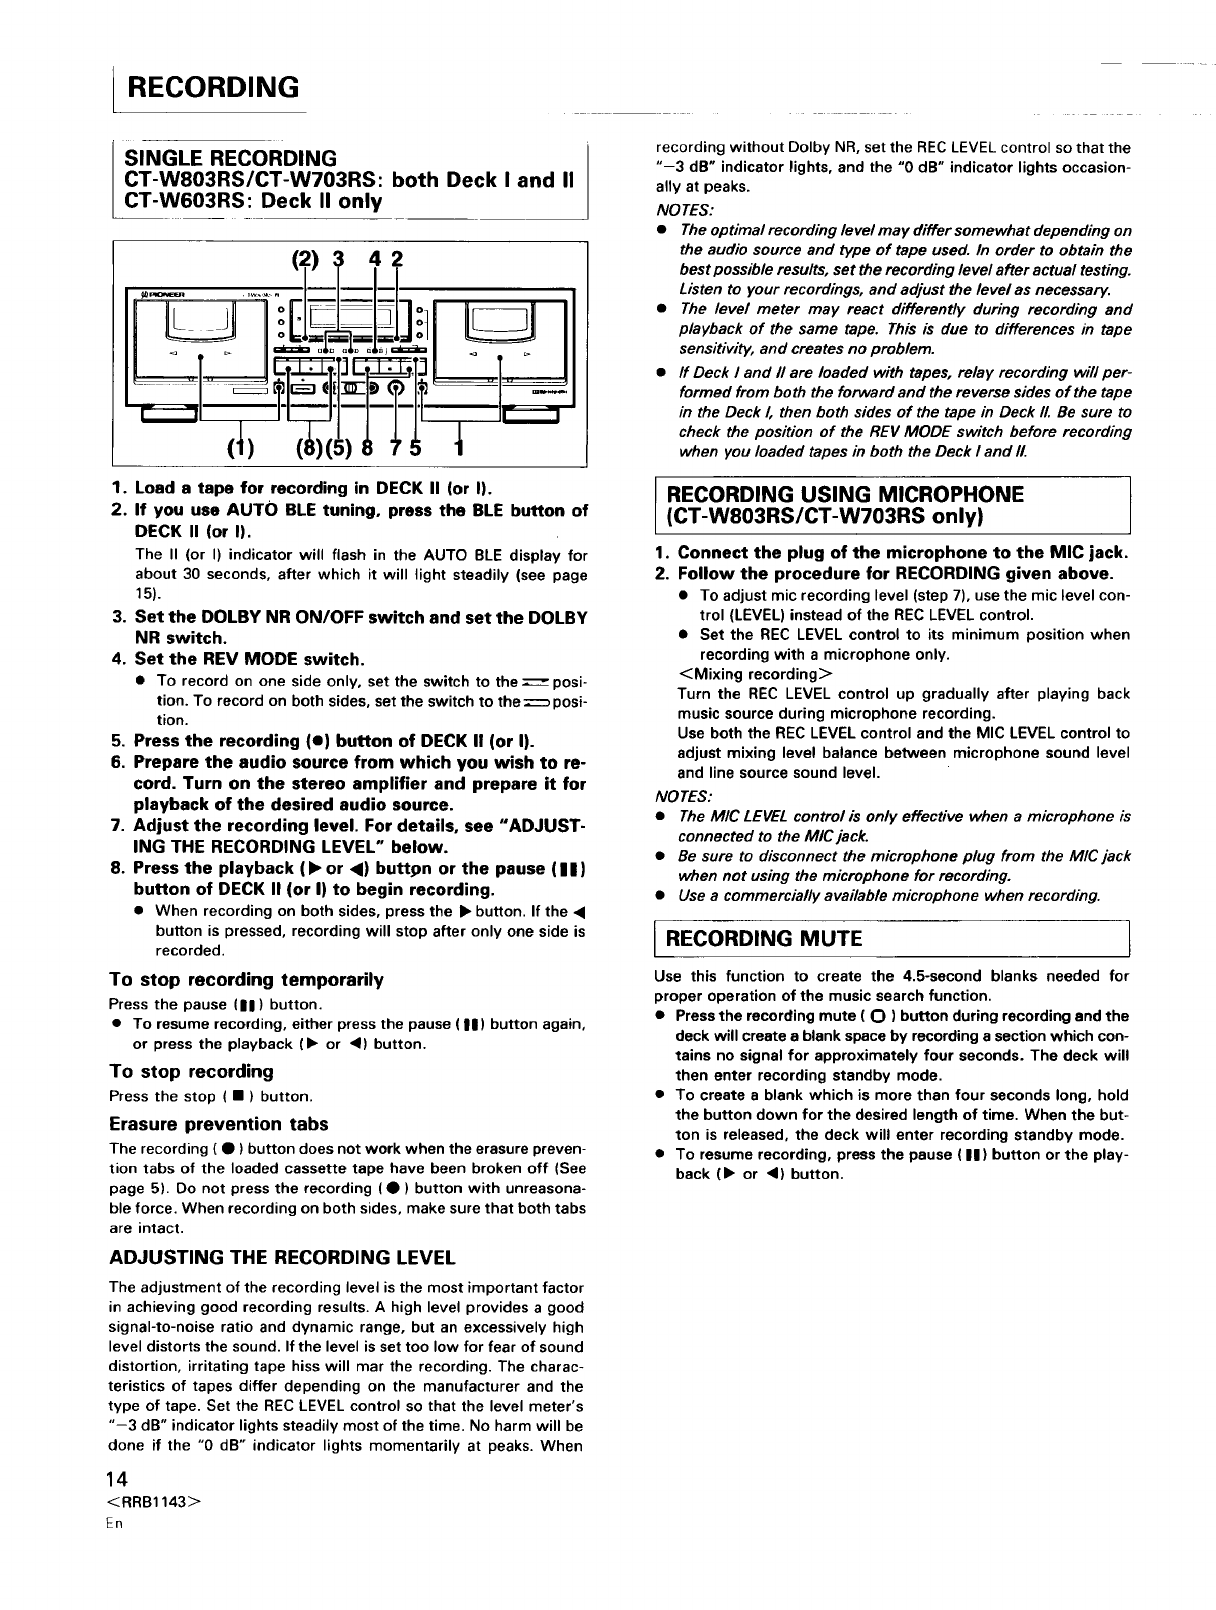
SINGLE RECORDING
I CT-W803RS/CT-W703RS: both Deck I and II
l CT-W603RS: Deck II only
42
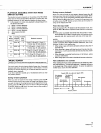
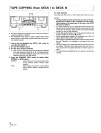
recording without Dolby NR, set the REC LEVEL control so that the
"-3 dB" indicator lights, and the "0 dB" indicator lights occasion-
ally at peaks.
NOTES:
• Theoptimal recording level may differ somewhat depending on
the audio source and type of tape used. In order to obtain the
best possible results, set the recording level after actual testing.
Listen to your recordings, and adjust the level as necessary.
• The level meter may react differently during recording and
playback of the same tape. This is due to differences in tape
sensitivity, and creates no problem.
• ff Deck I and II are loaded with tapes, relay recording will per-
formed from both the forward and the reverse sides of the tape
in the Deck I, then both sides of the tape in Deck II. Be sure to
check the position of the REV MODE switch before recording
when you loaded tapes in both the Deck I and I/.
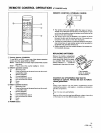
1. Load a tape for recording in DECK II (or I).
2. If you use AUTO BLE tuning, press the BLE button of
DECK II (or I).
The II (or I) indicator will flash in the AUTO BLE display for
about 30 seconds, after which it will light steadily (see page
15).
3. Set the DOLBY NR ON/OFF switch and set the DOLBY
NR switch.
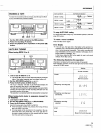
4. Set the REV MODE switch.
• To record on one side only, set the switch to the _ posi-
tion. To record on both sides, set the switch to the=--_ posi-
tion.
5. Press the recording (e) button of DECK II (or I).
6. Prepare the audio source from which you wish to re-
cord. Turn on the stereo amplifier and prepare it for
playback of the desired audio source.
7. Adjust the recording level. For details, see "ADJUST-
ING THE RECORDING LEVEL" below.
8. Press the playback (1_ or _1) buttpn or the pause (11)
button of DECK II (or I) to begin recording.
• When recording on both sides, press the • button. If the •
button is pressed, recording will stop after only one side is
recorded.
To stop recording temporarily
Press the pause (ll) button.
• To resume recording, either press the pause (II) button again,
or press the playback (1_ or <1) button.
TO stop recording
Press the stop ( • ) button.
Erasure prevention tabs
The recording ( • )button does not work when the erasure preven-
tion tabs of the loaded cassette tape have been broken off (See
page 5). Do not press the recording ( • ) button with unreasona-
ble force. When recording on both sides, make sure that both tabs
are intact.
ADJUSTING THE RECORDING LEVEL
The adjustment of the recording level is the most important factor
in achieving good recording results. A high level provides a good
signal-to-noise ratio and dynamic range, but an excessively high
level distorts the sound. If the level is set too low for fear of sound
distortion, irritating tape hiss will mar the recording. The charac-
teristics of tapes differ depending on the manufacturer and the
type of tape. Set the REC LEVEL control so that the level meter's
"-3 dB" indicator lights steadily most of the time. No harm will be
done if the "0 dB" indicator lights momentarily at peaks. When
14
<RRB1143>
En
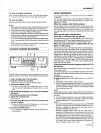
RECORDING USING MICROPHONE
(CT-W803RS/CT-W703RS only)
1. Connect the plug of the microphone to the MIC jack.
2. Follow the procedure for RECORDING given above.
• To adjust mic recording level (step 7), use the mic level con-
trol (LEVEL) instead of the REC LEVEL control.
• Set the REC LEVEL control to its minimum position when
recording with a microphone only.
<Mixing recording>
Turn the REC LEVEL control up gradually after playing back
music source during microphone recording.
Use both the REC LEVEL control and the MIC LEVEL control to
adjust mixing level balance between microphone sound level
and line source sound level.
NO TES:
• The MIC LEVELcontrol is only effective when a microphone is
connected to the M/C jack.
• Be sure to disconnect the microphone plug from the MlCjack
when not using the microphone for recording.
• Use a commercially available microphone when recording.
RECORDING MUTE
Use this function to create the 4.5-second blanks needed for
proper operation of the music search function.
• Press the recording mute ( O ) button during recording and the
deck will create a blank space by recording a section which con-
tains no signal for approximately four seconds. The deck will
then enter recording standby mode.
• To create a blank which is more than four seconds long, hold
the button down for the desired length of time. When the but-
ton is released, the deck will enter recording standby mode.
• To resume recording, press the pause (I|) button or the play-
back (1_ or 4) button.