11
Note
All the cables must be placed inside the rear •
panel in order to close the rear cover properly.
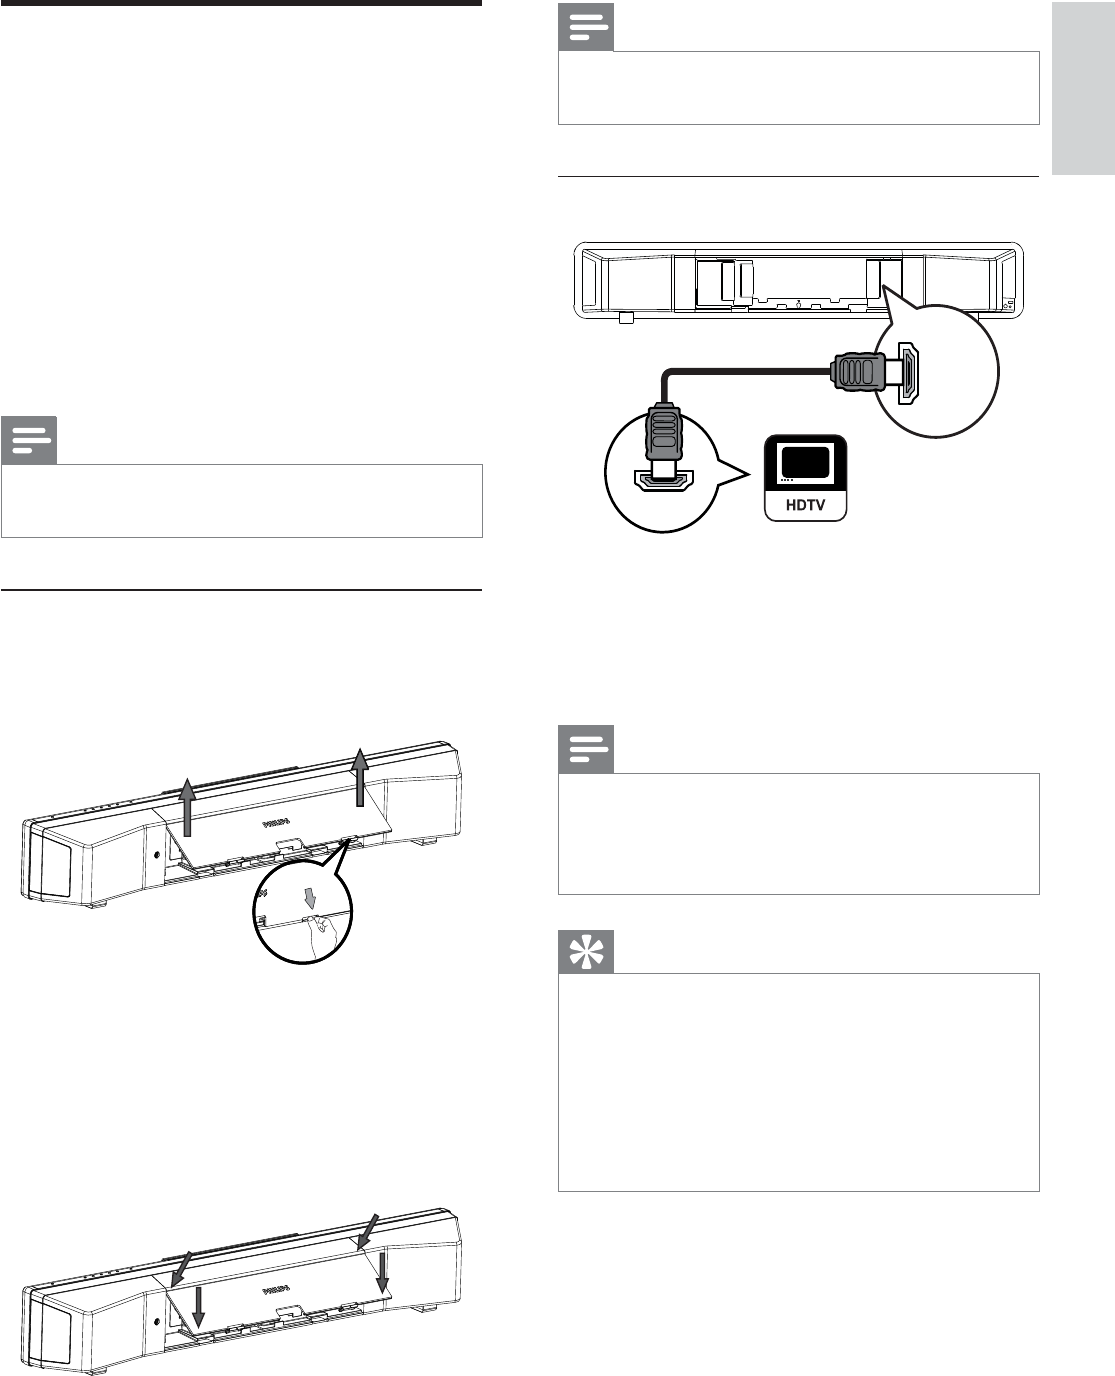
Option 1: Connect to the HDMI jack
1 Connect a HDMI cable (not supplied)
to the HDMI OUT jack on this Home
Theatre System and the HDMI input jack
on the TV.
Note
If your device supports HDMI CEC, you can •
control compliant devices with a single remote
control. (see ‘Get started’ > ‘Use Philips
EasyLink’).
Tip
If the TV has a DVI connection only, connect •
via a HDMI/DVI adaptor. Connect an audio
cable for sound output.
You can optimise the video output. (see
•
‘Adjust settings’ > ‘Video setup’ > [HDMI
Setup]).
This type of connection provides the best
•
picture quality.
HDMI IN
HDMI OUT
Connect video cables
Connect this Home Theatre System to a TV to
view disc play. Select the best video connection
that the TV can support.
Option 1: Connect to the HDMI jack (for •
a HDMI, DVI or HDCP-compliant TV).
Option 2: Connect to the SCART jack •
(for a standard TV).
Option 3: Connect to the component •
video jacks (for a standard TV or
progressive scan TV).
Note
You must connect this Home Theatre System •
directly to a TV.
Before you connect:
1 Push up the catches at the bottom of the
rear cover and lift it up.
2 Connect the cables to the corresponding
jacks and direct the cables to the CABLE
OUT point.
See the connection options in the •
following pages.
3 Once complete, close the rear cover.
English
EN


