


RQT9471
23
Switching between dual sounds
You can switch between dual sounds of Dolby Digital signals.
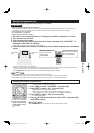
1. Press and hold [–SETUP, OFF] for about
2 seconds.
The setting items are displayed. (
➜
page 21)
2. Press [
w
][
q
] to select “DUAL PRG ” and
press [OK].
3. Press [
e
][
r
] to select the audio and press
[OK].
MAIN : Main audio SAP : Sub channel audio output
M+S : Main + Sub channel audio output
Factory setting : MAIN
4. Press [
RETURN] several times to select
“EXIT ” and press [OK] to fi nish the
setting.
Clear audio at low volume
Dynamic range compression function for Dolby Digital.
It compresses the dynamic range so that you can still hear
dialog and leave the sound fi eld unaffected.
Use this function when you have to turn the volume down, such
as late at night.
1. Press and hold [–SETUP,OFF] for about
2 seconds.
The setting items are displayed. (
➜
page 21)
2. Press [
w
][
q
] to select “DRCOMP ” and
press [OK].
3. Press [
e
][
r
] to select the setting and
press [OK].
OFF : Normal playback
STANDARD : The best suited playback for each audio
source
MAX : Always compressed at the maximum level
Factory setting : OFF
4. Press [
RETURN] several times to select
“EXIT ” and press [OK] to fi nish the
setting.
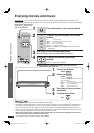
Switching the attenuator
Switch the attenuator “ON ” when big sounds become distorted
while playing an analog input source.
1. Press and hold [–SETUP, OFF] for about
2 seconds.
The setting items are displayed. (➜ page 21)
2. Press [
w
][
q
] to select “ATTENUATOR ”
and press [OK].
3. Press [
e
][
r
] to select “ON ” and press
[OK].
ON, OFF
Factory setting : OFF
4. Press [
RETURN] several times to select
“EXIT ” and press [OK] to fi nish the
setting.
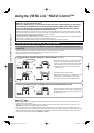
VIERA Link “HDAVI Control”
setting
When you do not wish to use VIERA Link “HDAVI Control”
(
➜
page 18), you can set the unlinked operation by selecting
“OFF ”.
The normal setting is “ON ” (Linked operation).
1. Press and hold [–SETUP, OFF] for about
2 seconds.
The setting items are displayed. (
➜
page 21)
2. Press [
w
][
q
] to select “HDMI ” and press
[OK].
3. Press [
w
][
q
] to select “CTRL ” and press
[OK].
4. Press [
e
][
r
] to select “ON ” or “OFF ”
and press [OK].
ON : When the operation is linked
OFF : When the operation is not linked
Factory setting: ON
5. Press [
RETURN] several times to select
“EXIT ” and press [OK] to fi nish the
setting.
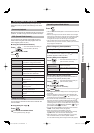
Adjusting the time lag between
audio and video by delaying
audio output
You can reduce audio and video time lag by adjusting sound
delay.
1. Press and hold [–SETUP, OFF] for about
2 seconds.
The setting items are displayed. (➜ page 21)
2. Press [
w
][
q
] to select “SOUND DLY ” and
press [OK].
3. Press [
e
][
r
] to select the setting and
press [OK].
AUTO, OFF, 10, 20, 30, 40, 60, 80, 100, 120, 140,160,
180, 200
Factory setting: AUTO
4. Press [
RETURN] several times to select
“EXIT ” and press [OK] to fi nish the
setting.
Note
• If delaying audio output is not necessary, select “OFF ”.
• “AUTO ” is effective only when connecting the Panasonic TV
(VIERA) supporting HDAVI Control 3 and later versions. (Auto
Lip Synchronization Function)
• When you connect the Panasonic TV incompatible with
HDAVI Control 3 and later versions or non-Panasonic TV, if
“AUTO ” is set, “40 ” (msec) is set.
Functions and settings
Play
5%<622436;'PKPFF5%<622436;'PKPFF ඦ೨ඦ೨