


17
RQT9952
Recording
This system can record up to the followings depending
on the available storage capacity of the USB device in
USB B
and the mode selected:
• MP3 disc and CD-DA to
USB B
−255 folders or a total of 4000 tracks.
• USB A-AUDIO and others to
USB B
−800 folders (maximum 999 tracks in an album) or a
total of 8000 tracks.
To check storage space
In the stop mode (except for DVD/CD, USB A-VIDEO
and USB B-VIDEO), press [FL DISPLAY].
• “UPDATE” is shown when the system is reading the
device.
• “NODEVICE” is shown if there is no USB device
connected to
USB B
.
Panasonic cannot be held responsible on the action of
consumer to record copyrighted contents which can
cause copyright infringement.
Note:
• All recordings are in “.mp3” format.
• You cannot do recording when you are using random
playback mode.
• You cannot do recording when DJ jukebox is switched on.
• Repeat playback mode is off during recording.
• A new album is added each time you do a recording.
• The sequence of album may change after the recording.
• The recordings are kept in a folder named “REC_DATA” in
the USB device.
• USB status indicator blinks in red during USB recording.
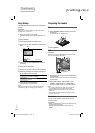
Basic recording
1 Select the source you want to record.
CD-DA
Prepare the disc playback mode (
Z
12, “Play
mode”)
Make sure the disc is stopped.
Radio
Tune in to the radio station.
External equipment
Connect and play the equipment
(
Z
19, “External equipment”).
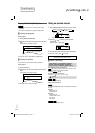
2 Press [USB REC 7/9] to start recording.
The name of the folder that keeps the recording is
shown.
Stop
recording
Press [8]. “WRITING” is shown.
Pause
recording
Press [USB REC 7/9] during recording.
Press again to continue recording.
Note:
You can pause during recording from
radio, AUX 1 or AUX 2 (except in
SYNCHRO mode). A track mark is added
every time you pause (
Z
18, “Adding
track marks”).
Note:
• Wait for a few seconds for the system to prepare the USB
device before recording starts.
• When the next track of the CD-DA disc is being recorded, it
will be shown on the display.
Recording MP3 tracks
Recording from MP3 disc
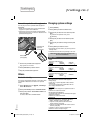
1 Put in the disc.
2 Press [R,
T
] to select the album and then press
[OK].
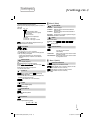
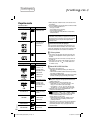
3 Press [USB REC 7/9] to start recording.
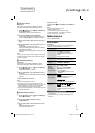
Example: Recording an album from MP3 disc.
DATA-DISC
. ./Audio/mp3
Hakkushon
LevelUp
Mata Sazae
Sazae***
Hakkushon
Recording from USB A-AUDIO
1 Prepare the source you want to record.
You can also use playmode function to record
specified files (
Z
12
, “Play mode”).
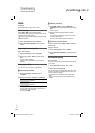
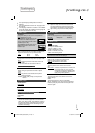
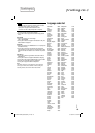
2 Press [USB REC 7/9] to start recording.
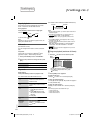
Example: Recording an album from the USB device.
Stop
recording
Press [8].
Recording stops at the last fully
recorded track in the album. For
example, if you stop recording
during the fourth track, only the first
three tracks are recorded.“NO FILE
RECORDED” is shown if no track is
recorded.
Note:
• Some tracks can use a longer time to record.
• Some tracks cannot be recorded because of the condition
of the source.
• When recording from MP3 disc, the recorded file name will
be different from the original file.
• When recording from USB A-AUDIO, the recorded file
name will be the same as the original file (maximum 32
characters).
Recording progress in percentage
of all contents in the group
Track
currently
being
recorded
Album being
recorded
Percentage of the
recording process
SC-VKX25GAGS_RQT9952-1B_En.indd 17SC-VKX25GAGS_RQT9952-1B_En.indd 17 8/21/2014 11:59:56 AM8/21/2014 11:59:56 AM
printing rev.1
Confidential
Until:
29 Aug 2014