


44
MASTER VOLUME
STANDBY/ON
PHONES
VIDEO CAM INPUT/4VIDEO
VIDEO AUDIOLR
(
MONO
)
SVIDEO
STAND
-
BY
AV
RECEIVER
TX-DS
777
POWER
OFF
ON
A SPEAKERS B
TI CH
INPUTMUL
FM
AM PHONO C
D
TAPEVIDEO-1
DVD
VIDEO-4
VIDEO-3
VIDEO-2
D
O
W
N
U
P
FM MUTE/
MODE
CHARACTER/
MEMORY
SP/SYS
SETUP
SMART SCAN
CONTROLLER
MODE
AUDIO
ADJUSTMENT
BASS/
TREBLE
DISPLAY DSP REC OUT
PRESET/MODE ADJ
PUSH TO ENTER
DOWN TUNING UP
THX /DTS
SURROUND MODE
LISTENING MODE
STEREODIRECT
DIGITAL/
ANALOG
CH LEVEL
DIMMER
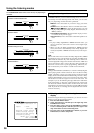
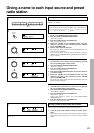
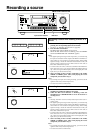
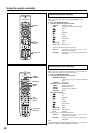
Recording a source
Recording a source while listening to music or a
movie
1. Select the source you wish to play (recording source) by
pressing the corresponding input selector button.
See step 1 of “Selecting an input source” (page 26).
2. Press the REC OUT button.
The REC OUT indicator blinks for 8 seconds.
While the REC OUT indicator is blinking, rotate the SMART
SCAN CONTROLLER until "SOURCE" appears.
Notes:
• The digital input signals assigned to the input source you selected using
the input selector buttons will be output to the DIGITAL OUTPUT ter-
minal. There are some restrictions on digital recording. When making
digital recordings, consult the instruction manual that came with your
digital recording equipment (such as MD recorder or DAT deck) to
know what restrictions are imposed.
• You cannot select the source connected to the MULTI CHANNEL IN-
PUT connectors. Even if you press the MULTI CH INPUT button in
step 1 above, the signals will be output to the L and R output jacks of the
input source you selected most recently.
4. Start recording on the recorder connected to the TAPE,
VIDEO-1, VIDEO-2 jacks. Then, start playing the source
component you selected in step 1.
Notes:
• If you change the input source during recording, you will record the
signals from the newly selected input source.
• You cannot record the surround effects.
VIDEO-1
VIDEO-2 VIDEO-3 VIDEO-4
DVD FM
AM PHONO C
D
TAPE
3
1
2
PRESET/MODE ADJ
PUSH TO ENTER
1
2
PRESET/MODE ADJ
PUSH TO ENTER
REC OUT
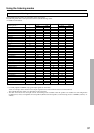
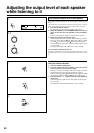
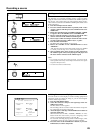
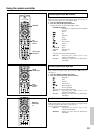
Recording from on audio /video source
1. Press the REC OUT button
The REC OUT indicator binks for 8 seconds
2. While the REC OUT indicator is blinking, rotate the
SMART SCAN CONTROLLER to select the desired re-
cording source.
Notes:
• Selecting "SOURCE" sets the currently selected input source as the re-
cording source.
• The digital input signals assigned to the input source you selected using
the input selector buttons will be output to the DIGITAL OUTPUT ter-
minal. There are some restrictions on digital recording. When making
digital recordings, consult the instruction manual that came with your
digital recording equipment (such as MD recorder or DAT deck) to
know what restrictions are imposed.
• You cannot select the source connected to the MULTI CHANNEL IN-
PUT connectors. Even if you press the MULTI CH INPUT button in
step 1 above, the signals will be output to the L and R output jacks of the
input source you selected most recently.
3. Start recording on the recorder connected to the TAPE,
VIDEO-1, VIDEO-2 jacks. Then, start playing the source
component you selected in step 1.
Notes:
• If you change the input source during recording, you will record the
signals from the newly selected input source.
• You cannot record the surround effects.
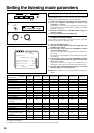
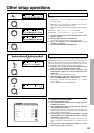
Input selector buttons REC OUT
SMART SCAN CONTROLLER
REC OUT
SPEAKERS REC OUT
A
STEREO
REC OUT
REC OUT