


7
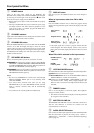
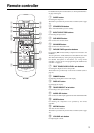
5 DISPLAY button
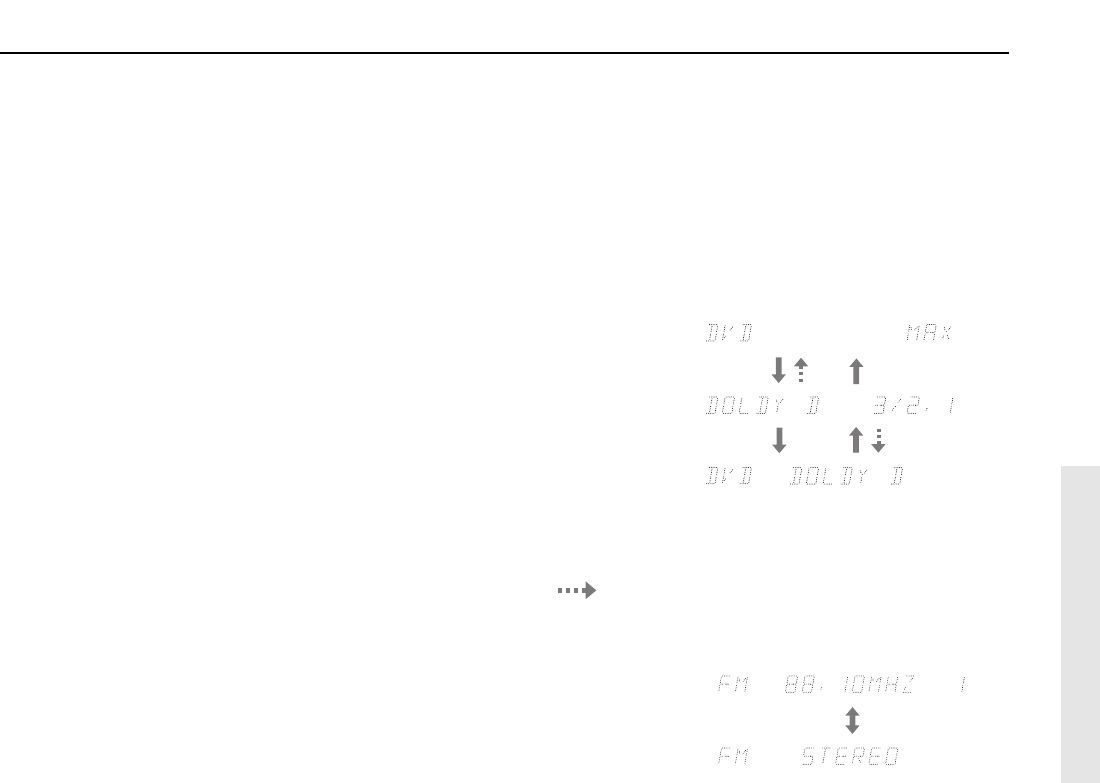
Each time you press the DISPLAY button, the screen changes as
follows:
When an input source other than FM or AM is
selected:
Press the DISPLAY button once to initiate the program format
display. Pressing the button again switches the display to the other
display.
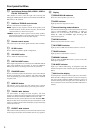
* If the input signal does not have a program format, then this
will be skipped. The format display returns to the previous
display after the format display has lasted for about 5 seconds
(
).
When FM or AM is selected as the input source:
6 LISTENING MODE buttons
Press these buttons to select a listening mode for the current input source.
STEREO: Select for normal stereo output.
j/DTS SURROUND: Select for the DOLBY PRO LOGIC II,
DOLBY DIGITAL, or DTS surround modes.
DSP: Select for the ORCHESTRA, UNPLUGGED, or ALL CH
ST surround modes. During Dolby Digital playback, this
button is used to switch the Late Night function between ON
and OFF.
7 DIMMER button
Press to set the brightness of the front display. The brightness
changes to normal and dim.
• The dimmer control for the front display can also be performed
by using the remote controller.
8 MASTER VOLUME dial
The MASTER VOLUME dial is used to control the volume level.
Turn the dial clockwise to increase the volume level and
counterclockwise to decrease it.
9 AUDIO SELECTOR button
Press to select an audio input signal format other than FM and AM.
Each time this button is pressed, the setting cycles; “AUTO” →
“MULTI CH” → “ANALOG” → “AUTO” (back to the beginning)
(refer to page 23).
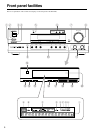
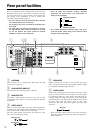
Front panel facilities
1 POWER switch
Turns on the main power supply for the HT-R490. The
HT-R490 enters standby state and the STANDBY indicator lights
up. Pressing the switch again to the off position (— OFF) shuts
down the main power supply into the HT-R490.
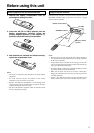
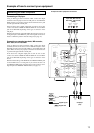
• Before turning on the power, make sure all cables are properly
connected.
• Turning on the HT-R490 may cause a momentary power surge
that might interfere with other electrical equipment on the
same circuit. If this is a problem, plug the HT-R490 into a
different electrical circuit.
2 STANDBY indicator
Lights when the HT-R490 is in the standby state and flashes when
a signal is received from the remote controller.
3 STANDBY/ON button
When STANDBY/ON button is pressed to ON while the POWER
switch is set to ON, the display will light to show the current
volume setting for about 5 seconds then show the current sound
input source and listening mode. Pressing the button again returns
the HT-R490 to the standby state. This state turns off the display,
disables control functions.
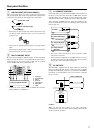
4 SPEAKERS A/B buttons
Press to switch the speaker systems in use between A and B.
SPEAKERS A:
Select for the speakers connected to the FRONT
SPEAKERS A, CENTER SPEAKER, SURROUND SPEAKERS
and SUB WOOFER PRE OUT terminals. When the speakers are
turned on, the SPEAKERS A indicator lights up.
SPEAKERS B: Select for the speakers connected to the FRONT
SPEAKERS B terminals. When the speakers are turned on, the
SPEAKERS B indicator lights up.
Notes:
• Be sure to use SPEAKERS A to listen to the sound through
MULTI CHANNEL INPUT port or in any listening mode
other than STEREO.
• You cannot select surround mode when you are using
SPEAKERS B. If you select SPEAKERS B while surround
mode is selected, surround mode will be automatically
canceled.
• You cannot use the A and B speakers simultaneously.
FM/AM frequency
+ Preset no.
FM/AM +
Listening mode
ch
Input source +
volume
Program format*
Input source +
Listening mode