17
Fig. 20
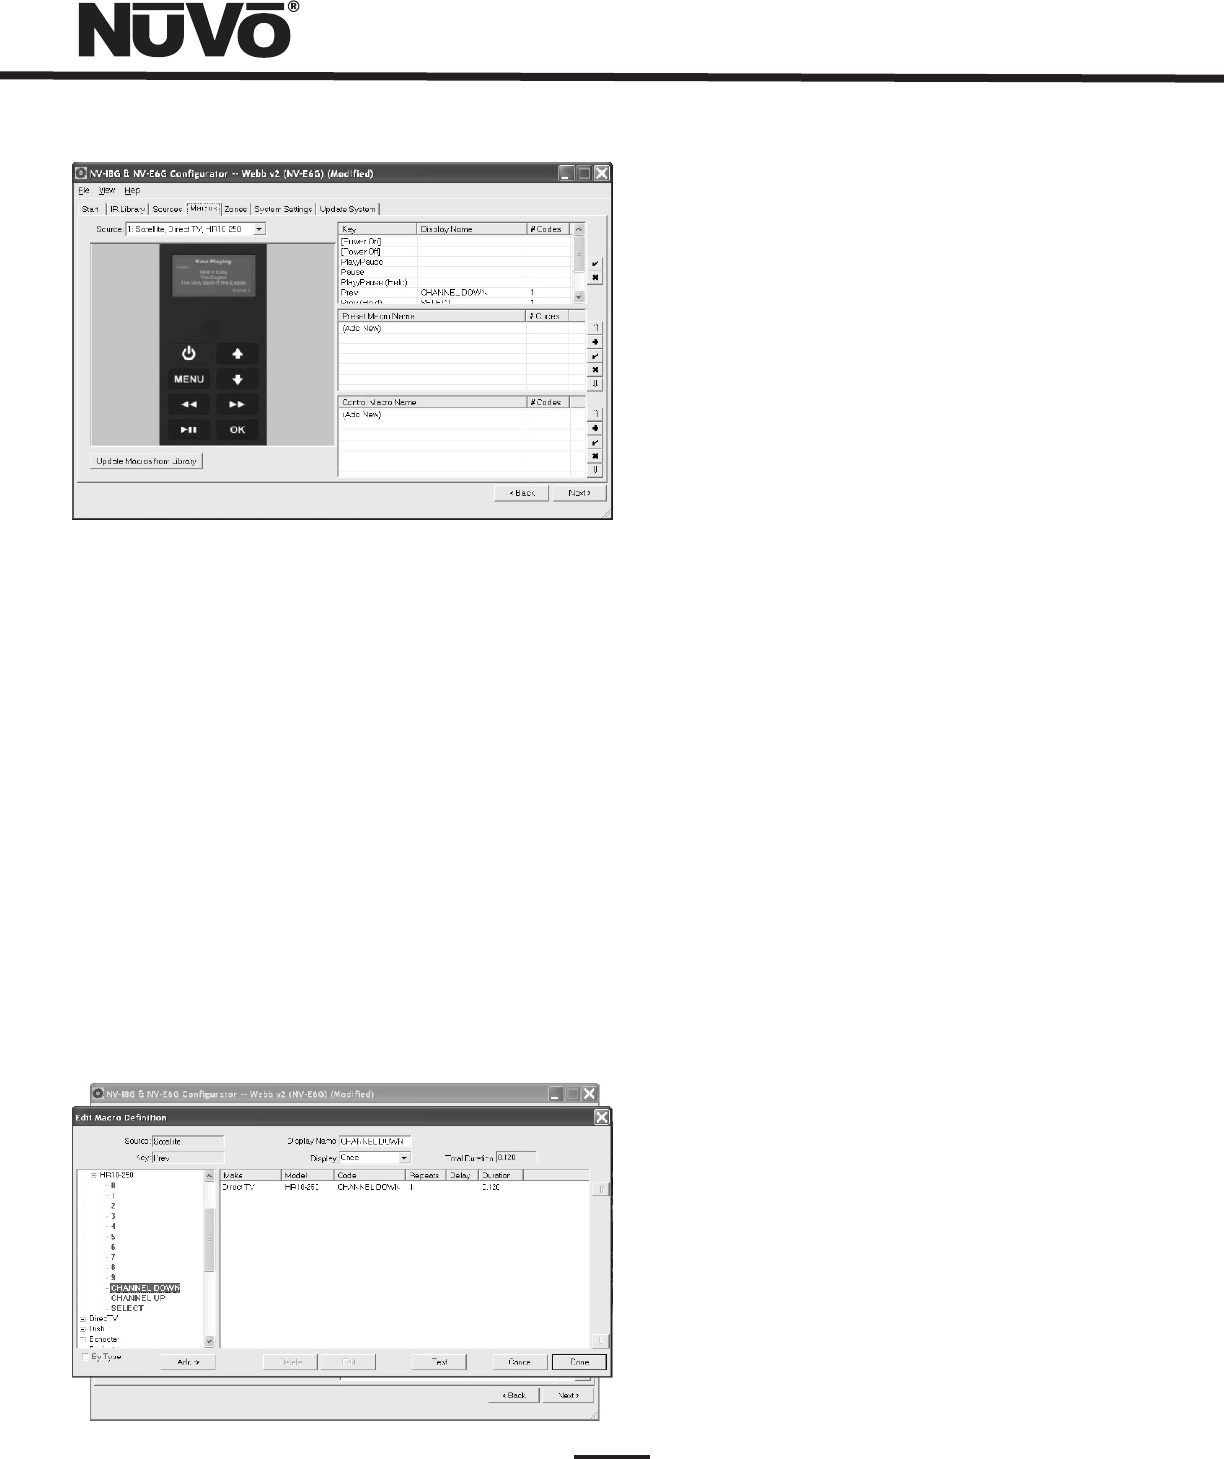
4.1 Edit Macro Definition (Fig. 21)
The Macro tab has a Source pull down menu that displays the
six sources defined in their order 1-6. When a non-NuVoNet
source is highlighted and selected, three separate definition
windows appear on the right side of the screen. The left side
of the screen is a representation of the Control Pad display.
When the curser is scrolled over the buttons on the Control
Pad, a tool tip appears indicating the function command or
commands that have been assigned to that button. Here you
can double click on the button which opens the Macro
Definition Window. When in Macro Definition, if you choose
to, you can reassign new codes. You can also double click on
the appropriate function in the window on the right side of
the tab and access the Macro Definition window.
Fig. 21
4.1 Creating a Macro Preset String (Fig. 22)
An important function of the Macro tab is to create a menu
of preset choices for third party components, such as
satellite, cable and CD changers. When a non-NuVoNet
source is selected, a Preset Macro window appears on the
right side of the screen with open spaces for storing preset
station choices. Up to 250 macros can be defined in this
window. When a preset is added to a source, an additional
Preset menu item will be added to that source browsing
capability on the Control Pads. The preset menu is preceded
by the three character source designation established in the
Source tab.
To create a preset macro, double click on the first available
preset macro selection, Fig. 20. This will open the Edit Macro
Definition window. Once in that window you must type a
name for the preset in the Display Name window, which will
establish the preset name as it will appear in the preset
menu. Note that the Display drop down menu directly below
the Display Name window defaults to Forever. This is the
desired choice for a preset and will keep the preset name on
the Control Pad while that selection is currently playing.
The available IR codes for that source will be expanded in
green on the left side of the Edit Macro Definition window.
As you double click on a code, it will automatically be added
to the macro string on the right. Up to 255 codes can be
added to a single macro and the codes will fire in the order
in which they are added to the string. Once the desired
macro string is complete, click done and return to the main
macro tab. The completed macro will appear in the Preset
Macro window. To create a second preset, double click on the
next space and repeat the Macro Definition steps.
If the component had default keys defined in the IR Library,
single IR code macros will be automatically created for each
key. Hovering the mouse over each key in the Control Pad
picture on the left side of the screen will bring up a tool-tip
displaying the name of the macro assigned to that key.
Clicking on the key highlights the macro on the right side of
the screen.
Double-clicking on a key in either display will allow you to
change the default assignment or create a new one in the
Edit Macro Definitions window, Fig. 21


