


15
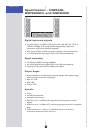
SETTING UP THE DSP
LOUDSPEAKERS
Caution (DSP6000 and DSP6000C only)
Meridian Audio has taken every care in the design, assembly, finishing and
packing of this product. The high gloss finish on parts of the cabinet is
achieved by painting up to five coats of polyester lacquer onto the
plywood, each one hand polished.
Due to the product size and high technology cabinet construction, small
marks on the lacquer surface may be visible when unpacked. These small
marks can usually be removed as described in Cleaning, page 40.
It is the nature of all lacquer finishes to shrink over time. This is
unavoidable and may result in cabinet joint lines becoming visible.
Meridian Audio has supplied products using lacquer finishes for many years
and we are confident that when carefully used your product will return a
lifetime’s enjoyment.
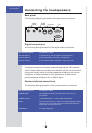
Tightening the drive units
The DSP loudspeakers typically take about two weeks of normal use for the
drive units to settle. It is therefore recommended that you tighten the
mounting bolts on each drive unit every few days during this period.
Tighten the bolts in symmetrically opposite pairs using the 3mm hex
wrench supplied.
Note (DSP5500): The DSP5500 grille frame has been designed to be as
acoustically transparent as possible, and is quite fragile. When removing
the grille, ease it carefully off by hand from the bottom and sides, avoiding
excessive bending of the frame.
You should then check and if necessary retighten the drive units every few
years.
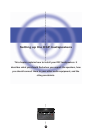
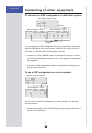
To fit the feet (except DSP5000C and DSP5500HC)
The feet ensure that the loudspeakers have a stable base, and can be
adjusted to allow for uneven floors. Use the spikes for carpeted floors; they
are designed to penetrate the pile without damaging or flattening the
carpet.
Each DSP loudspeaker needs four feet, fitted as follows:
• Fit a lock nut to each spike, leaving about 2mm of thread between the
lock nut and spike. If a foot is required rather than a spike, fit a foot
cap. Screw each foot into the threads on the bottom of the base units.
Do not fully tighten the foot at this stage.