30
No30 Mark Levinson Reference Digital Audio Processor
No30.5 Mark Levinson Reference Digital Audio Processor
No30.6 Mark Levinson Reference Digital Audio Processor
No35 Mark Levinson Nº35 Digital Audio Processor
No36 Mark Levinson Nº36 Digital Audio Processor
No36S Mark Levinson Nº36S Digital Audio Processor
No360 Mark Levinson Nº360 Digital Audio Processor
No360S Mark Levinson Nº360S Digital Audio Processor
No39 Mark Levinson Nº39 CD Processor
changing input names To change an input name, use the setup menu:
• press
setup to enter the setup menu
• press
enter or turn the select knob to move to Inputs
• press
enter to move to Input 1
• turn the select knob (or use the select buttons on the
remote) to move to whatever input you want to edit
• press enter (Note that enter will either take you down to
the next “lower” level in the menu, or if you are at the bot-
tom level of the “branch” of the menu you are on, it will
allow you to edit that item. Having changed the item, you
can then save the change by pressing enter again.)
• choose the name you want from the list, using the volume
knob
(or use the volume buttons on the remote)
If this seems a little complicated when you read about it, just try it on
the Nº383 itself, referring to the menu system on page 29. It really be-
comes intuitive quite quickly.
input programming tip You can take advantage of a shortcut to the settings of the specific in-
put to which you are currently listening. By pressing and holding the
setup button on either the remote control or the front panel for a few
seconds, you will be taken directly to the first menu item for that par-
ticular input (its name). You may change anything pertaining to that
input, and when you leave that level of the menu (by pressing setup
again), you will leave the menu system entirely.
factory default
input names
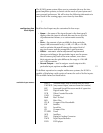
The factory default names for the inputs are the somewhat generic IN-
PUT 1
through INPUT 5. This makes it easy to tell what connectors
correspond to what input, but you may find the system easier to use
once you have customized the names to reflect the actual components
you have connected.


