13
material needed The following materials and tools are needed to perform the installa-
tion of the Nº32 Phono modules into the Nº32 Preamplifier:
1 – Nº32 reference preamplifier
1 – pair Nº32 phono preamp modules
1 – wrist strap for ESD protection
1 –
3
⁄32" hex driver
1 –
5
⁄64" hex driver
1 –
5
⁄32" hex key
2 – 10-32 socket head cap screws
installation procedure Carefully perform the following procedure after having read it through
at least once from start to finish; taking it one step at a time should
make it quite simple. Photographs are provided along the way for refer-
ence.
Note that if you intend to use the custom loading binding posts, you
will have to remove and reinstall the phono modules. If by chance you
know exactly what loading resistor you would like to use, you may
want to jump ahead to Installing a Custom Load, later in the manual,
and return to this section afterward. (Most people will find the stan-
dard assortment of loading options quite comprehensive.)
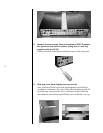
1. Place the Nº32 reference preamp on suitable work area
Ideally, the work area itself should be grounded and static-free. It
should also be clear of small parts and other items that might get
in the way. Have a separate area prepared ahead of time for laying
out the disassembled parts during the procedure. (A soft towel
laid on a table works well to keep screws from rolling off onto the
floor.)
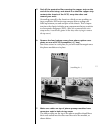
2. Remove DC power cables from the Nº32 Preamplifier
There is no need to disconnect the Nº32 Controller from the AC
mains, although there is no real harm in doing so, either. either
way, however, you must disconnect the DC power cables between
the Controller and the Preamplifier, allowing the Preamplifier to
“float” with respect to ground.


