7
ENGLISH
This CD player is connected to an amplifier, CD recorder and
other components for use. To ensure that the components
are connected properly, refer to the instruction manuals that
come with the components to be connected.
Before connecting the components, be absolutely sure to turn
off their power.
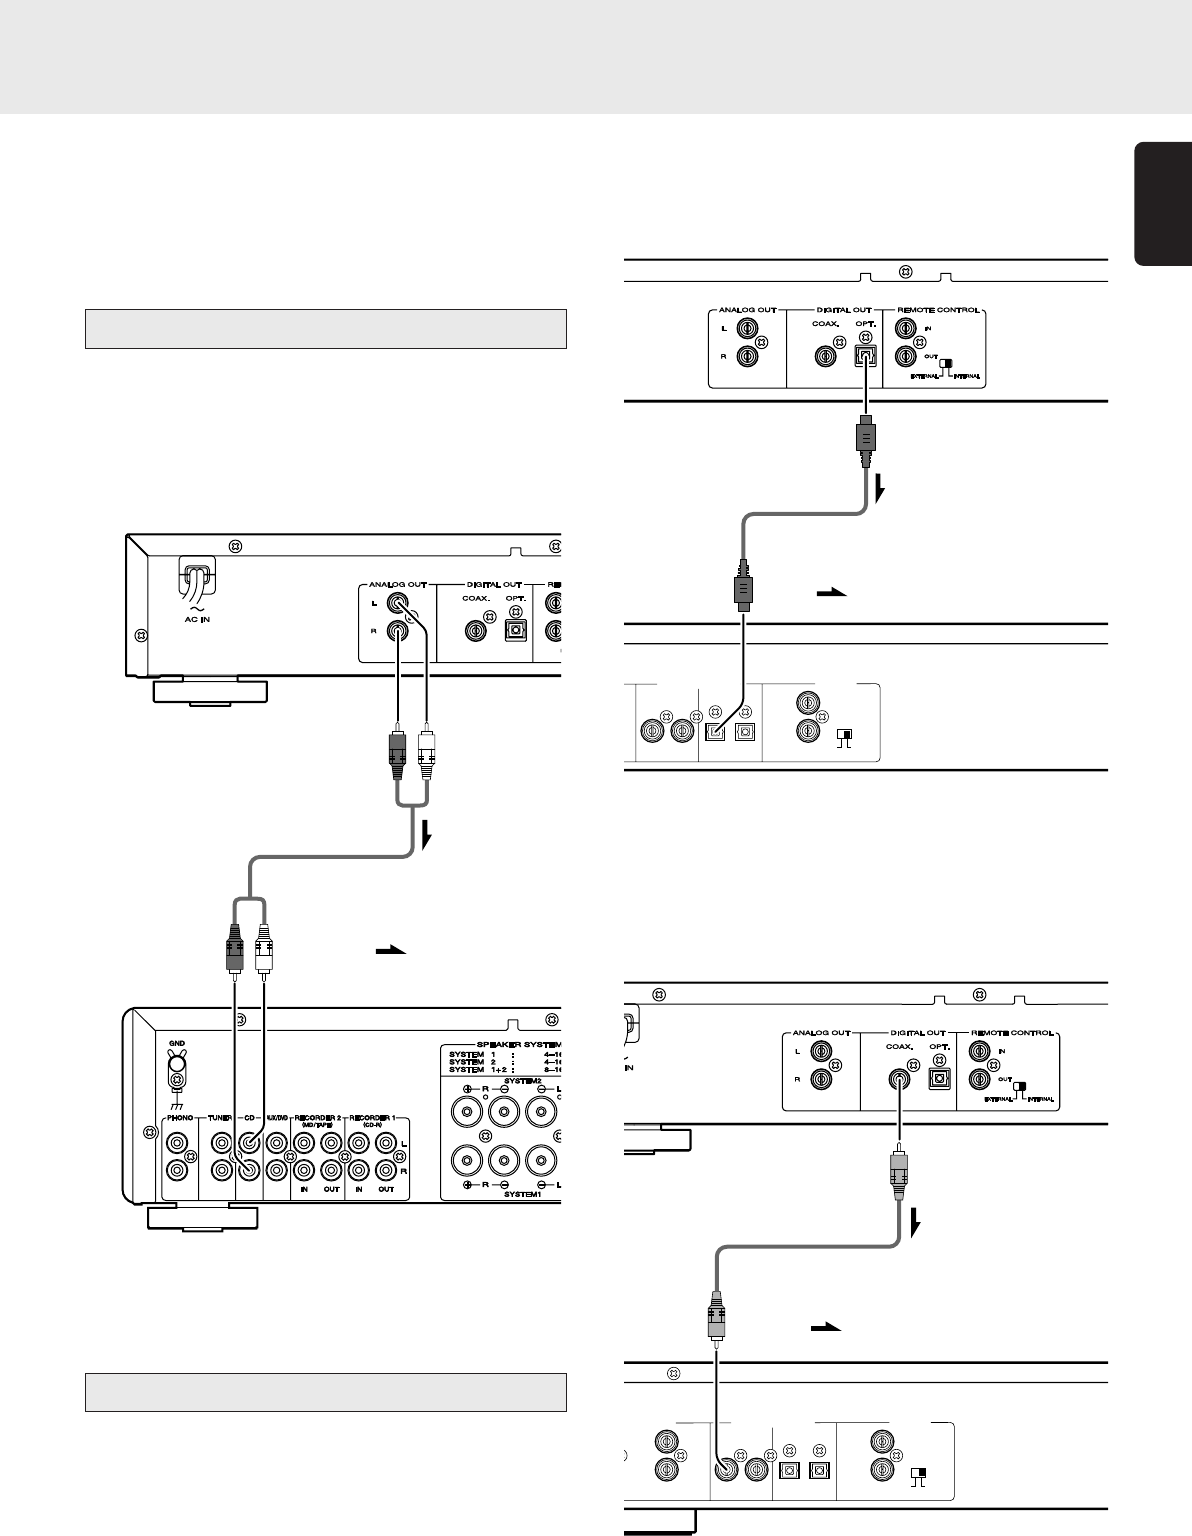
Connecting to an amplifier
Use the audio connecting cord to connect the player with a
stereo amplifier or AV amplifier. Do not connect the player to
the PHONO input connectors on the amplifier.
When making the connections, insert the plugs securely into
the connectors. Failure to insert the plugs securely may result
in noise.
4. CONNECTIONS
Connecting to a digital audio component
The player has one digital optical output connector and one
digital coaxial output connector.
You can enjoy digital recording when the player is connected
to a CD recorder or other digital recording component.
• Connecting the optical output connector
Use an optical digital connecting cable available on the
market. Insert the plug firmly in until it clicks into place. Do
not bend or bundle the optical digital connecting cable.
• Connecting the coaxial output connector
Use a coaxial digital connecting cable available on the market.
Optical digital connecting cable
(available on market)
Signal flow
CD recorder, MD deck, AV amplifier, etc.
Coaxial digital connecting cable
(available on market)
CD recorder, MD deck, AV amplifier, etc.
Signal flow
:
INTERNAL
EXTERNAL
OUTPUT
DIGITAL IN/OUT
INPUT
OPTICAL COAXIAL
CONTROL
REMOTE
INPUT OUTPUT
IN
OUT
:
INTERNAL
EXTERNAL
ALOG IN/OUT
OUTPUT
OUTPUT
R
L
DIGITAL IN/OUT
INPUT
OPTICAL COAXIAL
CONTROL
REMOTE
INPUT OUTPUT
IN
OUT
:
(Red)
(White)
Audio connecting cord (supplied)
Signal flow
Amplifier
(Red) (White)
05.7.6, 9:00 AMPage 7


