


Owner’s Manual
13
Owner’s Manual
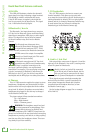
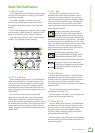
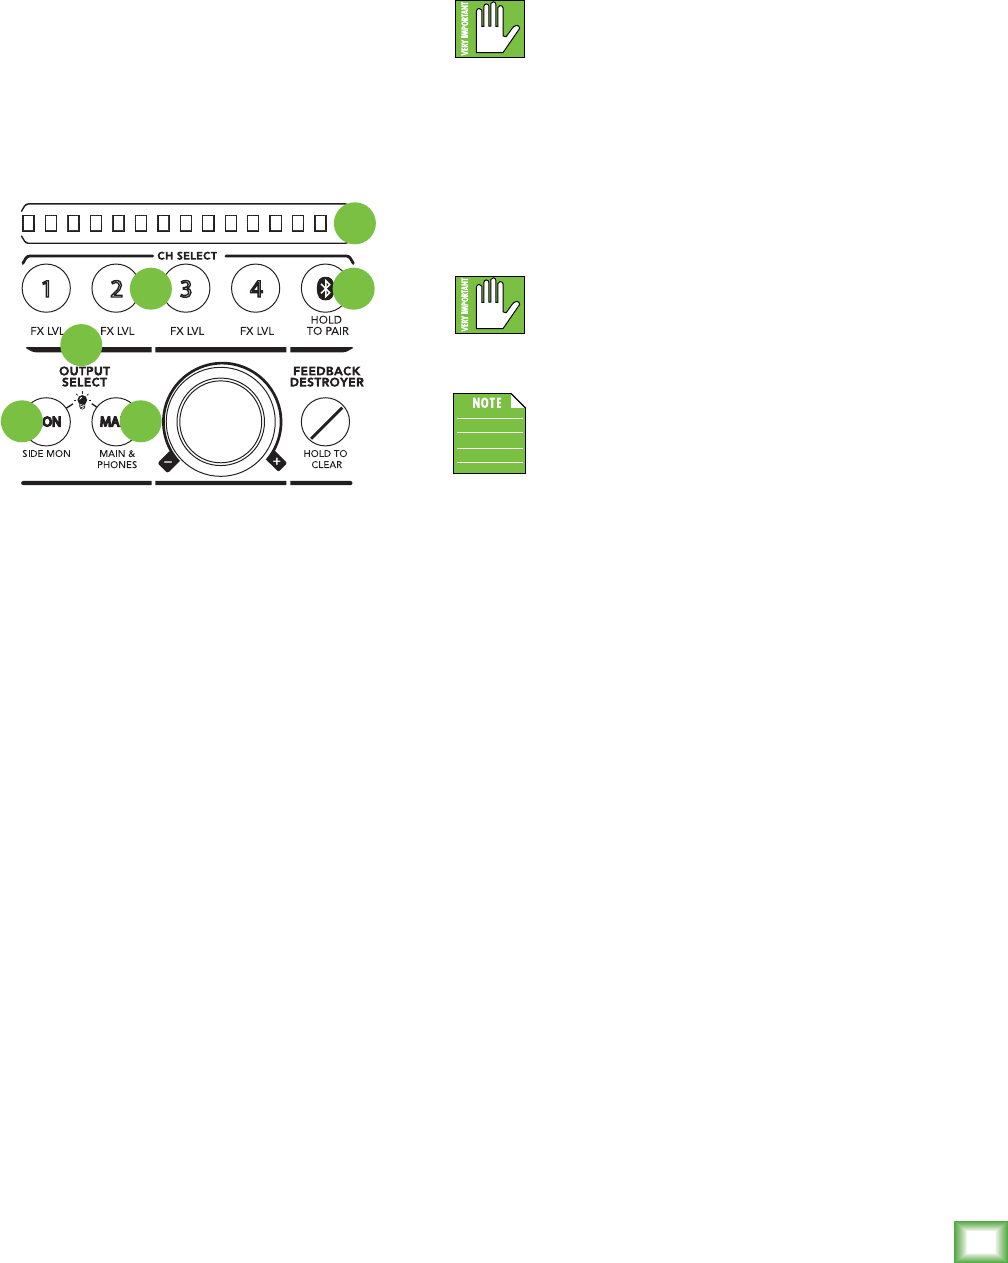
9. LED Indicator
The 15-segment bi-color LED ladder is used to gauge
the input, FX and output level settings, as well as the
main output metering.
These LEDs illuminate to indicate the level of
the currently selected input or output level [white
for channel level setting and green for FX send level
setting].
This is easily changed by selecting the input or output
level you want to update followed by turning the level
knob up (clockwise) or down (counter-clockwise).
If you are simply metering – after 5-second timeout
to Main – they will reflect output metering.
10. Ch 1-4 Buttons
Press a channel button to select it. It will illuminate
white when selected. Once a channel is selected, be
sure to raise or lower that channel’s input level using
the endless rotary level knob. The input level will be
represented in the meters with white LEDs. After five
seconds of inactivity, the selection changes back to the
default “Main”.
Press and hold a channel button to select and
adjust that channel’s FX send level. It will illuminate
green when selected. Once a channel is selected, be
sure to raise or lower that channel’s FX send level using
the endless rotary level knob. The FX send level will be
represented in the meters with green LEDs. After five
seconds of inactivity, the selection changes back to the
default “Main”.
3 421
MAINMON
FX EQ SIDE
9
10
14
11
12 13
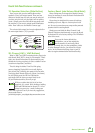
11. BT / Aux
Press the BT / Aux button to select it. It will
illuminate white when selected (whether a device
is paired or not). Once selected, be sure to raise or
lower the Bluetooth/Aux input level using the endless
rotary level knob or Mackie Connect. The input level
will be represented in the meters with white LEDs.
After five seconds of inactivity, the selection changes
back to the default “Main”.
To enter pairing mode, press and hold
the BT / Aux button. The button LED will
illuminate and flash white while in pairing
mode. While Reach is in pairing mode, simultaneously
scan for Bluetooth devices on your device. You should
see Reach appear in the “available devices” list. From
there, your device should indicate that it is successfully
connected. If it does not, start the pairing process
again, and make sure that Reach and your device are
both in pairing mode at the same time.
The Bluetooth may disconnect when
affected by Electrostatic Discharge [ESD]
or electrical fast transients (EFT). If this
occurs, manually reconnect the Bluetooth connection.
If no device is paired and a smart phone
or MP3 player is plugged into the aux input,
the Bluetooth channel controls the level
for this input.
12. Mon Button
Press the Mon button to select it. It will illuminate
white when selected. Once mon is selected, be sure
to raise or lower the selected mon output level using
the endless rotary level knob or Mackie Connect.
The mon output level will be represented in the meters
with white LEDs.
The side monitor speakers may be selected by
pressing the mon button [19].
The main button is the default, so it will revert back
to main after five seconds of inactivity.
13. Main Button
Press the Main button to select it. It will illuminate
white when selected. Once main is selected, be sure
to raise or lower the main / phones output level using
the endless rotary level knob or Mackie Connect.
The main / phones output level will be represented
in the meters with white LEDs.
The main button is the default, so if any other button
has been selected, it will revert back to main after five
seconds of inactivity.
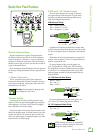
Reach: Side Panel Features