


24
Operations
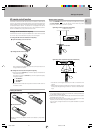
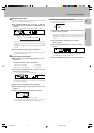
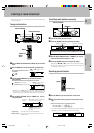
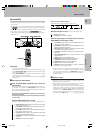
1 Use the INPUT SELECTOR knob to select the source (other than
“MD/TAPE”) you want to record.
2 Set the cassette deck or MD recorder to record.
3 Start playback, then start recording.
Recording audio (analog sources)
Recording
Recording a music source
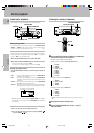
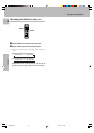
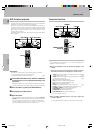
1 Press the MONITOR key.
2 Use the INPUT SELECTOR knob to select a source other than
“MD/TAPE”.
3 Start playback on the cassette deck connected to the MONITOR
jacks and start recording on the cassette deck or MD recorder
connected to the MD/TAPE jacks.
Recording tapes or MD (with MONITOR function)
1 Use the INPUT SELECTOR knob to select “MD/TAPE”.
2 Start playback on the cassette deck connected to the MD/TAPE
jacks and start recording on the cassette deck connected to the
MONITOR jacks.
MONITOR = MD/TAPE recording
MD/TAPE = MONITOR recording
• To copy tapes using a double cassette deck, refer to the instruction
manual of the double cassette deck.
INPUT SELECTOR
MONITOR
S.DIRECT
FM
AM
MHz
kHz
PRO LOGIC
3
DOWN MIX
DIGITAL
DSP
MEMO
ST.
TUNED
AUTO SOUND
AUTO
STEREO MONITOR
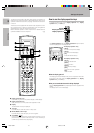
MONITOR function (analog sources only)
You can connect a cassette deck or graphic equalizer to the MONITOR
jacks of the receiver. If a graphic equalizer is connected, the MONITOR
key should be left in the on position. Alternately, if a cassette deck
equipped with a 3-head system is connected to the MONITOR jacks,
you will be able to monitor the just-recorded signal while making
recordings on the cassette deck. By switching the MONITOR key on
and off, you can compare the sound of the source signal and the just-
recorded signal. For more information, refer to the instruction manual of
the connected component.
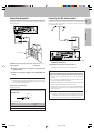
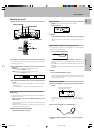
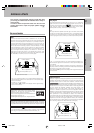
1 Use the INPUT SELECTOR knob to select the source (CD/DVD,
DVD/6ch, VIDEO2, or VIDEO3) you want to record.
2 Set the cassette deck or MD recorder to record.
3 Press and hold the DIMMER key for more than 2 seconds to
select the A-REC or M-REC mode.
• The mode changes every 2 seconds as shown below.
1 Rec mode off : The digital input record mode is
switched off.
2 A-REC : The digital input signals (DTS,
Dolby Digital, or PCM) are identi-
fied automatically and converted
into stereo signals that are ready
for recording.
3 M-REC : The input signal type at the mo-
ment this mode is selected is held
throughout this mode.
Recording audio (digital sources)
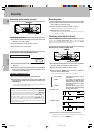
Switch on the REC mode to record a digital input source.
Usually use the A-REC (Auto-Record) mode to record audio input
sources. When the digital mode changes during recording in the A- REC
mode, the audio may be interrupted momentarily.
4 Play the source from the beginning and start recording.
• If the audio reproduction stops in the middle due to change in the
input signals, etc., press the DIMMER key.
Recording video
1 Use the INPUT SELECTOR to select the video source (other
than “VIDEO1”) you want to record.
2 Set the video deck connected to VIDEO 1 to record.
• Select the REC MODE to record a digital input source.
3 Start playback, then start recording.
• Recording may not be normal for some video software. This is due to
the copy guard condition.
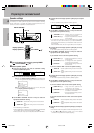
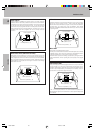
Recording music in A-REC or M-REC mode
INPUT SELECTOR
DIMMER
FM
AM
MHz
kHz
3
DOWN MIX
S.DIRECT
MONITOR
DSP
MEMO
ST.
TUNED
AUTO
PRO LOGIC
FM
AM
MHz
kHz
3
DOWN MIX
S.DIRECT
MONITOR
DSP
MEMO
ST.
TUNED
AUTO
PRO LOGIC
STEREO
STEREO
DIGITAL
AUTO SOUND
DIGITAL
AUTO SOUND
FM
AM
MHz
kHz
3
DOWN MIX
S.DIRECT
MONITOR
DSP
MEMO
ST.
TUNED
AUTO
PRO LOGIC
FM
AM
MHz
kHz
3
DOWN MIX
S.DIRECT
MONITOR
DSP
MEMO
ST.
TUNED
AUTO
PRO LOGIC
STEREO
STEREO
DIGITAL
AUTO SOUND
DIGITAL
AUTO SOUND
For A-REC mode:
For M-REC mode:
*509/24-26/EN 3/15/01, 2:15 PM24