


— 14 —
English
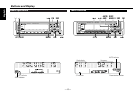
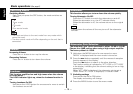
Tuner features
(See page 6)
Station Name Preset (SNPS)
You can assign names to radio stations with the Station
Preset Memory. Up to 32 FM stations and 16 AM stations can
be assigned names.
Adjust the frequency to the station whose name you want to
enter.
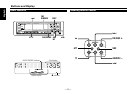
Hold down the NAME.S button for two seconds or more.
“NAME SET” is displayed once the station name preset mode
is entered.
The cursor will blink in the position where letters are entered.
Press either the 4 or ¢ button to move the cursor to the
desired position.
The 4 button moves the cursor to the left, and the ¢
button to the right.
You can also move the cursor left or right by pressing the 4
or ¢ buttons, respectively, on the remote control.
Press the FM or AM button to display the desired character.
Besides the alphabet (capital letters only) and numerals, you
can choose the following characters: /,
+, –, *, =, <, >, [ and ].
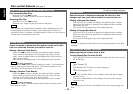
Direct Alphabet Input (Function of the KCA-R6A : Optional)
Direct input can made of letters (alphabetical) with the letter
entry buttons on the remote control.
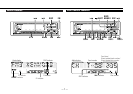
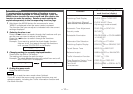
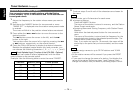
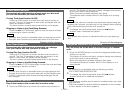
Example: Use the following table to enter the name "DANCE".
NOTE
4
3
2
1
Continue steps 3 and 4 until all the characters are chosen for
the name.
You can enter up to 8 characters for each name.
• Assigning Names
Press the NAME.S button.
The name of the station is stored in memory, and the Station
Name Preset mode ends.
• Assigning Name and Storing Frequency with Station Preset
Memory
Hold down the desired preset button for two seconds or
more.
The name of the station is stored and the frequency for the
current station is stored in the selected preset button. The
Station Name Preset mode ends.
Also, if you make no input for 10 seconds, the name will be
stored up to the point that you have entered, and the mode
ends.
• You can assign names to up to 32 FM stations and 16 AM
stations.
• All the station names will be erased if you press the RESET
button.
• If you want to change the name of a station, first display the
name of the station (following steps 1 and 2 above), then
change the letter(s) that you want by following steps 3 and 4.
NOTE
6
NOTE
5
Button to press # Times pressed
Character
#3 1“D”
1“A” #2
#6“N” 2
#2 3“C”
#3“E” 2