5
English
CAUTION: Make all connections before plugging the System into an AC power outlet.
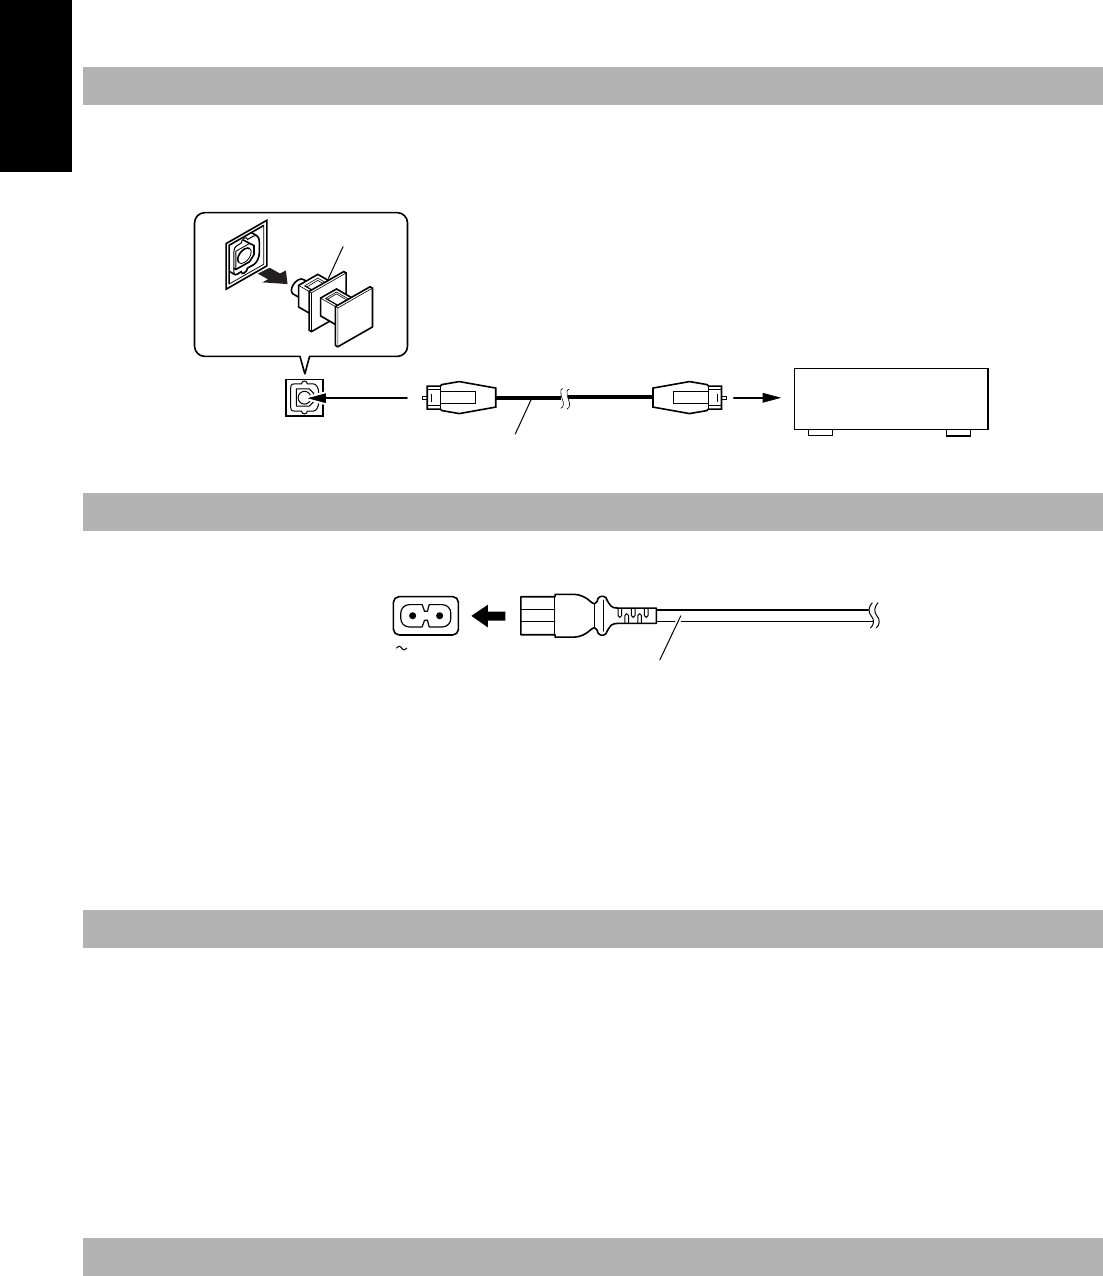
Unplug the cap and connect an optical digital cord (not supplied) between the System’s OPTICAL DIGITAL OUT terminal and the input ter-
minal of the MD recorder, etc.
You can now record the digital output signal from the System’s CD Player to the MD recorder, etc.
Firmly insert the supplied AC power cord into the AC inlet on the back of the Unit.
CAUTIONS:
• ONLY USE THE JVC POWER CORD PROVIDED WITH THIS SYSTEM TO AVOID SHOCK OR DAMAGE TO
THE SYSTEM.
• ALWAYS UNPLUG THE POWER CORD FROM THE OUTLET WHEN YOU PLAN ON NOT USING THE SYS-
TEM FOR AN EXTENDED PERIOD OF TIME.
Now you can plug the AC power cord into the wall outlet, and your System is at your command!
JVC’s COMPU PLAY feature lets you control the most frequently used System functions with a single touch.
With COMPU PLAY, you can play a CD, a tape, or turn on the radio with a single press of the play button for that function.
COMPU PLAY turns the power on for you, then starts the function you have selected. If the System is not ready, for example, no CD is loaded,
the System still turns on so that you can load a CD.
The COMPU PLAY buttons are:
The System automatically turns on with the following operation.
• When you press the CD
0 button, the System automatically turns on and the CD cover opens to allow CD insertion. However, this opera-
tion does not change the function to CD.
When you press the
%
button to turn off the System, the CD cover will automatically closed if it is open.
Connecting an MD Recorder, etc (Digital Output)
Connecting the AC Power Cord
COMPU PLAY
On the Unit
CD #¥8 button
TUNER BAND button
TAPE
@ #
button
MD/AUX button
On the Remote Control
CD #8 button
TUNER BAND button
TAPE
@ #
button
MD/AUX button
AUTOMATIC POWER ON
OPTICAL
DIGITAL OUT
Cap
MD recorder, etc. (not supplied)
Optical digital cord (not supplied)
AC IN
Power cord
UX-V6V(U)-eng.fm Page 5 Thursday, August 5, 1999 2:59 PM


