21
English
PRESET
GROUP
UP
DOWN
PRESET
GROUP
TUNER
TAPE
CD
SET
DAILY 1
To deactivate the timer, press and
hold DAILY TIMER/SNOOZE
repeatedly until (timer) and DAILY
1, 2, 3 or REC indicators go off from the
display.
To change the timer, repeat steps
1
to
6
on pages 20 and this
page.
•To activate the Daily Timer again without changing the
setting, press DAILY TIMER/SNOOZE on the unit
repeatedly to select the timer number you want.
When there is no playing source (either a cassette tape
or a disc) inside when you select “TAPE” or “CD”
The source to play is changed to “TUNER” when the on-time
comes.
If the unit is already turned on when the timer on-time
comes
The timer does not work.
When you unplug the AC power cord or if a power
failure occurs
The timer setting remains. Set the built-in clock and activate the
timer again.
Using Snooze Timer
The Snooze Timer turns off the unit (standby) only for 5
minutes while Daily Timer is in operation.
•You can set the Snooze Timer only while the Daily Timer is
in operation.
On the unit ONLY:
Press DAILY TIMER/
SNOOZE while Daily Timer
is in operation.
The unit turns off (standby) and the SNOOZE indicator
appears on the display.
After 5 minutes, the unit automatically turns on with the
source you selected in step
4
on the left column.
If the unit is turned on when the Snooze Timer is
working
Both Snooze Timer and Daily Timer will be canceled.
If you set the Snooze Timer when there is less than 5
minutes until the Daily Timer off-time
The unit will not turn on even when 5 minutes passed.
When you unplug the AC power cord or if a power
failure occurs
The timer will be canceled. You need to set the clock first, then the
timer again.
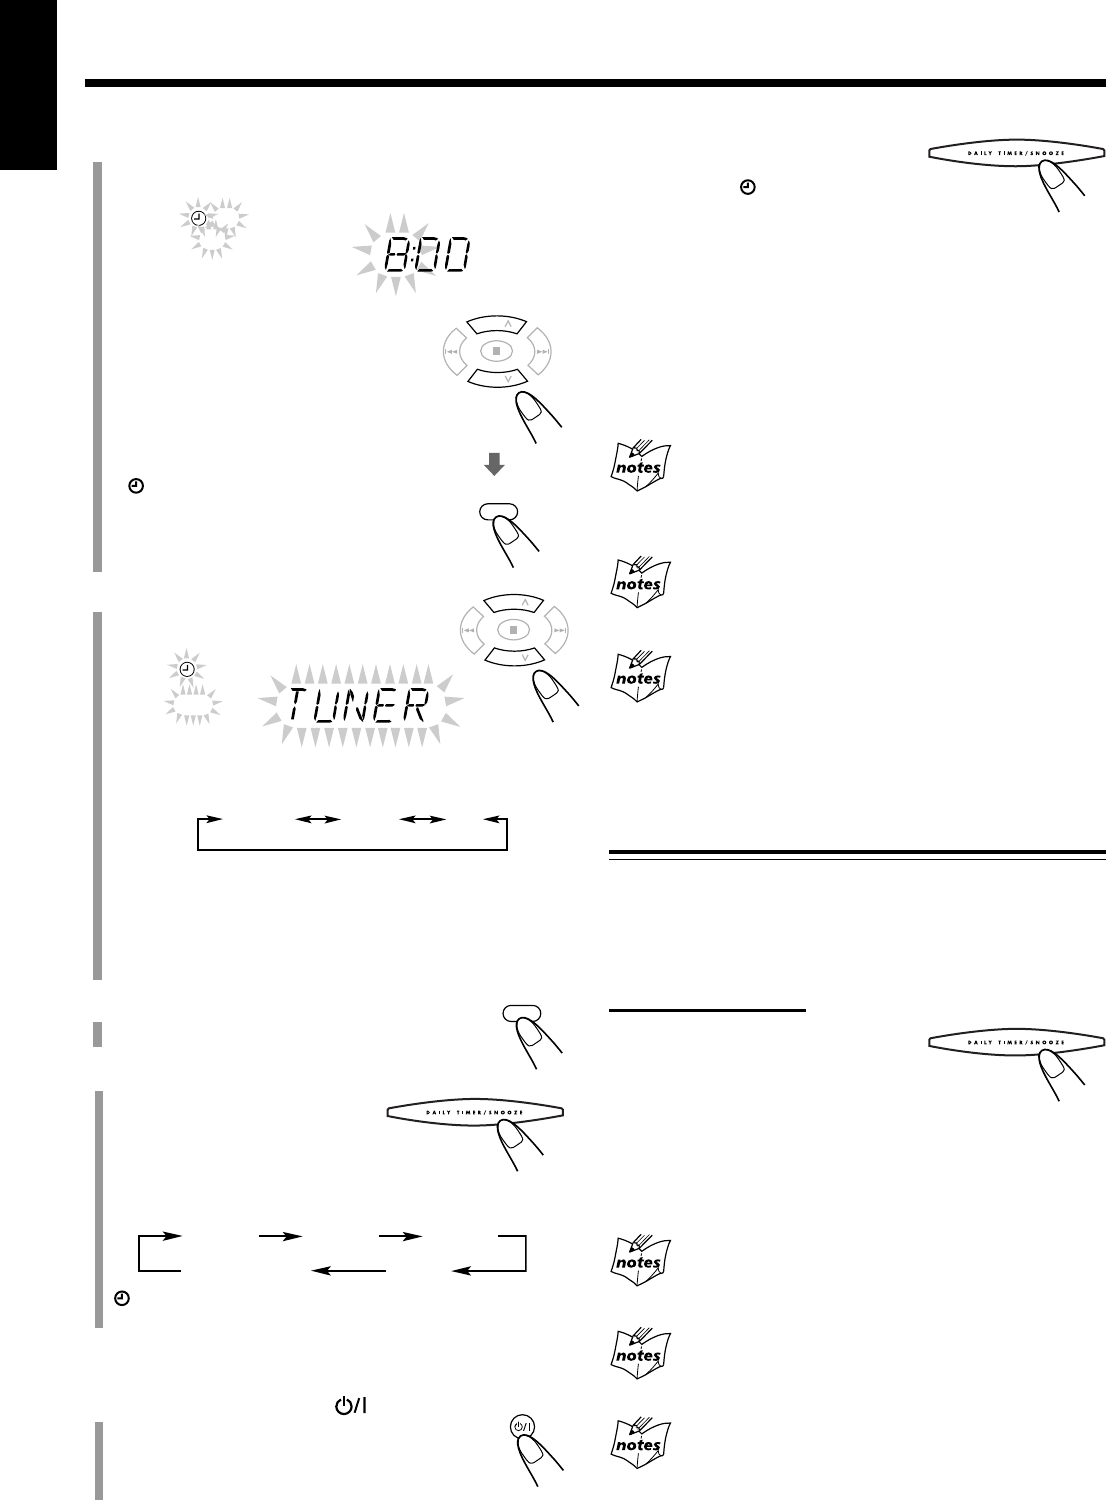
SET
PRESET
GROUP
UP
DOWN
PRESET
GROUP
DAILY 1 DAILY 2 DAILY 3
REC
Canceled
STANDBY/ON
3
For the Recording Timer ONLY:
Set the off-time you want the unit to turn off.
(1) Press UP or DOWN to set the hour,
then press SET.
(2) Press UP or DOWN to set the
minute, then press SET.
If you want to change the time
setting, press CANCEL.
•The Recording Timer is activated. The
(timer) and REC indicators light
up. The display returns to the normal
indication.
\ Go to step
7
.
4
Press UP or DOWN to select the
source to play.
Each time you press the button, the source changes as
follows:
• Make sure the playing source (either a cassette tape or a
disc) is inside when you select “TAPE” or “CD.”
If you want to change the time setting, press CANCEL
repeatedly to return step
2
.
5
Press SET.
The display returns to the normal indication.
6
Press and hold DAILY
TIMER/SNOOZE on
the unit.
• Each time you press and
hold the button, the timer
setting changes as follows:
(timer) indicator and active daily timer number
indications light up on the display.
When the unit is turned on, perform the following step.
7
Press STANDBY/ON to turn
off the unit.
•You can adjust the volume level for on time
before turn off the unit.
OFF
REC
EN20-22_UXG4G3[UW] 05.5.9, 4:20 PM21


